Creating a customized view – Brocade Network Advisor SAN + IP User Manual v12.3.0 User Manual
Page 573
Brocade Network Advisor SAN + IP User Manual
501
53-1003155-01
SAN view management overview
9
If you discover or import a network with more than approximately 2,000 devices, the devices
display on the Product List, but not on the Topology Map. Instead, the Topology Map shows a
message stating that the topology cannot be displayed. To resolve this issue, create a new view to
filter the number of devices being discovered. Refer to
for instructions.
Creating a customized view
You may want to customize the Product List and Connectivity Map to simplify management of large
SANs by limiting the topology size or Product List columns.
For each customized view, you can specify the fabrics and hosts that display on the Connectivity
Map, as well as the columns and device groupings that display on the Product List.
Customized view settings reside on the server. Only users with the same login to the same server
can see and select the view settings. No individual user can have access to the views created by
another user.
If you select a customized view and new devices are discovered, those new devices display in the
customized view if they belong in that view category or fabric.
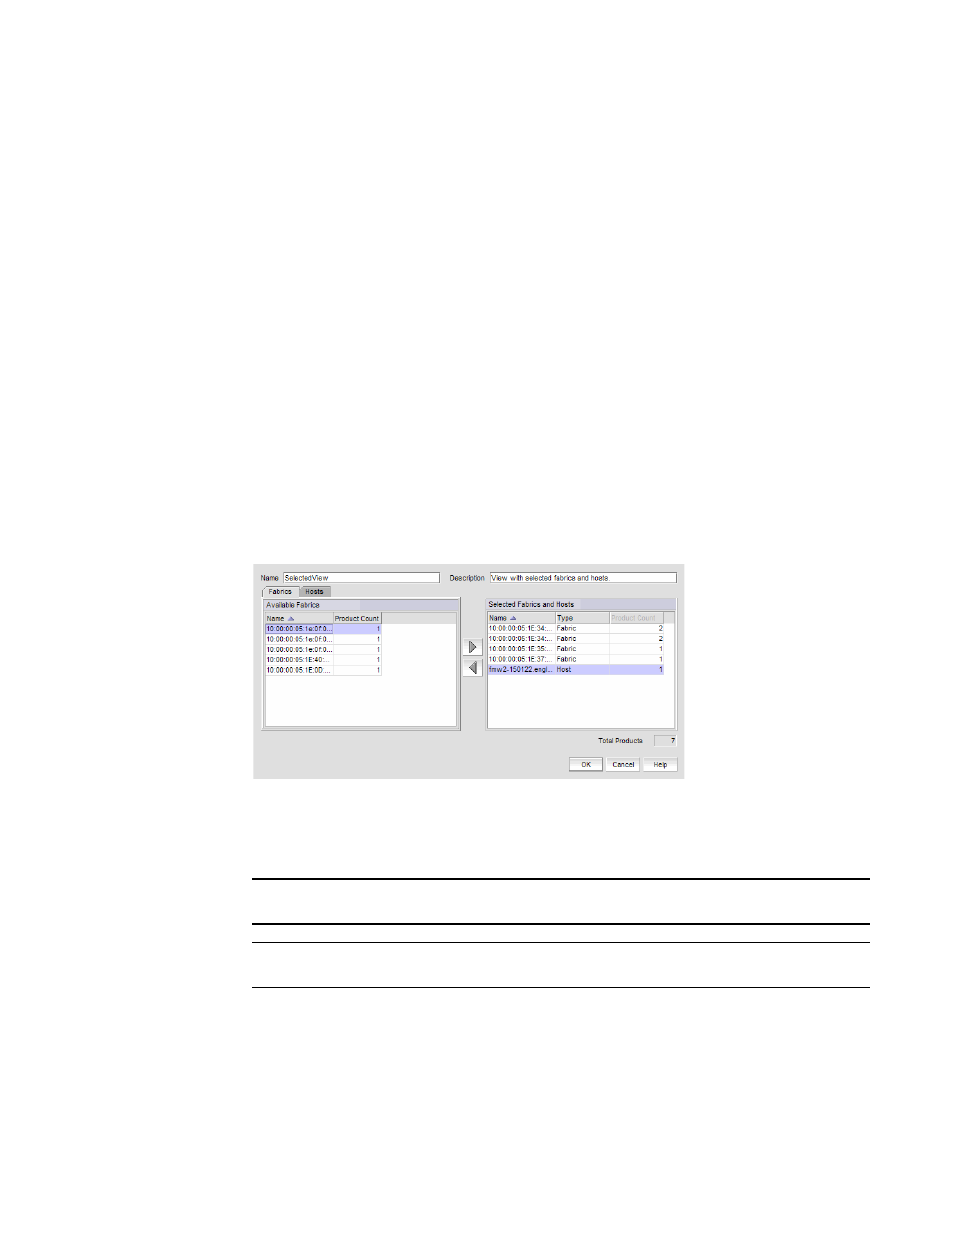
1. Select View > Manage View > Create View.
The Create View dialog box displays.
FIGURE 220
Create View dialog box - Fabrics tab
2. Enter a name (128-character maximum) in the Name field and a description (126-character
maximum) in the Description field for the view.
NOTE
You cannot use the name “View” or “View All” in the Name field.
NOTE
You cannot use an existing name in the Name field.
3. Click the Fabrics tab.
4. In the Available Fabrics table, select the fabrics you want to include in the view and click the
right arrow button to move your selections to the Selected Fabrics and Hosts table.