Adding a trap recipient to one or more switches, Adding a trap recipient, To one or more switches – Brocade Network Advisor SAN + IP User Manual v12.3.0 User Manual
Page 1986: Adding a trap, Recipient to one or more switches
1914
Brocade Network Advisor SAN + IP User Manual
53-1003155-01
SNMP traps
48
•
“Customizing a registered trap definition”
•
“Reverting the customization of a registered trap to default”
Adding a trap recipient to one or more switches
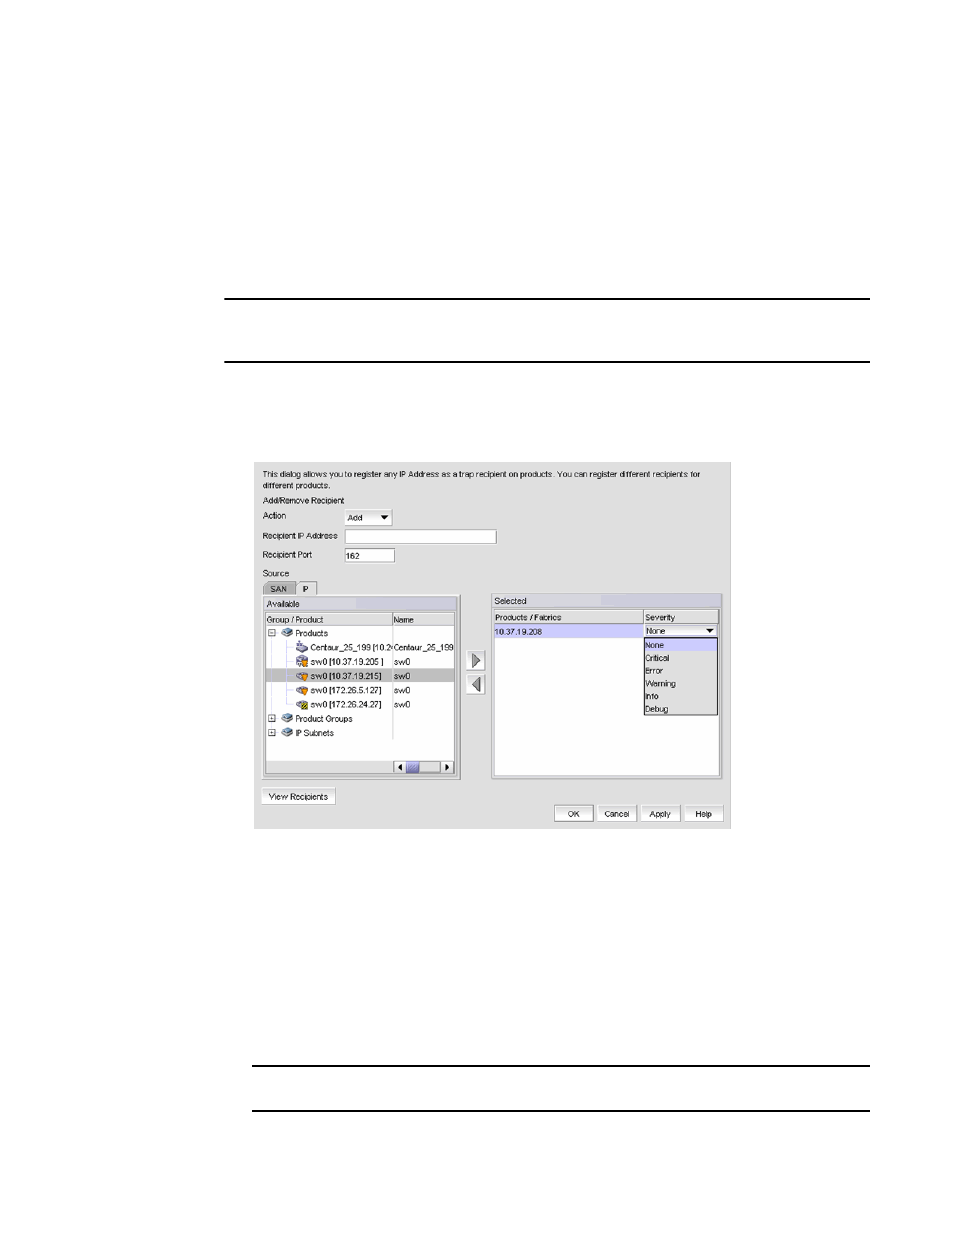
The SNMP Trap Recipients dialog box allows you to register any recipient as a trap recipient on
selected products. You can register different recipients for different products.
NOTE
You can register and unregister other recipient servers on the Fabric OS switches on a per-switch
basis. For IP products, you can perform registration only at the switch level.
To add a trap recipient to one or more switches, complete the following steps.
1. Select Monitor > SNMP Setup > Product Trap Recipients.
The SNMP Trap Recipients dialog box, shown in
Figure 848
, displays.
FIGURE 848
SNMP Trap Recipients dialog box
2. Click Add from the Action list.
3. Enter the IP address of the SNMP trap receiver (the recipient server) in the Recipient IP
Address field. This is a mandatory field. IPv4 addresses are accepted, but a Domain Name
System (DNS) name is not accepted.
4. Enter the SNMP trap port of the recipient in the Recipient Port field. This is a mandatory field.
Valid numeric values range from 1 through 65535 and 162 is the default.
5. Select the fabric or switches from the Available list and click the right arrow button to move it to
the Selected list. You can select multiple products.
NOTE
For IP products and product groups, only switches are available to select.