Editing a target configuration, Figure 10-6 – Dell Emulex Family of Adapters User Manual
Page 1615
Boot Version 10.2 for NIC, iSCSI, FCoE, and RoCE Protocols User Manual
P010097-01B Rev. A
10. Configuring and Managing iSCSI Targets with the iSCSISelect Utility
Managing an iSCSI Target
1615
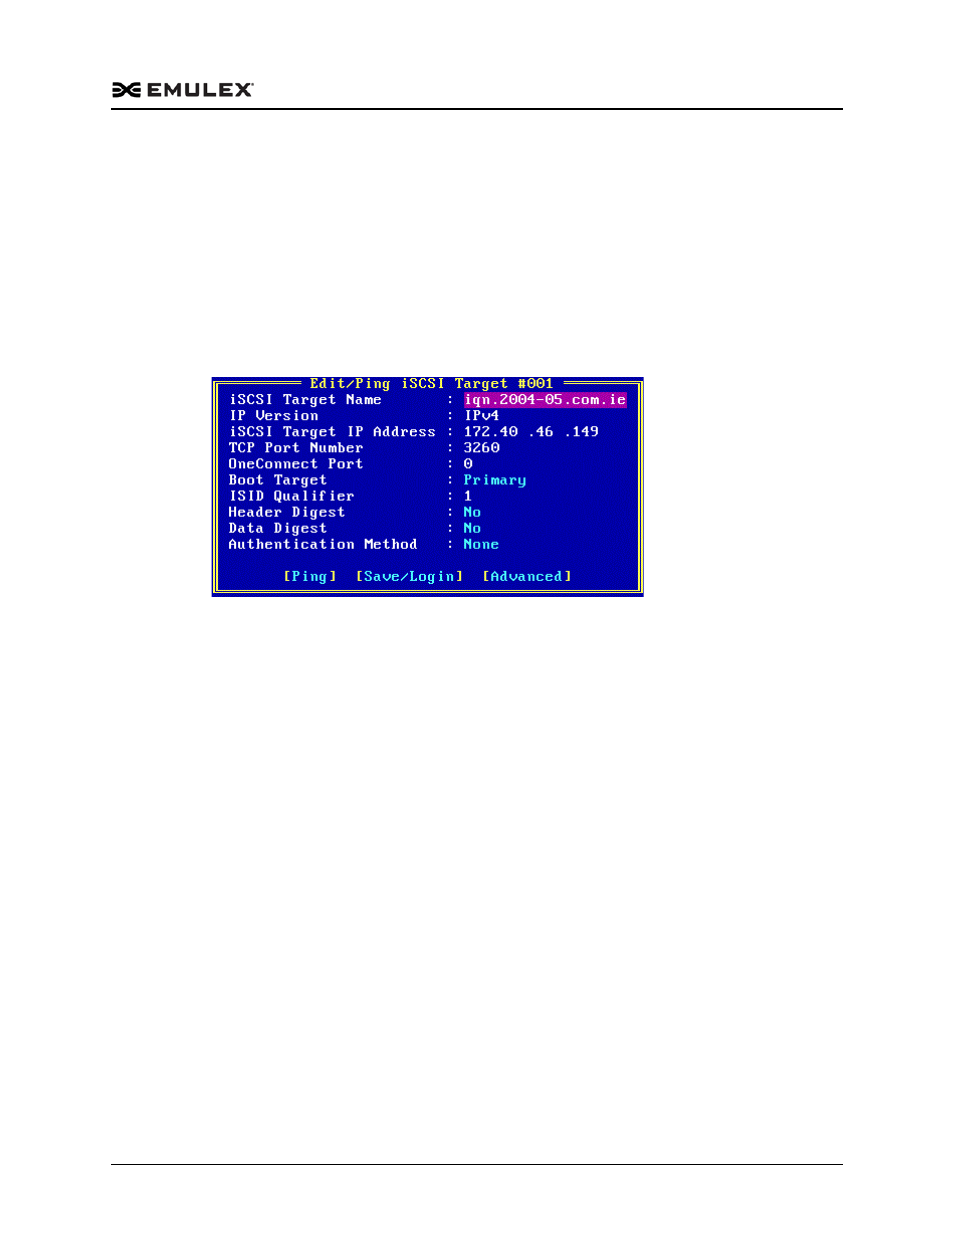
Editing a Target Configuration
Once you have added a target, you can edit your iSCSI target configuration or apply
other management options to the target.
Note: If you want to change the target name, you must delete the existing target and
add it again with the new target name.
To edit a target configuration:
1. From the iSCSI Target Configuration dialog box, select the target and press
Figure 10-6 Edit/Ping iSCSI Target Dialog Box
2. If you want to enable the target as a boot target, select Boot Target and select either
Primary or Secondary in the Boot Target pop-up menu.
3. You can set the ISID Qualifier on the Edit/Ping iSCSI Target dialog box by selecting
ISID Qualifier and typing a number value up to 65535. A unique ISID value is
required if you are connecting dual sessions to the same target portal group. For
additional information, see “Setting an ISID Value” on page 1616.
4. To enable the Header Digest, select Yes in the Header Digest pop-up menu. When
set to Yes, and the iSCSI initiator is set accordingly, the integrity of an iSCSI PDU’s'
header segment is protected by CRC32C checksum. The default setting is No.
5. To enable the Data Digest, select Yes in the Data Digest pop-up menu. When set to
Yes, and the iSCSI initiator is set accordingly, the integrity of an iSCSI PDU’s data
segment is protected by CRC32C checksum. The default setting is No.
6. To select an authentication method to use when logging into the target, select an
authentication method from the Authentication Method pop-up menu. For more
information about authentication methods, see “Enabling CHAP Authentication”
7. To verify your target connection, select Ping and press
information about ping, see “Adding iSCSI Targets” on page 1610.
8. To view more target properties, select Advanced and press
information on these properties, see “Viewing Advanced Target Properties” on
9. To save your changes, select Save/Login and press