Configure captive portal groups, Add a captive portal group – NETGEAR AV Line M4250 GSM4210PX 8-Port Gigabit PoE+ Compliant Managed AV Switch with SFP (220W) User Manual
Page 639
The CP Binding Table page displays. This table displays the captive portal-to-interface
bindings.
6. To delete a captive portal-to-interface binding, do the following:
a. Select the check box next to the interface.
b. Click the Delete button.
The binding is removed.
7. To save the settings to the running configuration, click the Save icon.
8. To refresh the page, click the Refresh button.
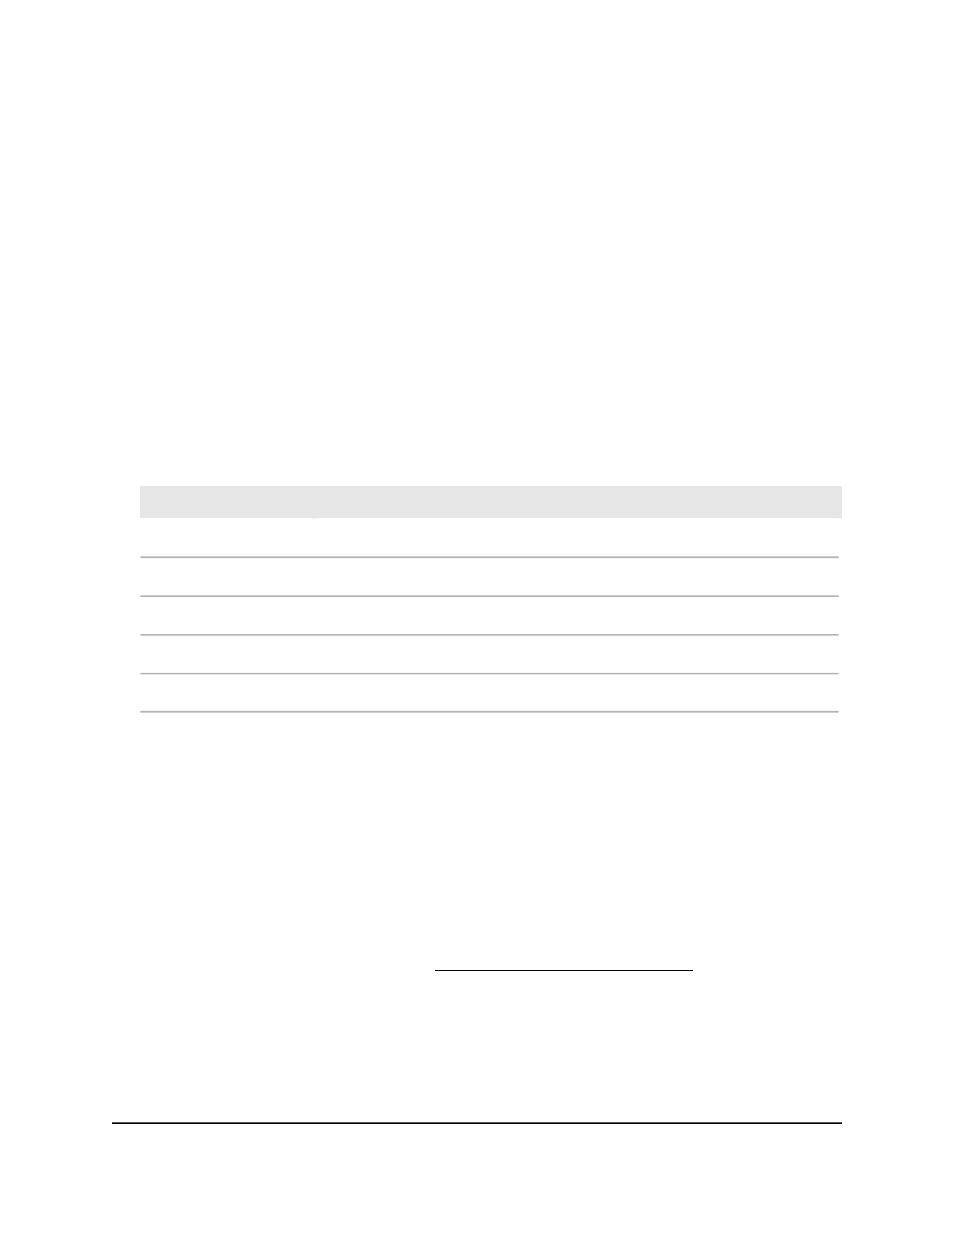
The following table describes the nonconfigurable information that is displayed.
Table 159. Captive portal binding information
Description
Field
The interface to which the captive portal is bound.
Interface
The ID of the captive portal.
CP ID
Indicates if the portal is active on the interface (Disable or Enable).
Operational Status
Indicates if the captive portal is temporarily blocked for authentication.
Block Status
The number of users authenticated through the captive portal on the interface.
Authenticated Users
Configure captive portal groups
Captive portal groups let you organize captive portal users, which is useful if a large
number of users must be able to access a captive portal. After you add a captive portal
group, you can add users to the group.
By default, all captive portal users are added to the default group with ID 1. You can
add up to 10 groups.
Add a captive portal group
After you add a captive portal group, you can add
captive portal users to the group (see Configure captive portal users on page 641).
To add a captive portal group:
1. Launch a web browser.
2. In the address field of your web browser, enter the IP address of the switch.
The login page displays.
Main User Manual
639
Manage Switch Security
AV Line of Fully Managed Switches M4250 Series Main User Manual