Inserting plug-ins on tracks – M-AUDIO Pro Tools Recording Studio User Manual
Page 894
Pro Tools Reference Guide
876
To make an insert inactive, do one of the following:
Control-Start-click (Windows) or Command-
Control-click (Mac) the Insert button.
Right-click the Insert button and select Make
Inactive
.
Make the track inactive. See “Making Tracks
To toggle inserts in the same position on all tracks
active or inactive:
Control-Start-Alt click (Windows) or Com-
mand-Control-Option click (Mac) an Insert but-
ton in the position you want to toggle.
To toggle inserts in the same position on all
selected tracks active or inactive:
Control-Start-Alt-Shift-click (Windows) or
Command-Control-Option-Shift-click (Mac) an
Insert button in the position you want to toggle.
Inactive Plug-in Inserts
Inactive plug-in inserts retain all associated au-
tomation playlists. In addition, any edits made
in the session affect the plug-in automation
playlists. You cannot record automation or ad-
just the controls for an inactive plug-in.
Inactive Hardware Inserts
Inactive hardware inserts retain their assign-
ments, but do not pass audio and do not con-
sume any DSP resources.
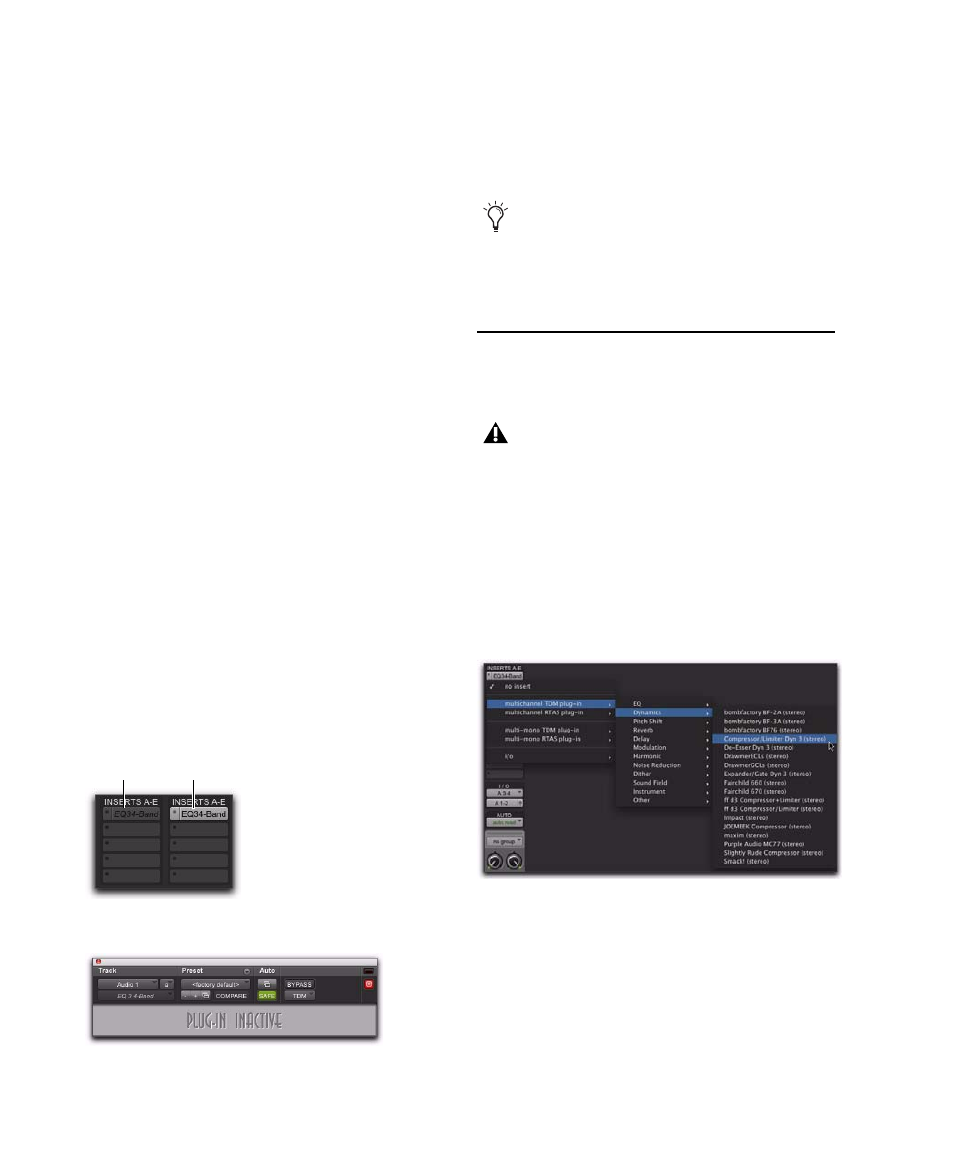
Inserting Plug-ins on Tracks
To use a real-time plug-in, insert it on a track.
To insert a plug-in on a track:
1
Make sure the Inserts (A–E or F–J) View is
shown in the Mix or Edit window.
2
Click the Insert selector on the track and select
the plug-in that you want to use. (See “Plug-in
Formats” on page 873 for related information.)
To remove an insert from a track:
Click the Insert selector and choose No Insert.
Display of inactive plug-ins
Display of inactive Plug-in window
(italicized)
Active
(plain text)
Inactive
Hardware inserts do not provide a bypass
control. You can use the inactive feature
whenever you need to mute or bypass a
hardware insert.
Plug-ins cannot be inserted or removed dur-
ing recording.
Inserting a TDM plug-in