M-AUDIO Pro Tools Recording Studio User Manual
Page 799
Chapter 38: Elastic Audio
781
To apply Telescoping Warp to a region:
In Warp view, do one of the following:
• With the Grabber tool, drag any Event
marker that is after the last Warp marker in
the region to the left or right to Telescope-
Warp the audio that is after the Warp
marker in or out. If no Warp marker is
present in the region, one is created auto-
matically at the region start. The region
start remains anchored to its location on
the Timeline.
– or –
• With the Grabber tool, Alt-click (Windows)
or Option-click (Mac) and drag any Event
marker that is before the first Warp marker
in the region to the left or right to Tele-
scope-Warp the audio that is before the
Warp marker in or out. If no Warp marker is
present in the region, one is created auto-
matically at the region end. The region end
remains anchored to its location on the
Timeline.
Workflow Example
Beat match a song to the session tempo and
Bar|Beat grid using Telescoping Warp:
1
Make sure the Main Timebase ruler is set to
Bars|Beats.
2
Set the default tempo and meter.
3
Select Grid mode.
4
Import a song, or any other longer audio file
from a DigiBase browser.
5
Make sure that Elastic Audio is enabled on the
track.
6
Select Warp view.
7
Make sure there are no Warp markers present
on the region. If necessary, delete any exisiting
Warp markers.
8
With the Pencil tool, add a Warp marker at the
bar 1 downbeat location within the region.
9
With the Grabber tool, drag the single Warp
marker to the bar in the Timeline where you
want the downbeat of the audio file to start.
10
Drag the Event marker on the downbeat of
bar 2 of the region to Telescope warp the audio
such that the Event marker matches the corre-
sponding bar number in the Bars|Beats ruler.
11
If the region’s tempo varies, add a Warp
marker to the next downbeat location at the
tempo change and repeat the preceding steps.
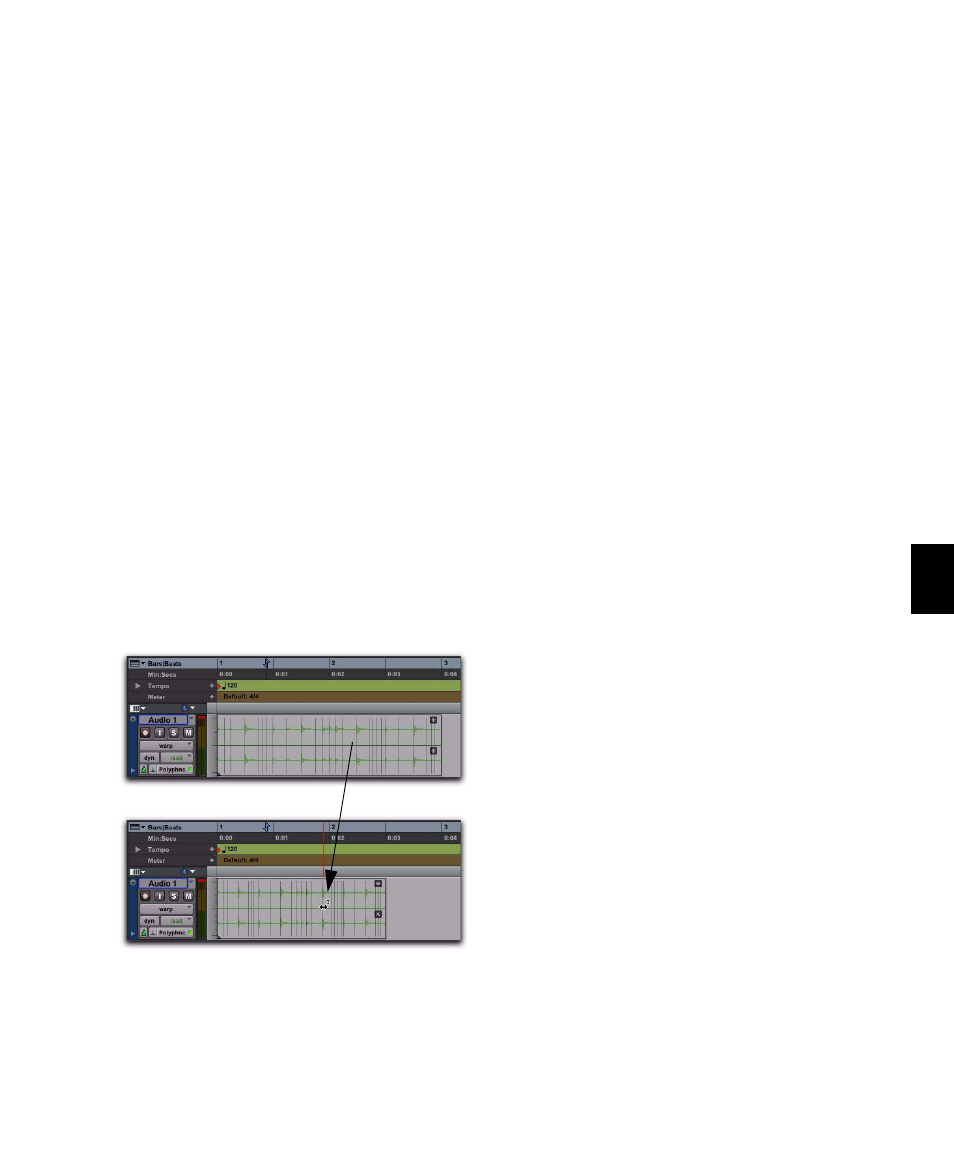
Telescoping Warp with the region start fixed
before warping
after warping