Using strip silence – M-AUDIO Pro Tools Recording Studio User Manual
Page 752
Pro Tools Reference Guide
734
Using Strip Silence
To strip silence from an audio selection:
1
Select one or more audio regions.
2
Choose Edit > Strip Silence.
3
To set the naming scheme for regions created
with Strip Silence, click Rename to open the Re-
name Selected Regions dialog. For details, see
“Auto-Naming for Strip Silence” on page 733.
4
In the Strip Silence window, adjust the set-
tings for Strip Threshold and Minimum Strip Du-
ration (Min Strip) until Strip Silence rectangles
appear in the selection.
For finer resolution on these controls, press
Control (Windows) or Command (Mac) while
adjusting them.
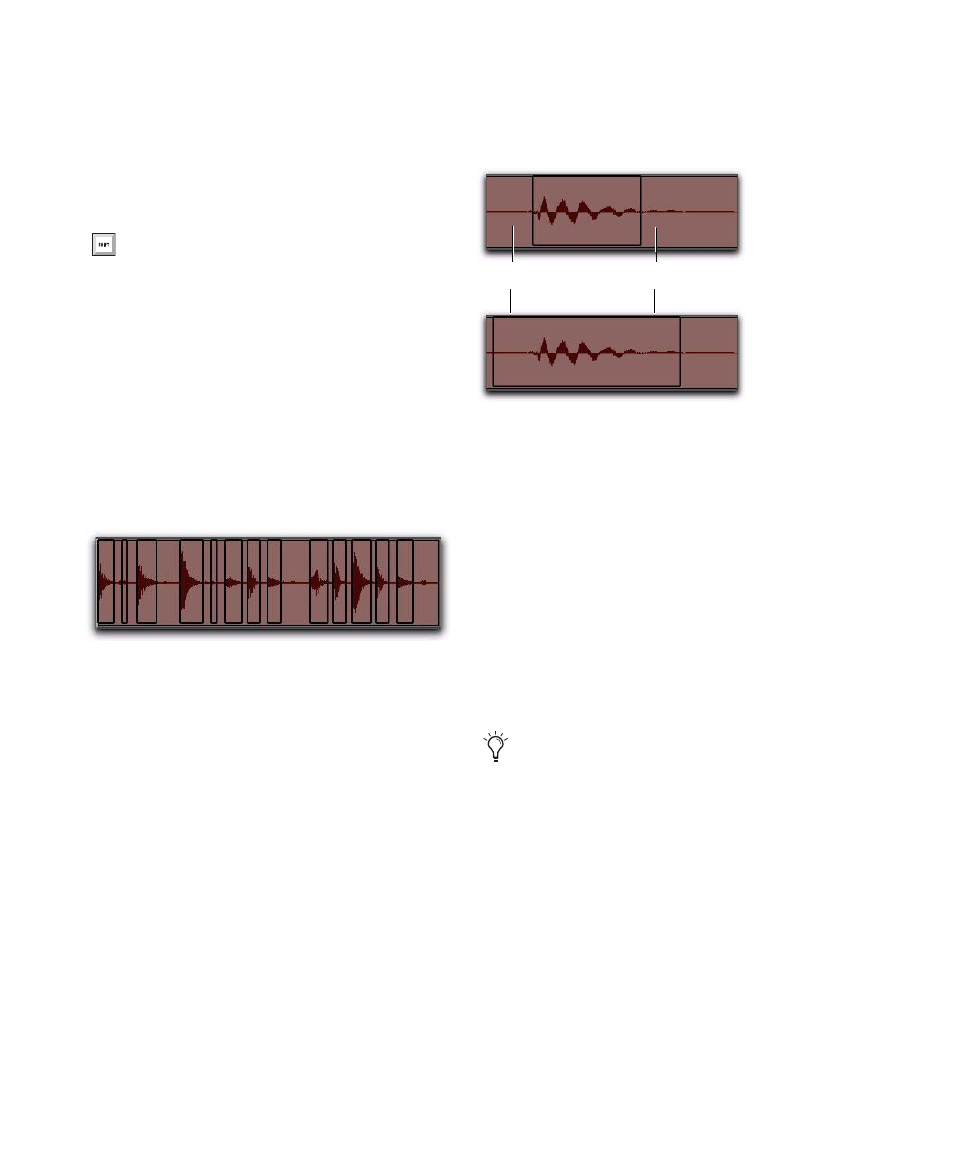
5
To retain material before and after the new re-
gions, adjust the settings for Region Start Pad
and Region End Pad.
6
Once the Strip Silence rectangles encompass
the audio that you want to keep, press the Strip
button.
The material defined as silence is removed from
the selection and new regions are created, which
also appear in the Region List.
Strip Silence is nondestructive and does not re-
move audio data from parent audio files. In ad-
dition to the Undo command, you can use the
Heal Separation
command to restore stripped
material.
Press Control+U (Windows) or Com-
mand+U (Mac) to open the Strip Silence
window.
Figure 43. Strip Silence rectangles
Strip Silence, padding region start and end points
Strip Silence works with stereo and multi-
channel tracks, and keeps their audio re-
gions phase-coherent.
Attack to be padded
Decay to be padded