Moving and nudging fades and crossfades – M-AUDIO Pro Tools Recording Studio User Manual
Page 542
Pro Tools Reference Guide
524
3
Do one of the following:
• Choose Edit > Fades > Create.
– or –
• Press Control+F (Windows) or
Command+F (Mac).
4
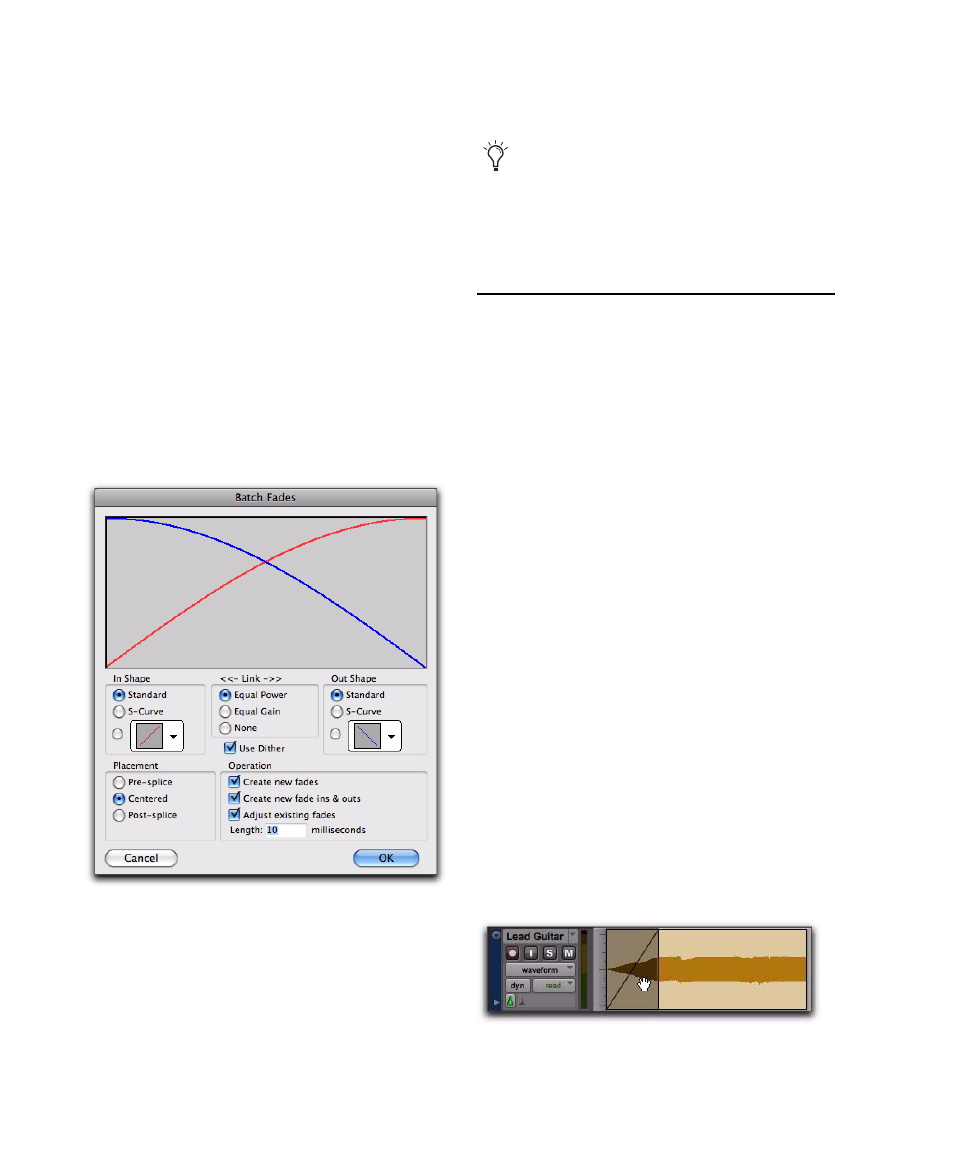
In the Batch Fades dialog, select whether you
want to Create New Fades, Create New Fade-Ins &
Outs
, Adjust Existing Fades, or a combination of
these options.
If you choose to create new fades and new fade-
ins and outs, new crossfades are created at each
region boundary that is bordered by another se-
lected region, a fade-in is created at the start of
the first region, and a fade-out is created at the
end of the last region.
5
Select the placement of the Fades: Pre-Splice,
Centered, or Post-Splice (see “About Crossfades
and Curves” on page 511).
6
Enter a crossfade length in milliseconds.
7
Click OK.
Pro Tools creates the fades for all selected re-
gions.
Moving and Nudging Fades
and Crossfades
Fades and crossfades can be moved or nudged in
tracks, independently of their contributing re-
gions. Moving or nudging fade-ins or fade-outs
reveals or hides audio as the fade is moved from
the edge of a contributing region. Moving or
nudging crossfades changes the overlap point of
the contributing regions. Moving or nudging
fades is also constrained by underlying region
boundaries.
Moving or Nudging Fades or
Crossfades within Regions
To move or nudge a fade or crossfade within its
contributing regions:
1
Select the fade or crossfade by doing one of
the following:
• Use the Time Grabber tool to select the
fade.
– or –
• Use the Selector tool to select a range that
includes the fade.
Batch Fades dialog
Fade lengths can be resized with any of the
Trimmer tools, including Nudge Trim com-
mands. See “Using the Trimmer Tools” on
page 458 and “Trimming with Nudge” on
page 502.
Selecting a fade with the Time Grabber