Record enabling tracks – M-AUDIO Pro Tools Recording Studio User Manual
Page 376
Pro Tools Reference Guide
358
2
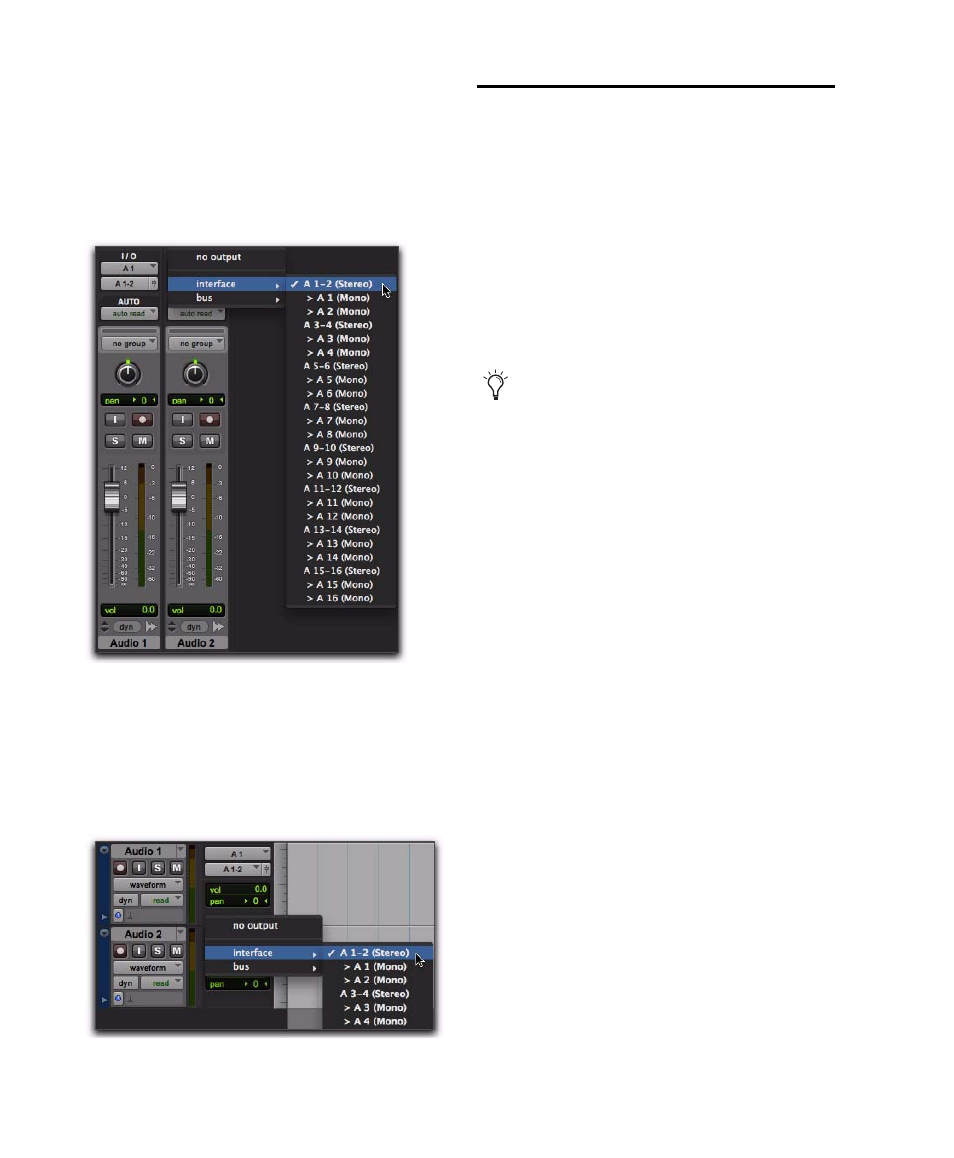
Assign a hardware output (for monitoring re-
cording) by doing one of the following:
• In the Mix window, select the correspond-
ing hardware output for monitoring (such
as A 1–2) from the track’s Output Path se-
lector.
– or –
• In the Edit window, with I/O view enabled,
select the corresponding hardware output
for monitoring (such as A 1–2) from the
track’s Output Path selector.
Record Enabling Tracks
To record audio or MIDI to a track you must first
enable the track’s Record Enable button. To
record simultaneously to multiple tracks, record
enable multiple audio, Instrument, or MIDI
tracks.
When one or more tracks are record-enabled,
click the Record button in the Transport to arm
recording, and then click the Play button in the
Transport to start recording.
To record enable an audio, MIDI, or Instrument
track:
From either the Mix or Edit window, click the
track’s Record Enable button to toggle record en-
able on or off for the track. The track’s Record
Enable button flashes red, the track’s fader is
solid red, and the Track Record Enabled indica-
tor in the Transport turns red (indicating at least
one track is record-enabled).
Output Path selector, Mix window
Output Path selector, Edit window
MIDI and Instrument tracks can be record-
enabled during playback or record. To
record enable audio tracks, the Transport
must be stopped, or QuickPunch, Track-
Punch, or DestructivePunch must be en-
abled. For more information on Quick-
Punch, TrackPunch, and DestructivePunch,
see “Record Modes” on page 353.