Routing hardware i/o to pro tools i/o – M-AUDIO Pro Tools Recording Studio User Manual
Page 82
Pro Tools Reference Guide
64
fault Output, Default Path Order, AFL/PFL Path
(Pro Tools HD only), and AFL/PFL Mutes
(Pro Tools HD only). See “I/O Setup Options” on
page 75.
Cancel Button
Closes the I/O Setup dialog with-
out saving changes.
OK Button
Closes the I/O Setup dialog and save
changes.
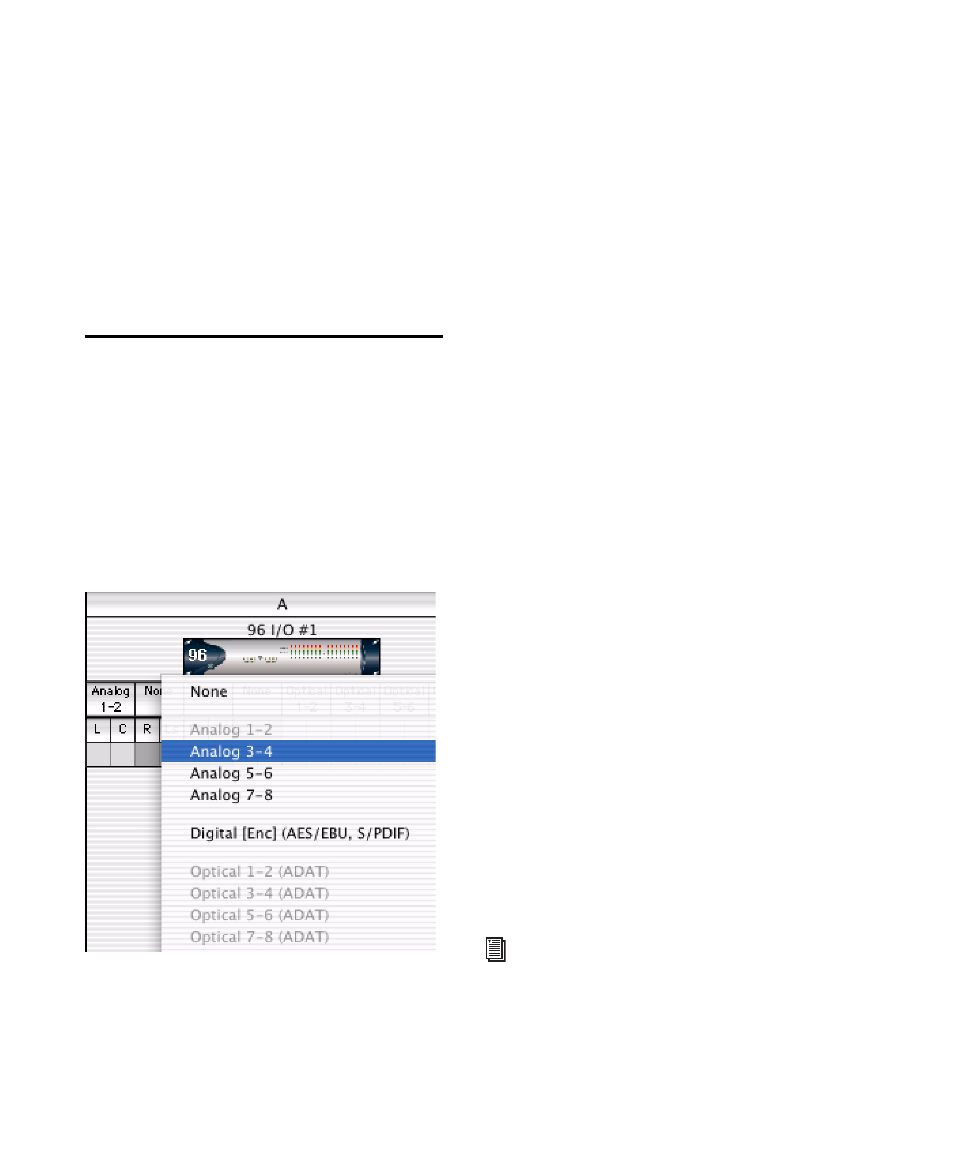
Routing Hardware I/O to
Pro Tools I/O
The I/O Setup dialog lets you define which
physical ports on your I/O peripheral are routed
to available inputs and outputs in Pro Tools. Use
the Input and Output selectors in the I/O Setup
dialog to serve as a patchbay to route any of the
physical inputs or outputs to your Pro Tools
mixer.
To configure I/O routing in I/O Setup:
1
Choose Setup > I/O.
2
Click the Input or Output tab to display the
corresponding path type.
3
Click the Input or Output selector for the first
interface channel pair, located below the first
audio interface icon.
4
From the pop-up menu, select a physical port
pair (such as Analog 1–2), to route to a Pro Tools
channel pair (such as A 1–2) in the Path Name
column on the left.
5
Repeat the above step for additional channel
pairs.
6
Click OK to save changes and close the I/O
Setup dialog.
Routing a Pro Tools Output Pair to
Multiple Destinations
Pro Tools channel pairs can be routed to multi-
ple outputs on an audio interface through the
I/O Setup dialog. For example, if you assign both
Analog 1–2 and Analog 3–4 interface outputs to
Pro Tools Output pair 1–2, when you send a sig-
nal to Pro Tools Outputs 1–2, that signal will be
routed simultaneously to both pairs of output
ports on your audio interface.
This lets you send the same signal (such as a ste-
reo pair, a stem mix, or a multichannel mix) to
multiple destinations (such as multiple master-
ing devices).
The only limit to output choices is the number
of outputs available in your system.
I/O Channel selector pop-up menu
0utput path assignments cannot overlap.
See “Valid Paths and Requirements” on
page 71 for details.