Trim to insertion commands, Trim to fill selection commands – M-AUDIO Pro Tools Recording Studio User Manual
Page 519
Chapter 25: Editing Regions and Selections
501
Trim to Insertion Commands
You can trim a region or MIDI note by automat-
ically removing the material between the Edit
insertion point and the start or end point of the
region.
To trim from a start point to insertion:
1
With the Selector tool, click inside the region
or note where you want the new start point to
be.
2
Choose Edit > Trim > Start To Insertion. The re-
gion’s start point is automatically trimmed to
the insertion point.
To trim from an end point to insertion:
1
With the Selector tool, click inside the region
or note where you want the new end point.
2
Choose Edit > Trim > End To Insertion. The re-
gion’s end point is automatically trimmed to the
insertion point.
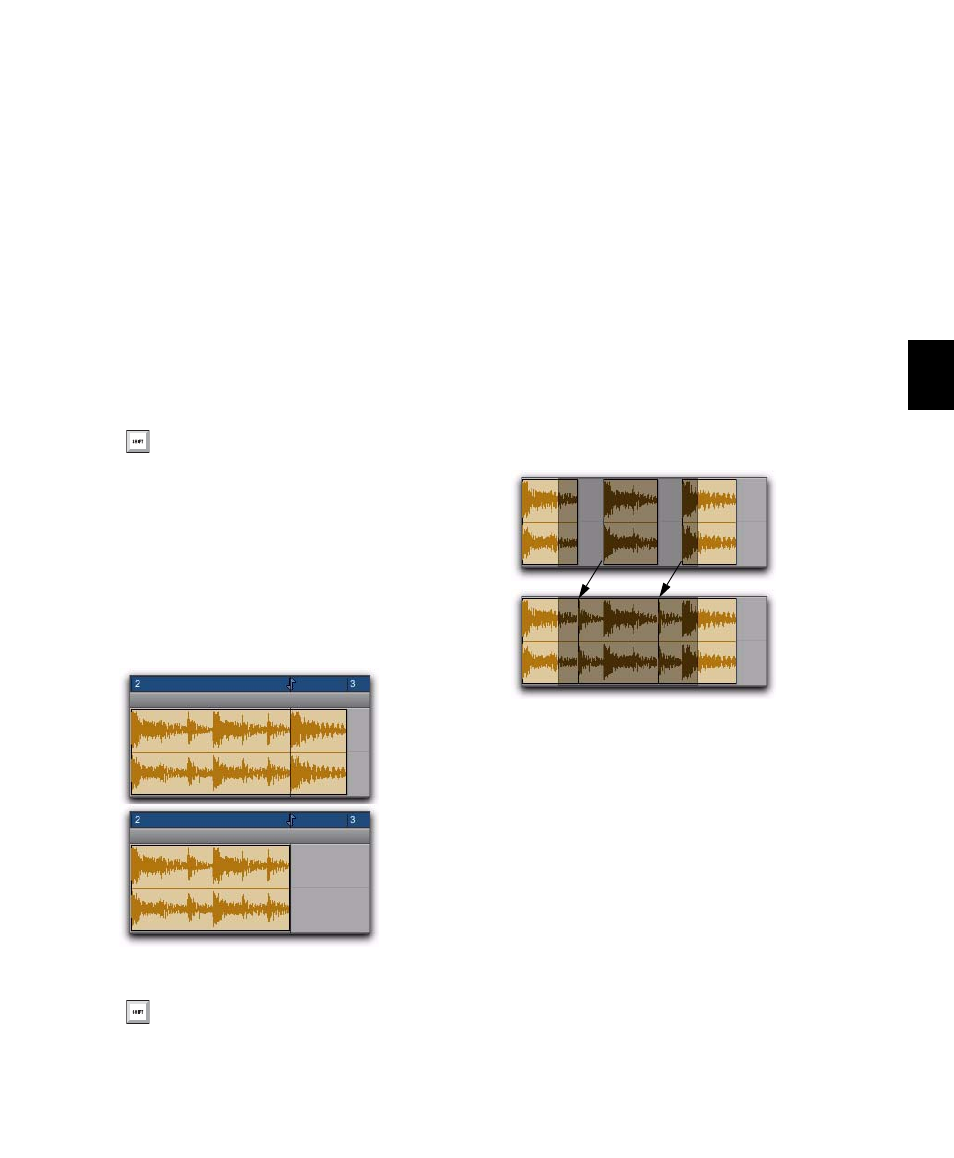
Trim to Fill Selection Commands
The Trim to Fill Selection commands let you au-
tomatically reveal underlying material in the
gaps between regions, or before and after indi-
vidual regions, as follow:
To trim from a start point to fill gaps:
1
With the Selector tool, select across at least
one gap between regions.
2
Choose Edit > Trim > Start to Fill Selection.
The start point of the region behind the gap is
automatically trimmed (expanded) to the previ-
ous region, or as far as possible if there is not
enough underlying material to cover the gap.
To trim from an end point to fill gaps:
1
With the Selector tool, select across at least
one gap between regions.
2
Choose Edit > Trim > End To Fill Selection.
Press Alt+Shift+7 (Windows) or Option+
Shift+7 (Mac) to Trim Start To Insertion.
Region end trimmed to insertion
Press Alt+Shift+8 (Windows) or Option+
Shift+8 (Mac) to Trim Start To Insertion.
Region start trimmed to fill gap