M-AUDIO Pro Tools Recording Studio User Manual
Page 306
Pro Tools Reference Guide
288
3
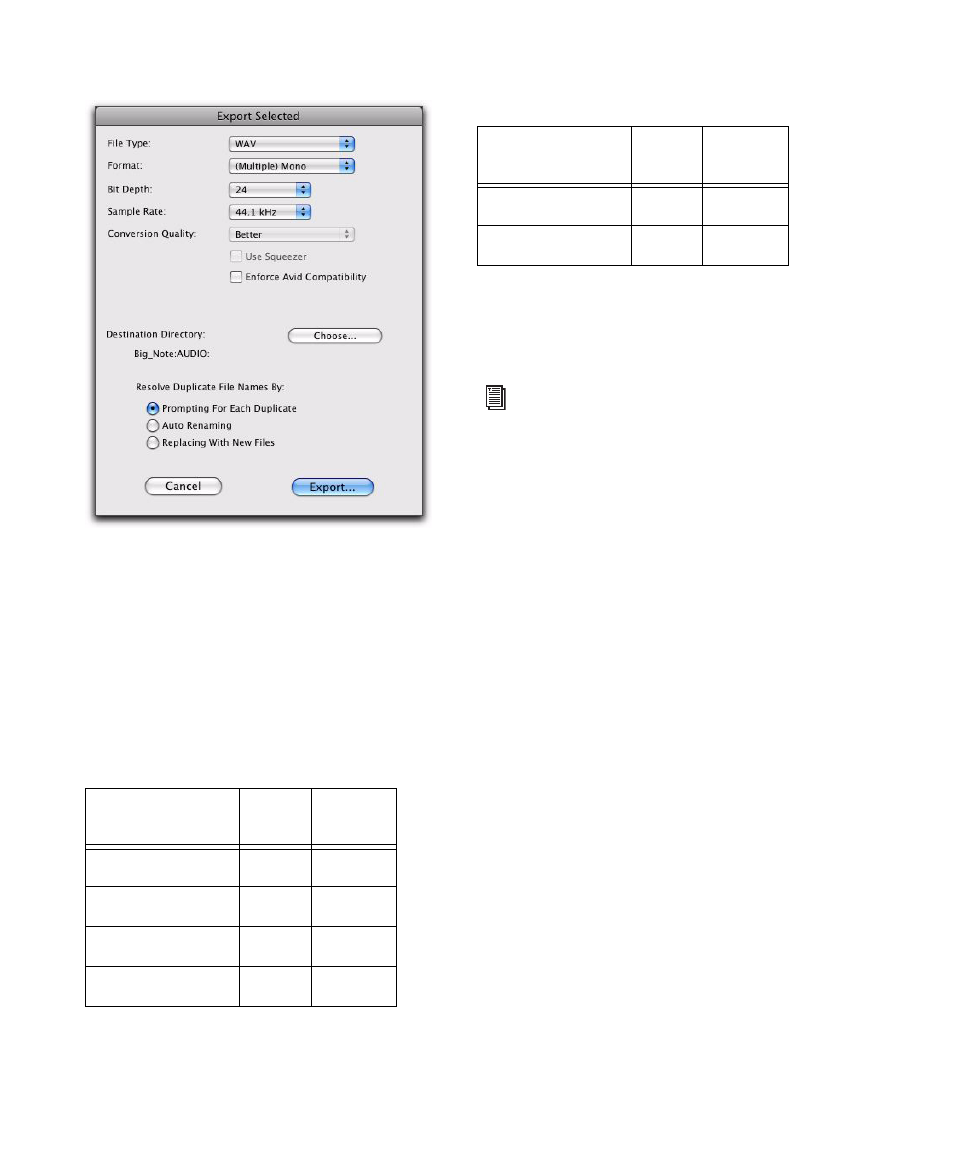
In the Export Selected dialog, set the File Type,
Format
, Bit Depth, and Sample Rate. In addition,
specify the Conversion Quality, and choose the
Destination Directory
.
When you export regions to a lower bit depth,
Dither (with or without Noise Shaping) is ap-
plied as shown in Table 16.
The Dither used for any conversion is the
Digidesign Dither plug-in (with or without
Noise Shaping enabled, as noted in Table 16).
4
If you are exporting to an 8-bit file, enable the
Use Squeezer
option. This optimizes the dynam-
ics of the exported audio by preprocessing it us-
ing compression, limiting, and gating before
conversion to 8-bit resolution (for more infor-
mation, see “Use Squeezer” on page 968).
5
Select an option for how Pro Tools should re-
solve duplicate file names.
Prompting for Each Duplicate
Prompts you for a
file name for any file that has the same name as
a file in your destination directory.
Auto Renaming
Automatically changes the
name of any duplicate file by adding a number
at the end of the file name (such as file_01).
Replacing with New Files
Replaces files with the
same name with the new files.
6
Click Export to export the new audio files.
Export Selected dialog
Table 16. Dither and Noise Shaping with Export
Selected dialog
Bit Depth
Dither
Noise
Shaping
24-bit to 24-bit
No
No
16-bit to 24-bit
No
No
24-bit to 16-bit
Yes
Yes
16-bit to 16-bit
No
No
24-bit to 8-bit
Yes
No
16-bit to 8-bit
Yes
No
For more information about using Dither,
see “Dither” on page 866.
Table 16. Dither and Noise Shaping with Export
Selected dialog
Bit Depth
Dither
Noise
Shaping