Adobe Photoshop CC 2014 v.14.xx User Manual
Page 77
Application Menus
Panel Menus
Note:
Choose Edit > Menus.
Choose Window > Workspace > Keyboard Shortcuts & Menus and click the Menus tab.
2. In the Keyboard Shortcuts and Menus dialog box, choose a set of menus from the Set drop-down menu. For information on creating a
new set, see Customizing keyboard shortcuts.
3. Choose a type from the Menu For menu:
Lets you show, hide, or add color to items in the application menus.
Lets you show, hide, or add color to items in panel menus.
4. Click the triangle next to a menu or panel name.
5. Do one of the following:
To hide a menu item, click the Visibility button
.
To show a menu item, click the empty Visibility button.
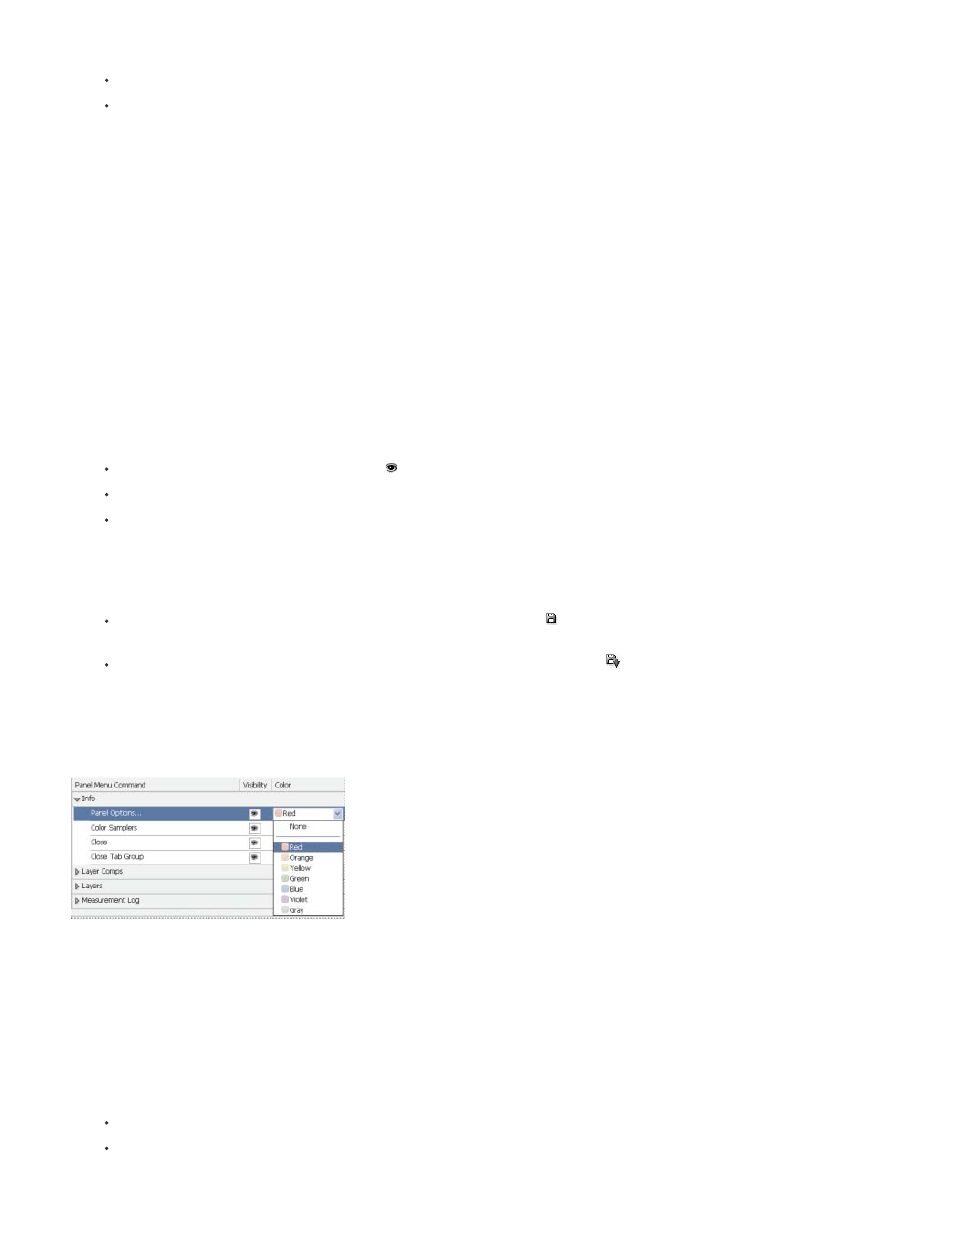
To add color to a menu item, click the color swatch (if no color is assigned, it will say None) and choose a color.
6. When you finish changing the menus, do one of the following:
To save all changes to the current set of menus, click the Save Set button . Changes to a custom set are saved. If you’re saving
changes to the Photoshop Defaults set, the Save dialog box opens. Enter a name for the new set and click Save.
To create a new set based on the current set of menus, click the Save Set As button
.
If you haven’t saved the current set of changes, you can click Cancel to discard all changes and close the dialog box.
7. In the Save dialog box, enter a name for the set and click Save.
Choosing a color for a menu item using the Keyboard Shortcuts & Menus dialog box
Delete a set of menus
1. Do one of the following:
Choose Edit > Menus.
Choose Window > Workspace > Keyboard Shortcuts & Menus and click the Menu tab.
70