Creating 3d objects and animations – Adobe Photoshop CC 2014 v.14.xx User Manual
Page 1013

Creating 3D objects and animations
Note:
Note:
Mesh tools
Repoussé Presets
Extrude
Create 3D repoussé | CS5
Create 3D objects from 2D images
Create 3D animations
In Photoshop CS5 and CS6, 3D functionality was part of Photoshop Extended. All features in Photoshop Extended are part of Photoshop
CC. Photoshop CC does not have a separate Extended offering.
Create 3D repoussé | CS5
Beginning Photoshop CS6, the repousse feature has changed and is now called 3D Extrusion. For details, see Create and adjust 3D
Extrusions.
The term repoussé describes a metalworking technique in which object faces are shaped and patterned by hammering on the opposite side. In
Photoshop, the Repoussé command converts 2D objects into 3D meshes, which you can precisely extrude, inflate, and reposition in 3D space.
The Repoussé command works with RGB images. If you start with a grayscale image, Repoussé converts it to RGB. The Repoussé command is
not available for CMYK or Lab images.
For a video about converting from 2D to 3D with Repoussé, see
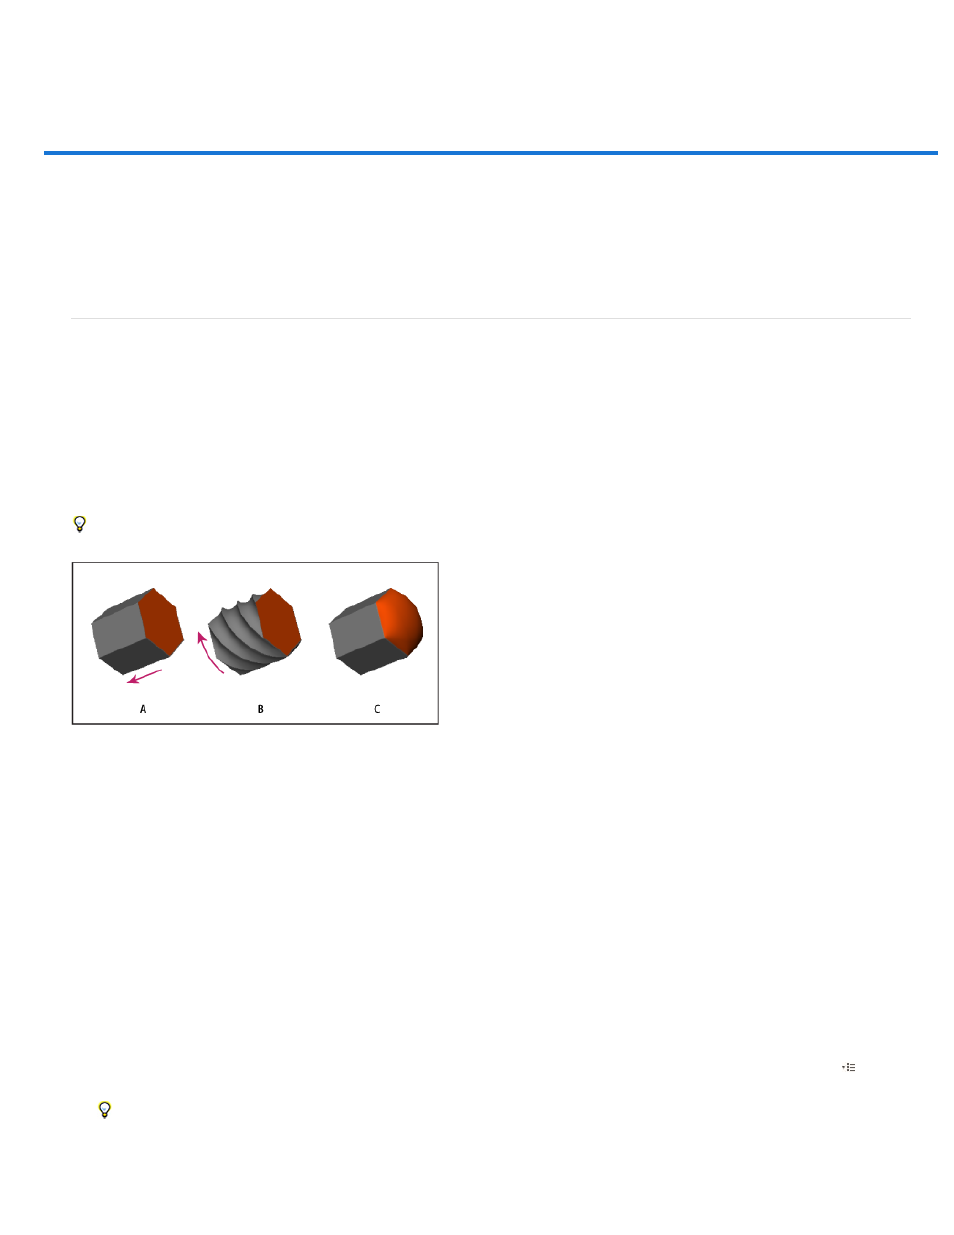
Applying Repoussé to a pixel selection
A. Increasing the depth of extrusion B. Twisting the extrusion 180° C. Inflating the front
1. Create a pixel selection, or select a text layer, layer mask, or work path.
2. Choose 3D > Repoussé, then choose the item that reflects your selection in step 1.
3. Set the following options:
Available along the upper left of the dialog box, these tools function like 3D object tools. See Move, rotate, or scale a model
with 3D object tools and Move, rotate, or scale selected items with the 3D Axis.
Apply a predefined group of settings. To create your own preset from custom settings, click the pop-up menu
, and
choose New Repoussé Preset.
To organize groups of presets, see Work with the Preset Manager.
Extends the original 2D shape in 3D space. Depth controls the length of extrusion; Scale controls the width. Select Bend for a
1006
