Adobe Photoshop CC 2014 v.14.xx User Manual
Page 432
Edge Glow
Tone and Detail
Color
Toning Curve
Note:
Equalize Histogram
Exposure and Gamma
Highlight Compression
Radius specifies the size of the local brightness regions. Strength specifies how far apart two pixels’ tonal values must be
before they’re no longer part of the same brightness region.
Dynamic range is maximized at a Gamma setting of 1.0; lower settings emphasize midtones, while higher settings
emphasize highlights and shadows. Exposure values reflect f-stops. Drag the Detail slider to adjust sharpness and the Shadow and
Highlight sliders to brighten or darken these regions.
Vibrance adjusts the intensity of subtle colors, while minimizing clipping of highly saturated colors. Saturation adjusts the intensity of
all colors from –100 (monochrome) to +100 (double saturation).
Displays an adjustable curve over a histogram showing luminance values in the original, 32-bit HDR image. The red tick
marks along the horizontal axis are in one EV (approximately one f-stop) increments.
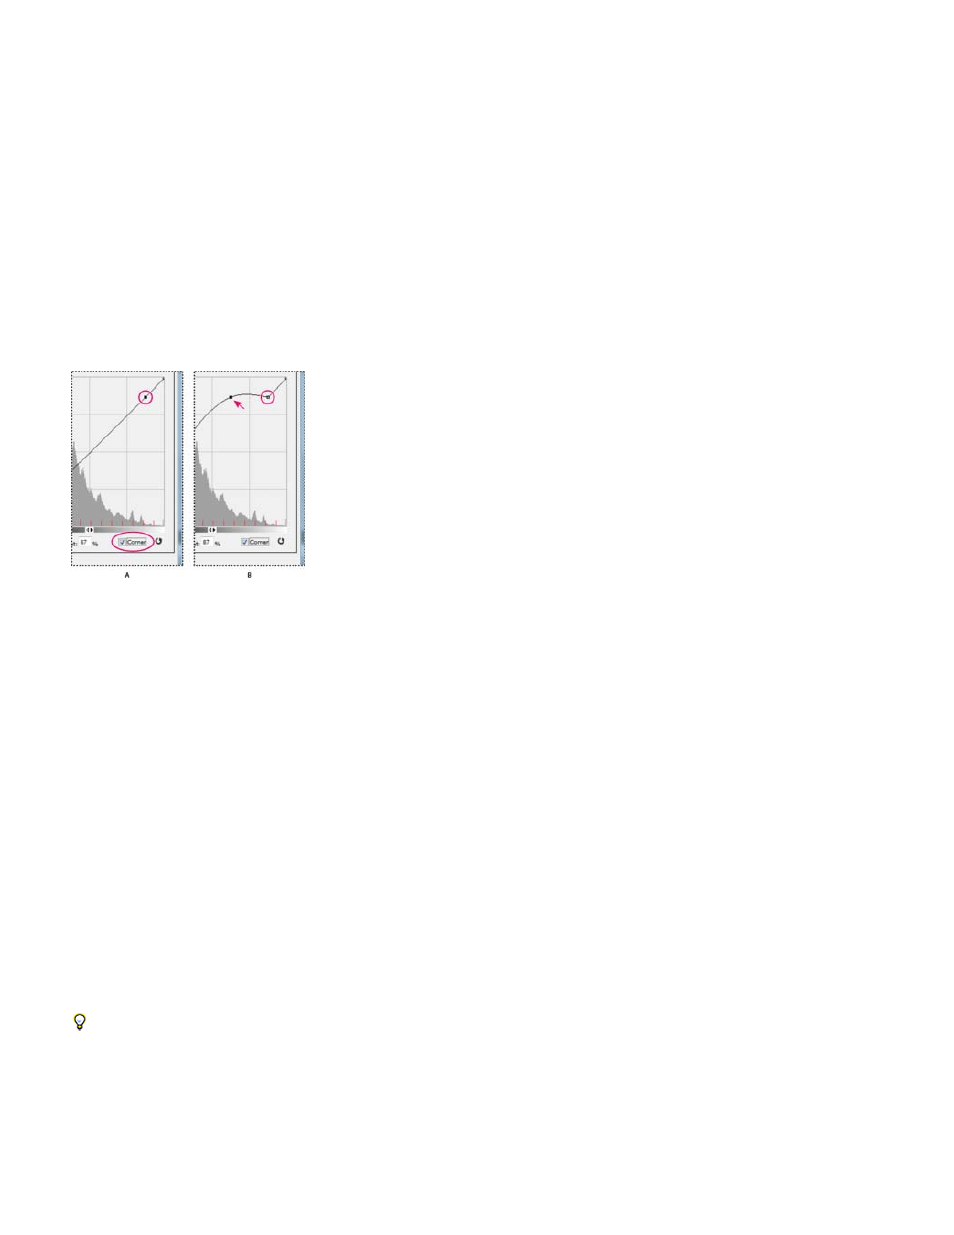
By default, the Toning Curve and Histogram limit and equalize your changes from point to point. To remove the limit and apply more
extreme adjustments, select the Corner option after inserting a point on the curve. When you insert and move a second point, the curve becomes
angular.
Toning Curve and Histogram adjustment using the Corner option
A. Inserting a point and selecting the Corner option. B. Adjusting new point makes the curve angular at the point where the Corner option is used.
Compresses the dynamic range of the HDR image while trying to preserve some contrast. No further adjustments are
necessary; this method is automatic.
Lets you manually adjust the brightness and contrast of the HDR image. Move the Exposure slider to adjust gain and the
Gamma slider to adjust contrast.
Compresses the highlight values in the HDR image so they fall within the luminance values range of the 8- or 16-bpc
image file. No further adjustments are necessary; this method is automatic.
Compensate for moving objects
If images have different content due to moving objects like cars, people, or foliage, select Remove Ghosts in the Merge To HDR Pro dialog box.
Photoshop displays a green outline around the thumbnail with the best tonal balance, identifying the base image. Moving objects found in other
images are removed. (If movement occurs in very light or dark areas, click a different thumbnail where moving objects are better exposed to
improve results.)
For a tutorial on the Remove Ghosts option,
. (Discussion of Remove Ghosts begins at 3:00.)
Save or load camera response curves
Response curves indicate how camera sensors interpret different levels of incoming light. By default, the Merge To HDR Pro dialog box
automatically calculates a camera response curve based on the tonal range of images you are merging. You can save the current response curve
and later apply it to another group of merged images.
425