Adjust tone – Adobe Photoshop CC 2014 v.14.xx User Manual
Page 485
Tint
Note:
Note:
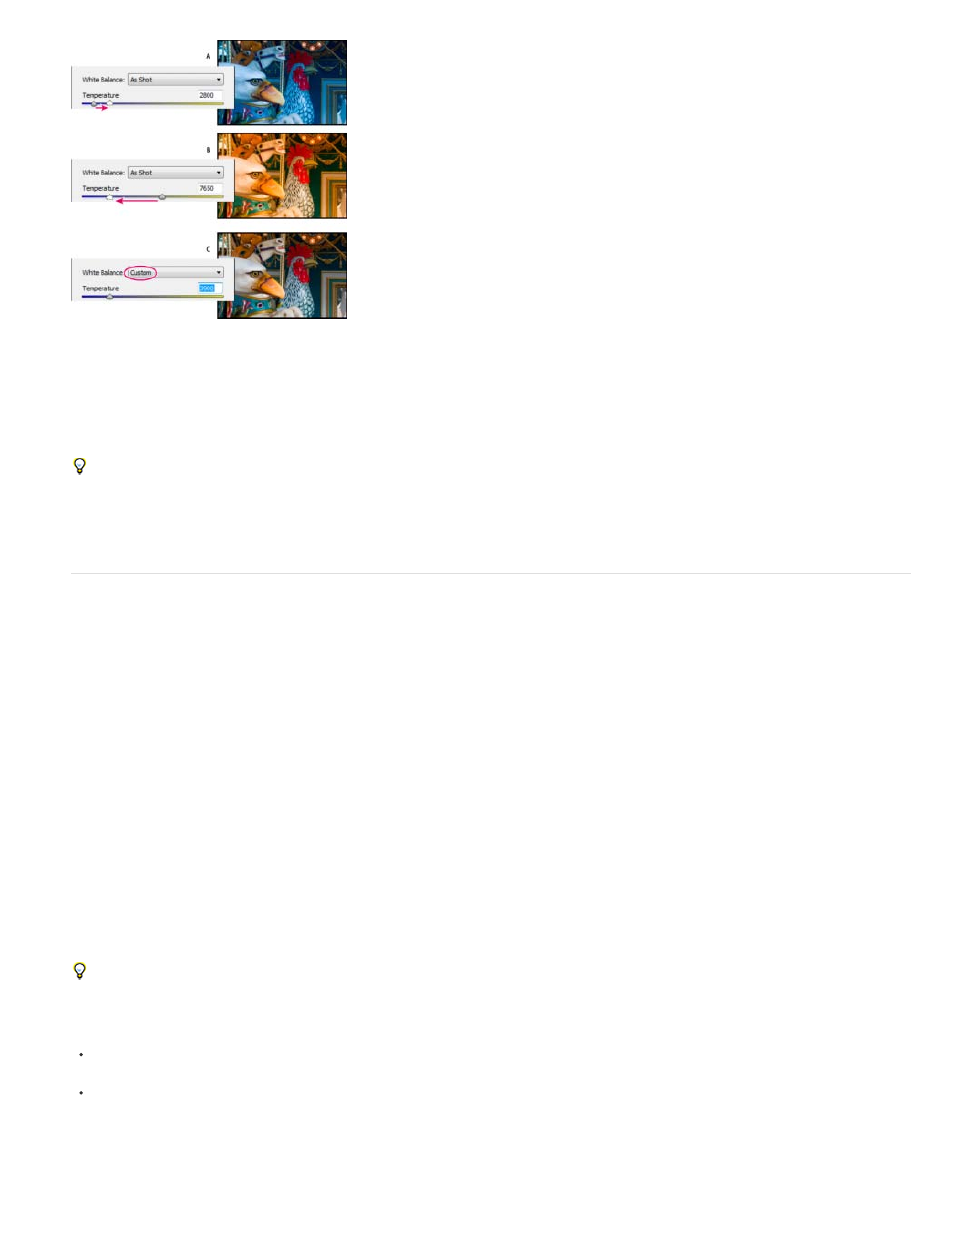
Correcting the white balance
A. Moving the Temperature slider to the right corrects a photo taken with a higher color temperature of light B. Moving the Temperature slider to
the left corrects a photo taken with a lower color temperature of light C. Photo after color temperature adjustment
Sets the white balance to compensate for a green or magenta tint. Decrease Tint to add green to the image; increase Tint to add magenta.
To adjust the white balance quickly, select the White Balance tool and then click an area in the image that you want to be a neutral gray. The
Temperature and Tint properties adjust to make the selected color exactly neutral (if possible). If you’re clicking whites, choose a highlight area
that contains significant white detail rather than a specular highlight. You can double-click theWhite Balance tool to reset White Balance to As
Shot.
Adjust tone
You adjust the image tonal scale using the tone controls in the Basic tab.
When you click Auto at the top of the tone controls section of the Basic tab, Camera Raw analyzes the image and makes automatic adjustments
to the tone controls.
You can also apply automatic settings separately for individual tone controls. To apply an automatic adjustment to an individual tone control, such
as Exposure or Contrast, press Shift and double-click the slider. To return an individual tone control to its original value, double-click its slider.
When you adjust tone automatically, Camera Raw ignores any adjustments previously made in other tabs (such as fine-tuning of tone in the Tone
Curves tab). For this reason, apply automatic tone adjustments first—if at all—to get an initial approximation of the best settings for your image. If
you are careful during shooting and have deliberately shot with different exposures, you probably don’t want to undo that work by applying
automatic tone adjustments. On the other hand, you can always try clicking Auto and then undo the adjustments if you don’t like them.
Previews in Adobe® Bridge use the default image settings. If you want the default image settings to include automatic tone adjustments, select
Apply Auto Tone Adjustments in the Default Image settings section of the Camera Raw preferences.
If you are comparing images based on their previews in Adobe Bridge, leave the Apply Auto Tone Adjustments preference deselected,
which is the default. Otherwise, you’ll be comparing images that have already been adjusted.
As you make adjustments, keep an eye on the end points of the histogram, or use the shadow and highlight clipping previews.
While moving the tone controls sliders, hold down Alt (Windows) or Option (Mac OS) to preview where highlights or shadows are clipped.
Move the slider until clipping begins, and then reverse the adjustment slightly. (For more information, see
To manually adjust a tone control, drag the slider, type a number in the box, or select the value in the box and press the Up or Down arrow
key.
To reset a value to its default, double-click the slider control.
The tone controls that appear in the Basic panel depend on whether you are working in Process Version PV2012, PV2010, or PV2003, as
noted.
478