Adobe Photoshop CC 2014 v.14.xx User Manual
Page 21
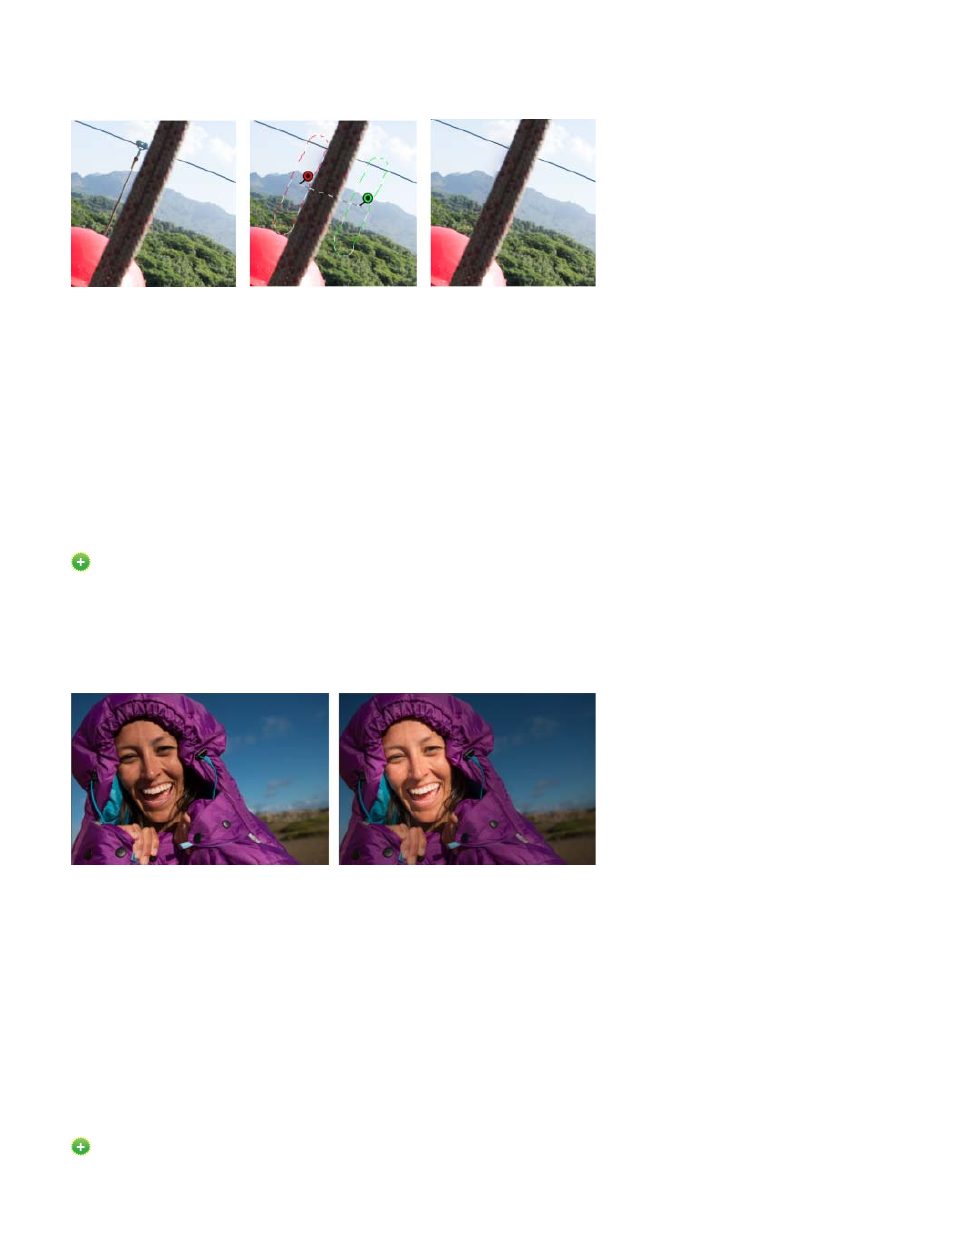
The new behavior of the Spot Removal (Camera Raw dialog > Spot Removal tool, or keyboard shortcut B) tool is similar to the Healing Brush in
Photoshop. Use the Spot Removal tool to paint over an element in your photo, select a source area that could be used on your selected area, and
the tool does the rest for you. You can press the forward slash (/) key to let Camera Raw pick the source area for you.
A zip-line that needs to be cleaned up (left), is identified, selected, and matched with a source area (center), and then removed (right)
While the Spot Removal tool enables you to remove visible imperfections, some flaws in the photo may not be visible in the normal view (for
example, sensor dust, or spots or blemishes on a portrait). The Visualize Spots option in the Spot Removal tool enables you to see smaller and
less-visible imperfections. When you select the Visualize Spots checkbox, the image appears inverted. You can vary the contrast levels of the
inverted image to see imperfections more clearly. You can then use the Spot Removal tool in this view to remove any imperfections.
For more information, see the article on the enhanced Spot Removal tool in Photoshop CC.
Radial Filter
New in Photoshop CC
The new Radial Filter tool (Camera Raw dialog > Radial Filter tool, or keyboard shortcut J) enables you to define elliptical marquees, and then
apply localized corrections to these areas. The corrections can be applied within or outside the marquee areas. You can place multiple Radial
Filters on an image, and apply a different set of adjustments to each Radial Filter.
The image as shot (left), and the subject brought into focus using a vignette-like effect using Radial Filters (right)
For example, a vignette-like effect has been simulated in the image above. Two overlapping Radial Filter areas were defined over the face of the
subject, one slightly larger than the other. Using the larger Radial Filter area, adjustments were made to subdue the regions behind the face. The
second, smaller Radial filter area was adjusted to brighten and highlight the face.
For more information, see the article on the Radial Filter tool.
Upright modes
New in Photoshop CC
14