Curves adjustment – Adobe Photoshop CC 2014 v.14.xx User Manual
Page 448
Curves adjustment
Note:
Curves overview
From an expert: Working with Curves
Adjust image color and tone with Curves
Add contrast to the midtones of a photo with Curves
Keyboard shortcuts: Curves
Curves overview
In the Curves adjustment, you adjust points throughout an image’s tonal range. Initially, the image’s tonality is represented as a straight diagonal
line on a graph. When adjusting an RGB image, the upper-right area of the graph represents the highlights and the lower-left area represents the
shadows. The horizontal axis of the graph represents the input levels (original image values) and the vertical axis represents the output levels
(new adjusted values). As you add control points to the line and move them, the shape of the curve changes, reflecting your image adjustments.
The steeper sections of the curve represent areas of higher contrast while flatter sections represent areas of lower contrast.
You can save Curves adjustment settings as presets. See Save adjustment settings and Reapply adjustment settings.
The Curves adjustment can also be applied to CMYK, LAB, or Grayscale images. For CMYK images, the graph displays percentages of
ink/pigment. For LAB and Grayscale images, the graph displays light values.
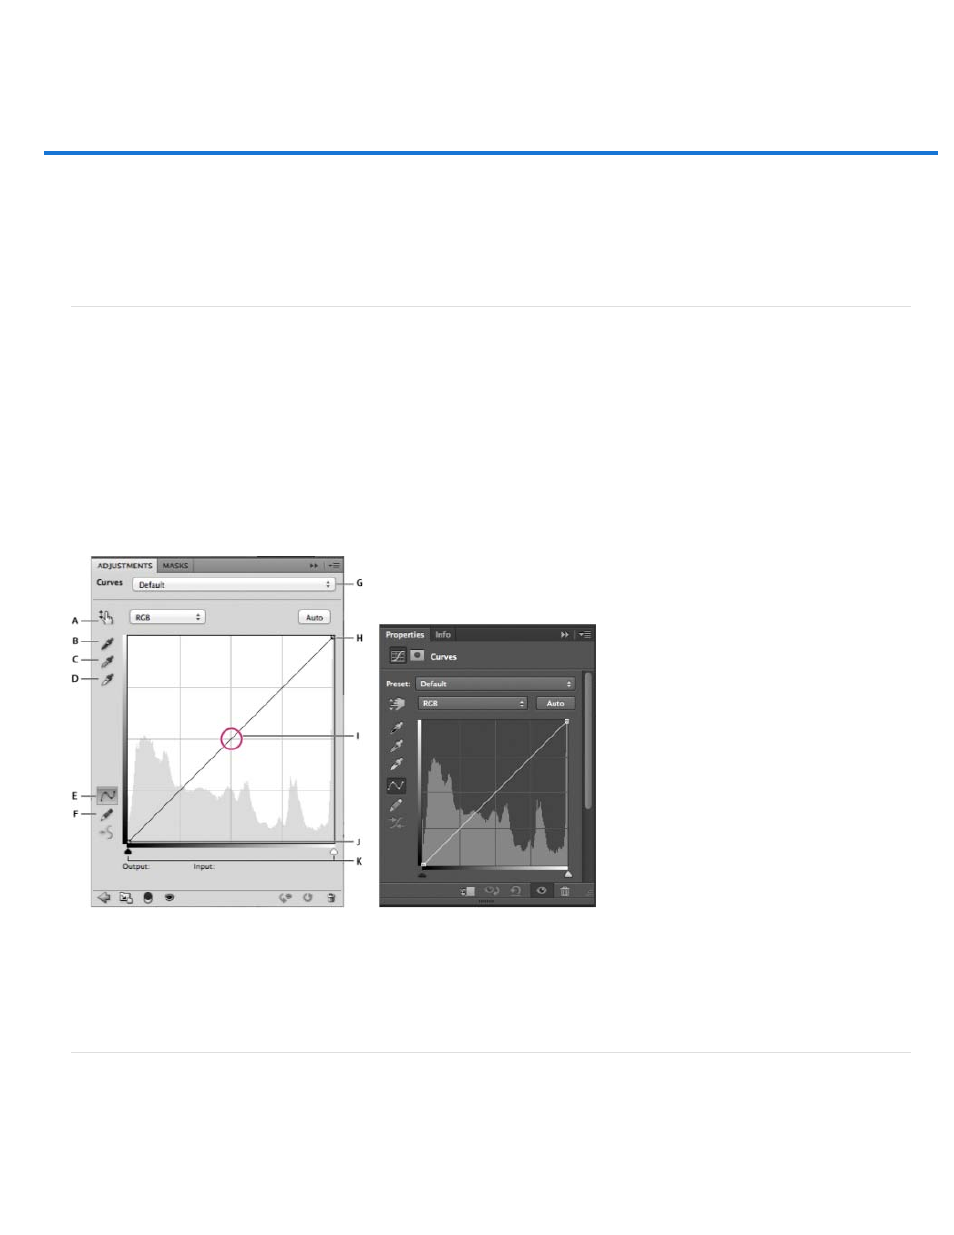
Curves options in the Adjustment panel (CS5) and Properties panel (CC, CS6)
A. On-image adjustment tool B. Sample in image to set black point. C. Sample in image to set gray point. D. Sample in image to set white
point. E. Edit points to modify the curve. F. Draw to modify the curve. G. Curves presets menu H. Set black point. I. Set gray point. J. Set white
point. K. Show clipping.
Adjust image color and tone with Curves
Moving a point in the top portion of the curve adjusts the highlights. Moving a point in the center of the curve adjusts the midtones, and moving a
point in the bottom section of the curve adjusts the shadows. To darken highlights, move a point near the top of the curve downward. Moving a
point either down or to the right maps the Input value to a lower Output value, and the image darkens. To lighten the shadows, move a point near
441