Adobe Photoshop CC 2014 v.14.xx User Manual
Page 449
Note:
the bottom of the curve upward. Moving a point either up or to the left maps a lower Input value to a higher Output value, and the image lightens.
1. To apply a Curves adjustment, do one of the following:
Click the Curves icon
in the Adjustments panel.
Choose Layer > New Adjustment Layer > Curves. Click OK in the New Layer dialog box.
(CS5) Select a Curves preset in the Adjustments panel.
Choosing Image > Adjustments > Curves applies the adjustment directly to the image layer and discards image information.
2. (Optional) To adjust the color balance, in the the Properties panel (CC, CS6) or the Adjustments panel, choose the channel you want to
adjust from the menu to the left of the Auto button.
3. In the Properties panel (CC, CS6) or the Adjustments panel (CS5), do any of the following:
Click directly on the curve line and then drag the control point to adjust a tonal area.
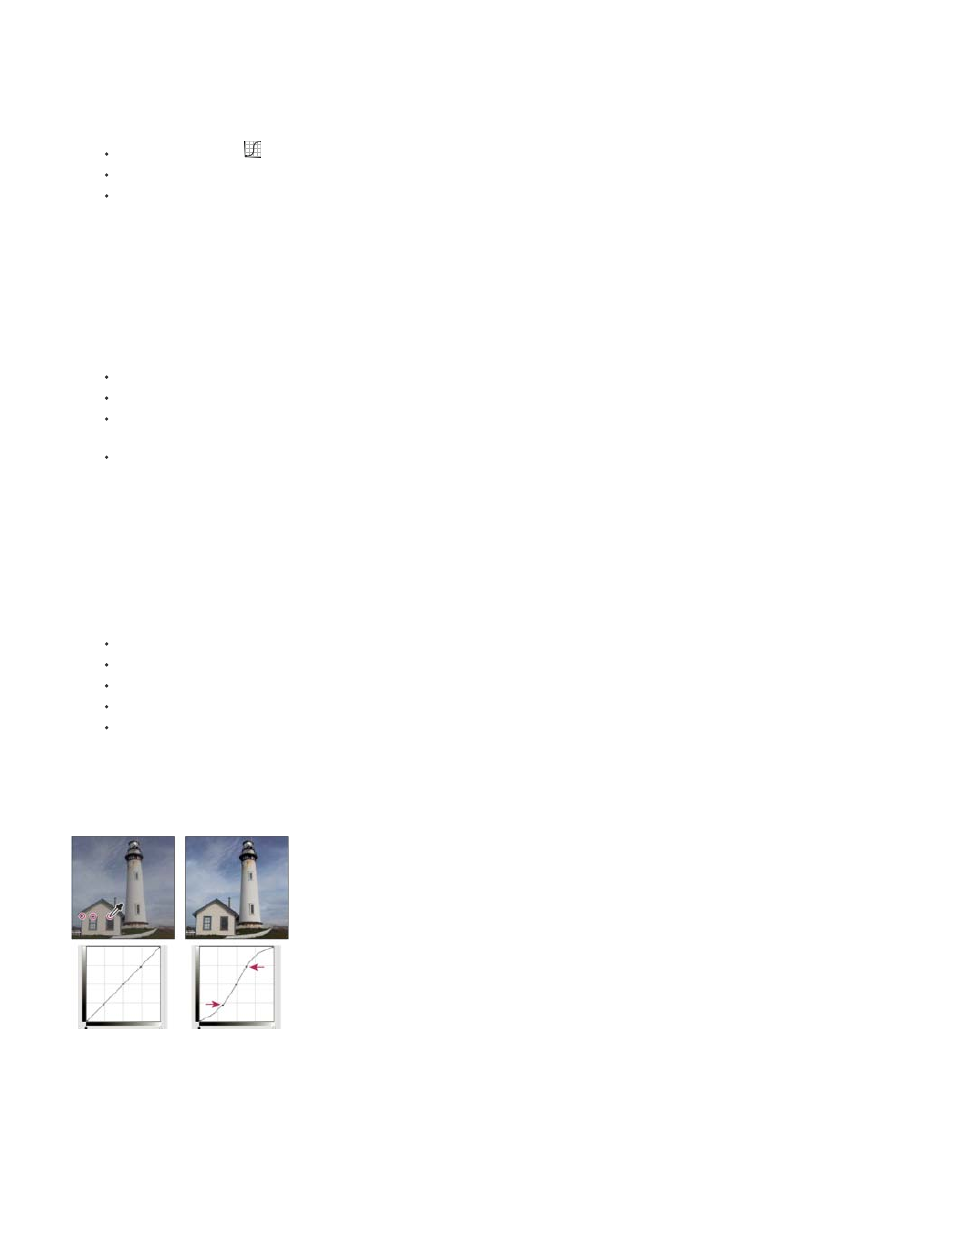
Select the On-image adjustment tool and then drag in the area of the image you want to adjust.
Select the On-image adjustment tool and click the tonal areas in the image that you want to adjust. This places control points along the
curve line.
(CC, CS6) Choose a preset from the Preset menu.
Dragging a control point up or down lightens or darkens the tonal area you’re adjusting. Dragging a control point left or right increases or
decreases the contrast. You can add up to 14 control points to the curve. To remove a control point, drag it off the graph. As you adjust the
tonality, the graph continues displaying the original diagonal baseline and image histogram as references. These options can be turned off,
see Set Curves Display Options.
4. (Optional) Do any of the following to modify the adjustment:
Add more points directly to the curve to adjust different tonal areas.
Click the On-image adjustment tool in other areas of the image, and drag up or down.
Move the Set Black and White Point sliders or use the Eyedropper tools to specify the darkest and lightest values in the image.
Click a point on the curve, and enter values in the Input and Output text boxes.
Select the pencil icon and draw a new curve over the existing one. When you have finished, click the Smooth the Curve Values icon or
to smooth the curve you drew. Clicking more than once continues to smooth the curve further.
Points on the curve remain anchored until you move them. You can make an adjustment in one tonal area without affecting other areas.
Clicking the On-image adjustment tool in the image adds control points to the curve. Moving the control points adjusts the tonality of the image.
Removing control points from a curve
442