Reordering filters, Changing filter timing – Apple Motion 4 User Manual
Page 959
Reordering Filters
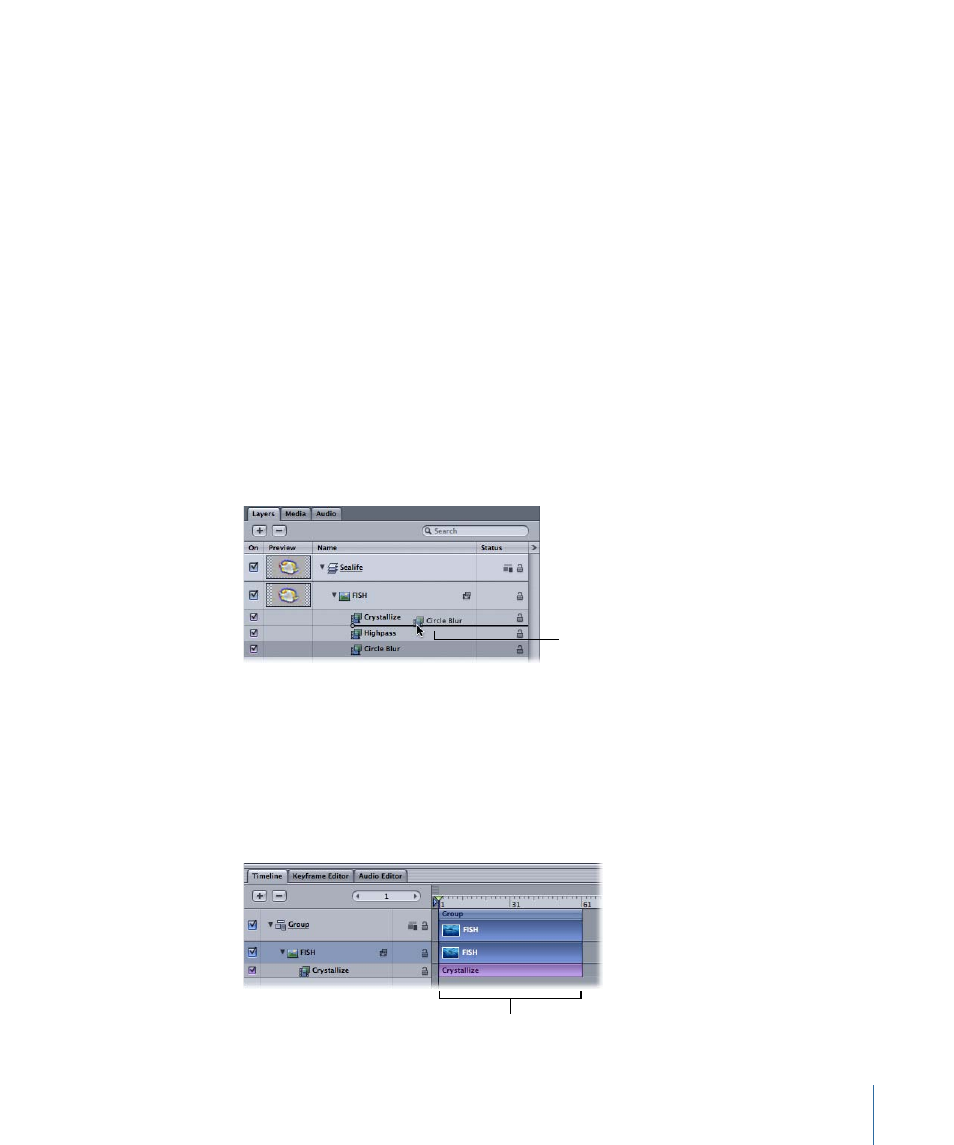
When multiple filters are applied to a single object, they appear beneath that object in
the Timeline or Project pane. You can change the order in which they are applied to the
object, to change how they interact.
Some filters yield better results depending on the order in which they are applied. For
instance, you wouldn’t want to apply a color correction after a blur. To get the most
accurate color correction, you want to apply the color correction filter to the source object,
not a modified version of the source. The same is true for extracting keys, and just about
process that depends on color information.
To reorder a filter
1
Select the filter you want to reorder.
2
Click the name of the filter or the icon to the left of the name, then drag it up or down
in the Layers tab.
A position indicator shows the new position for the filter when you release the mouse
button.
3
Release the mouse button when the position indicator is in the new location.
The Circle Blur moves
above the Highpass filter.
Changing Filter Timing
Filters appear as a bar in the Timeline and like other duration bars, can be trimmed or
moved (slipped) in time.
When you apply a filter to an object, the duration of the filter defaults to the length of
the object to which it is applied. This can be seen in the Timeline.
Filter duration defaults to
object duration.
959
Chapter 16
Using Filters