Modifying keyframes, Curve snapshots – Apple Motion 4 User Manual
Page 573
Note: When you Control-click an animation curve icon in the Library stack, the Edit
Description shortcut menu item becomes available. This is a handy tool that allows you
to enter custom notes about an item saved in the Library. Once you choose Edit
Description, enter your notes in the text field, then click OK.
Modifying Keyframes
The Keyframe Editor provides an ideal environment for manipulating your keyframes
because you can see their values, placement in time, and how the changes you make
affect the interpolative curves surrounding your keyframes.
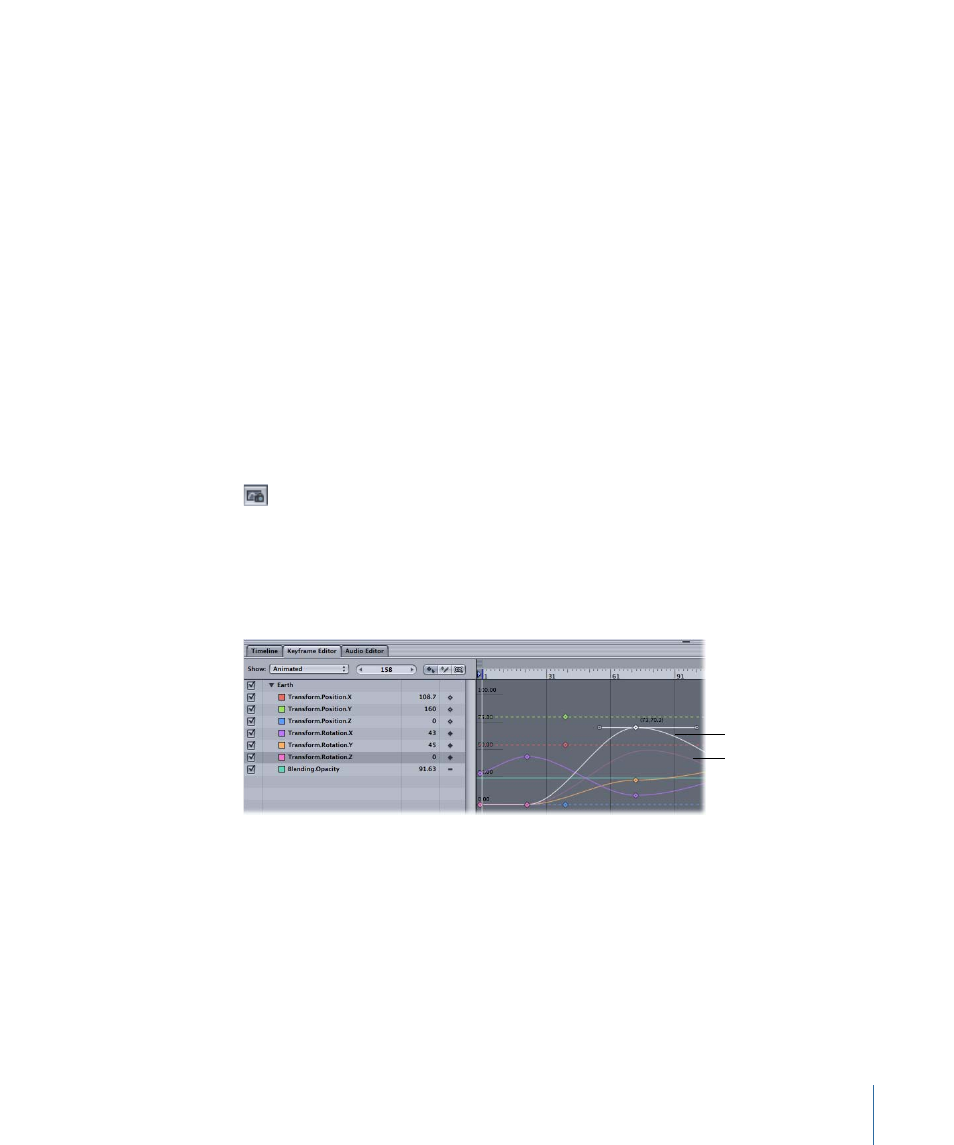
Curve Snapshots
When modifying keyframes, it is often helpful to have a frame of reference for your curves.
This is useful both as a guide as you’re editing, and as a safety net in case you make some
changes, then decide to go back to your curve’s original state.
To take and show curve snapshots
µ
Click the “Take/Show curve snapshot” button at the bottom of the Keyframe Editor.
Now, as you move keyframes in the Keyframe Editor, the original curve—as it appeared
when you took the snapshot—is represented by a lighter color. As long as you remain
in the Keyframe Editor editing the current set of curves, the snapshot curve will remain
available.
Original curve (pink)
New curve (white)
If, after editing a curve, you wish to revert back to the snapshot, you can do so from the
Animation menu in the Keyframe Editor.
To revert a curve back to its most recent snapshot
µ
From the Animation menu in the Keyframe Editor, select Set to Curve Snapshot.
The curve reverts to the state of its last snapshot.
Important:
If you leave the Keyframe Editor, or load a different set of curves into the
Keyframe Editor, curve snapshots are taken again, replacing the previous curve snapshots.
573
Chapter 10
Keyframes and Curves