Keyframe graph, Ruler, Zooming in the keyframe editor – Apple Motion 4 User Manual
Page 120

Keyframe Graph
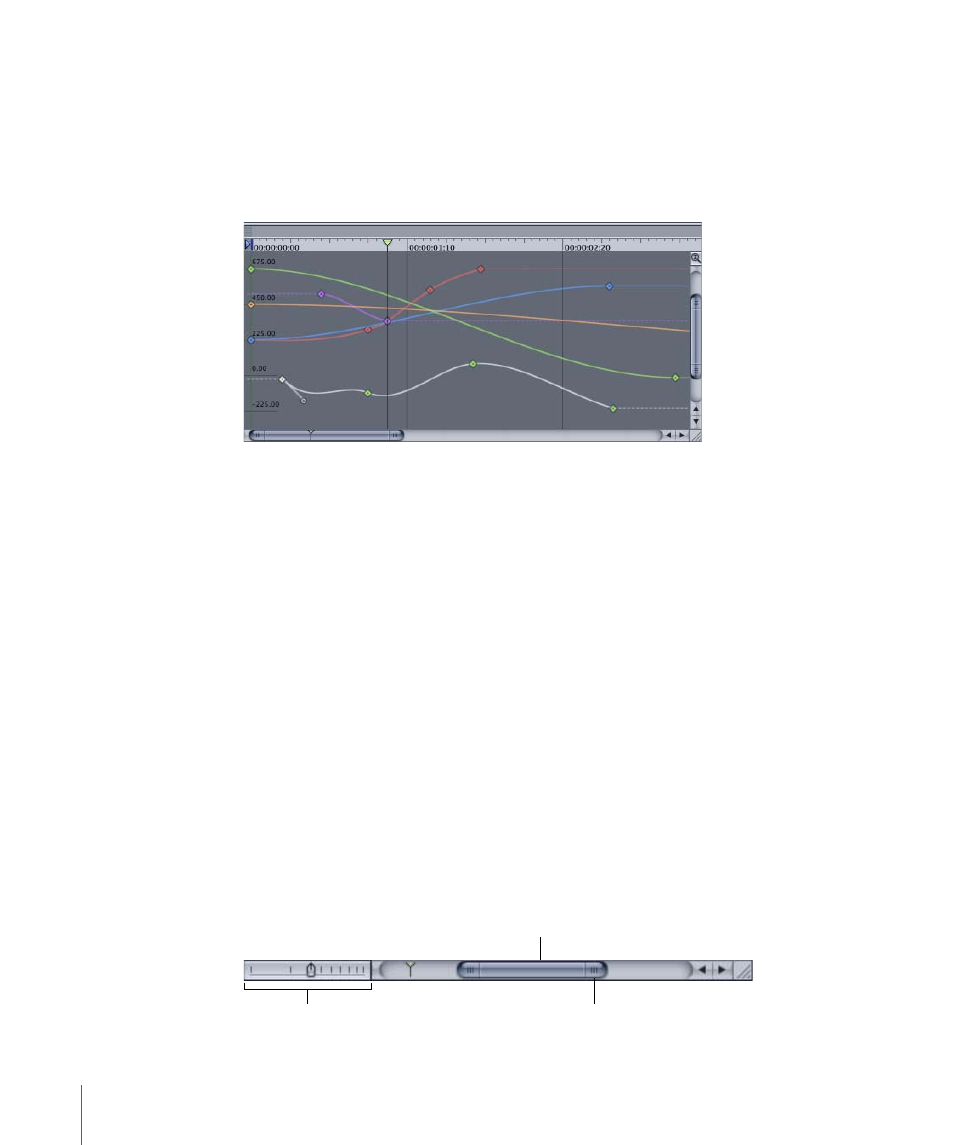
The remainder of the Keyframe Editor tab contains the keyframe graph. This area displays
all of the curves and keyframes for the selected parameters. Parameters are represented
by different colors. Keyframes appear as diamonds and curves appear as solid lines. Areas
before the first keyframe and after the last keyframe are represented by dotted lines.
Selected parameters and keyframes appear white.
You can manipulate keyframes directly by dragging them in the graph. Moving keyframes
left and right changes their position in time, while dragging them up and down changes
their values. You can also double-click a keyframe, type a number into the pop-up value
field, and then press Return to change its value.
Control-click a keyframe to access shortcut menu options as well as an Interpolation
submenu, which allows you to change curve types. For more information on manipulating
keyframes and curves in the graph, see
and
.
Ruler
At the top of the keyframe graph is a ruler that provides a visual gauge for the positions
and durations of the keyframes and curves. The ruler is identical to the Timeline ruler. For
more information on working with the ruler, see
Zooming in the Keyframe Editor
As you become familiar with the Keyframe Editor, you may want to switch between
focusing on an individual keyframe or curve and seeing an overview of your whole project.
Fortunately, you can quickly zoom in and out on the Keyframe Editor using a variety of
different tools.
The bottom of the Keyframe Editor contains a zoom slider and a scroller.
Zoom slider
Scroller
Handle
120
Chapter 2
The Motion Interface
