Apple Motion 4 User Manual
Page 63
Holding the pointer over the 3D Compass exposes color-coded shortcuts to the reference
camera views. Click any of the colored view icons, such as Front, Left, Right, Perspective,
and so on to switch to that corresponding camera view. The Canvas animates as it
changes to the new view. For more information on working with the 3D Compass and
the different views, see
3D Compass
3D Compass showing
camera shortcuts
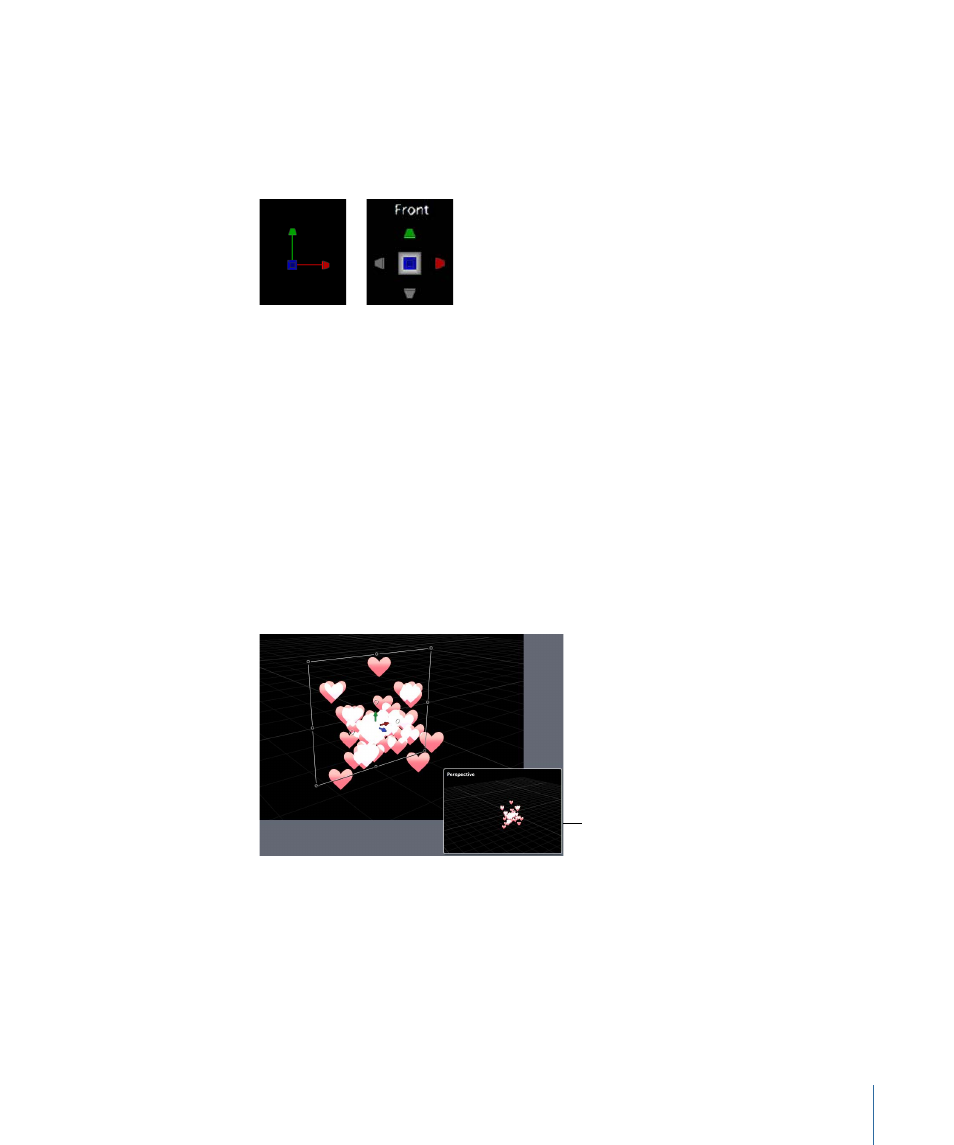
• Inset View: Turns the Inset view in the Canvas on and off. When enabled, a temporary
window appears in the lower-right corner of the Canvas displaying a Active Camera or
Perspective view of your project helping you stay oriented as you move objects in 3D
space. You can change the size of the Inset view, as well as control whether the Inset
view appears on transform changes, on all changes, or manually.
The Perspective view dynamically changes to fit the objects in the Inset view (even if
objects are no longer visible in the main window). This view is triggered when you are
already looking through the camera. The Active view is triggered when you are using
a camera view other than the active camera (such as Front). For more information on
the Inset view, see
.
Inset view
Note: Because project elements are 2D (flat) objects, the elements are not visible when
you use orthogonal camera views (Left, Right, Top, and Bottom) unless the elements
are rotated in 3D space (or unless text, particles, or the replicator is using the Face
Camera parameter in its Inspector). This is because orthogonal views are at right angles
(perpendicular) to the elements. When an object is selected, a thin gray line represents
the object in the Canvas. For more information on using cameras, see
63
Chapter 2
The Motion Interface