Creating a new encryption group – Brocade Network Advisor SAN + IP User Manual v12.1.0 User Manual
Page 976
922
Brocade Network Advisor SAN + IP User Manual
53-1002949-01
Creating a new encryption group
25
Creating a new encryption group
The following steps describe how to start and run the encryption setup wizard and create a new
encryption group.
NOTE
When a new encryption group is created, any existing tape pools in the switch are removed.
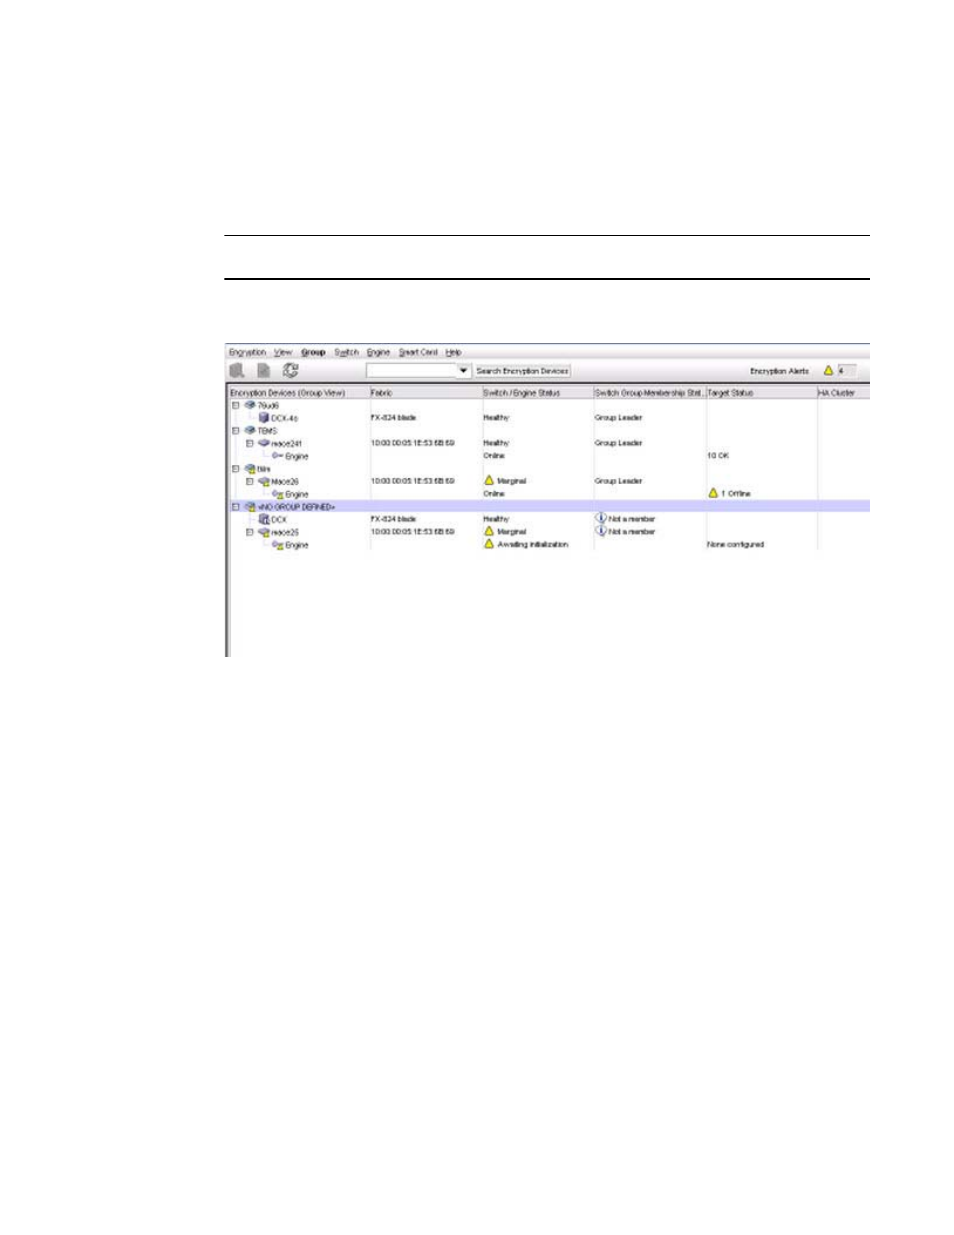
1. Select Configure > Encryption from the menu task bar to display the Encryption Center
dialog box. (Refer to
Figure 350
.)
FIGURE 350
Encryption Center dialog box - No group defined
2. Select a switch from the
assigned to an encryption group.)
3. Select Encryption > Create/Add to Group, from the menu task bar.
The Configure Switch Encryption wizard welcome screen displays. (Refer to
Figure 351
.) The
wizard enables you to create a new encryption group, or add an encryption switch to an existing
encryption group. The wizard also enables you to configure switch encryption.
Click Next on each screen to advance to the next step in the wizard. Steps might vary slightly
depending on the key vault type selected, but the basic wizard steps are as follows.
a. Designate Switch Membership.
b. Create a new encryption group or add a switch to an existing encryption group.
c. Select the key vault.
d. Specify the public key filename.
e. Select Security Settings.
f.
Confirm the configuration.
g. Configuration Status.
h. Read Instructions.