Automating audio filter parameters with keyframes, Keyframe controls in the filters tab of the viewer, Adjusting audio filter parameter keyframes – Apple Final Cut Pro 7 User Manual
Page 974
To change the order of filters
µ
Drag a filter in the Filters tab to change its place in the list of filters applied to a clip.
Note: To make it easier to drag the filter, click the disclosure triangle to the left of the
filter’s name to hide the filter’s parameters.
To remove a filter from a clip
Do one of the following:
µ
With a clip open in the Viewer, select a filter in the Effects tab, then choose Edit > Clear
(or press the Delete key).
µ
Click the filter category bar in the Filters tab to select all of the filters applied to a clip,
then choose Edit > Clear (or press the Delete key).
Automating Audio Filter Parameters with Keyframes
You can add keyframes for any audio filter parameter, just as you can with video filter
parameters. Unlike with video filter parameters, you can add keyframes to an audio filter
parameter during playback as long as the Record Audio Keyframes button is selected in
the Audio Mixer.
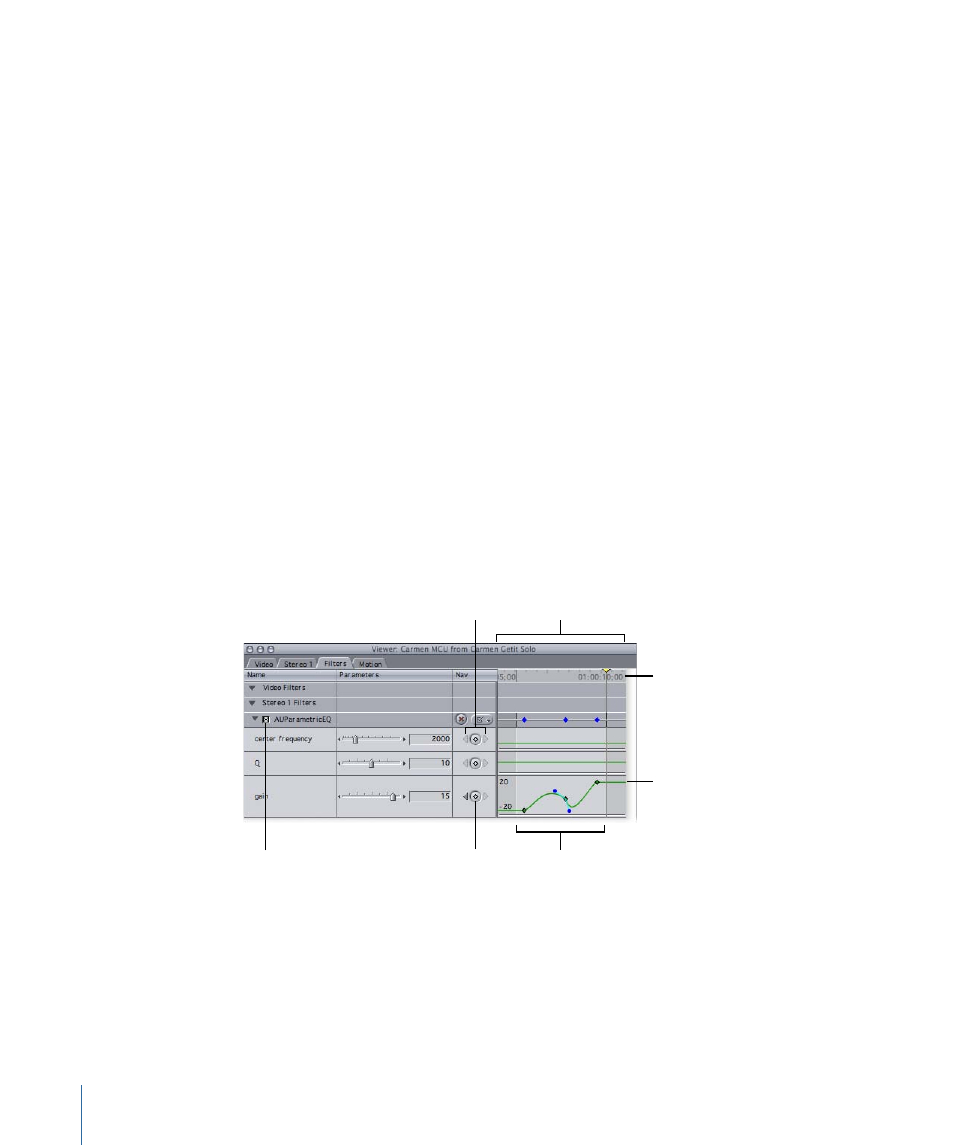
Keyframe Controls in the Filters Tab of the Viewer
To the right of each filter control is a set of keyframe controls. Like audio levels or stereo
pan, filters can be keyframed to change their effect on your clip over time.
Keyframe graph area
Section of clip
currently used
Keyframe navigation
buttons
Keyframe
button
Enable/Disable checkbox
Keyframe graph ruler
Keyframe graph line
For a detailed description of these controls, see
“Viewing and Adjusting a Filter’s
Adjusting Audio Filter Parameter Keyframes
You can add keyframes to audio filter parameters using the Selection and Pen tools, just
as you would for video filters.
974
Chapter 59
Using Audio Filters