Apple Final Cut Pro 7 User Manual
Page 1156
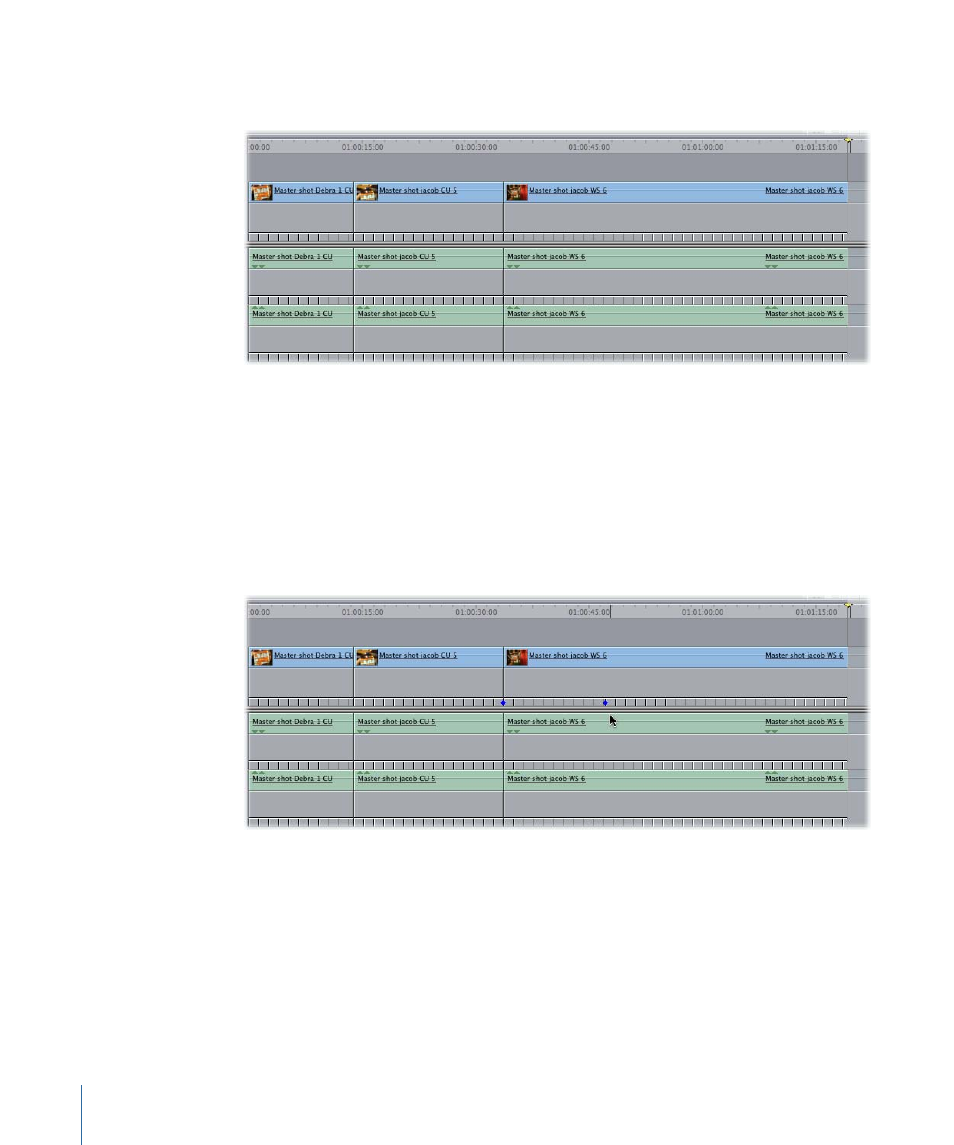
The keyframe graph area is displayed below each clip in the Timeline. You can use this
keyframe graph area to view and edit keyframes for applied effects.
Note: To have the keyframe graph area and speed indicator tick marks displayed by
default in new sequences, choose Final Cut Pro > User Preferences > Timeline Options
and select the Clip Keyframes checkbox and the Speed Indicators checkbox.
2
Move the pointer over the speed indicator tick marks in the keyframe graph area.
As you do this, the pointer automatically changes into the Pen tool.
3
Click in the speed indicator area where you want to add a speed keyframe.
A blue speed keyframe marker appears in the speed indicator area.
To adjust the position of speed keyframes in the Timeline
1
If there is no existing speed keyframe in the Timeline, add one.
1156
Chapter 69
Changing Clip Speed
- Câble composite AV (16 pages)
- Adaptateur secteur USB (16 pages)
- Battery Charger (52 pages)
- iSight (32 pages)
- StyleWriter - Adaptateur EtherTalk (19 pages)
- StyleWriter EtherTalk Adapter (19 pages)
- Câble AV composante YUV (16 pages)
- Adaptateur EtherTalk pour StyleWriter (19 pages)
- VESA Mount Adapter (20 pages)
- Mac Performa 5300CD (141 pages)
- Video System (95 pages)
- Final Cut Pro 7 (178 pages)
- Component AV Cable (16 pages)
- Component AV Cable (12 pages)
- Composite AV Cable (14 pages)
- Composite AV Cable (16 pages)
- IEEE1394 (24 pages)
- Universal Dock (88 pages)
- USB Power Adapter (8 pages)
- USB PowerAdapter (16 pages)
- World Travel Adapter (20 pages)
- TV (48 pages)
- AirPort Time Capsule 802.11ac (32 pages)
- Color StyleWriter 2200 (146 pages)
- AirPort Extreme 802.11n (5th Generation) (44 pages)
- AirPort Express 802.11n (1st Generation) (48 pages)
- AirPort Extreme 802.11n (3rd Generation) (44 pages)
- AirPort Express 802.11n (2nd Generation) (32 pages)
- AirPort Express v4.2 (48 pages)
- AirPort Time Capsule 802.11n (3rd Generation) (40 pages)
- Newton Connection Utilities (for Macintosh) (117 pages)
- Newton Backup Utility (for Macintosh) (39 pages)
- Wireless Keyboard and Mouse (20 pages)
- Newton Internet Enabler (29 pages)
- (22-inch) Cinema Display (21 pages)
- Color StyleWriter 1500 (144 pages)
- Bluetooth (4 pages)
- Color StyleWriter Pro (73 pages)
- Newton Connection Utilities (for Windows) (108 pages)
- AirPort Extreme Base Station v4.2 (36 pages)
- AirPort Extreme Card (12 pages)
- AirPort Time Capsule 802.11n (2nd Generation) (40 pages)
- ImageWriter LQ (2 pages)
- TV/FM Radio System (151 pages)