Apple Final Cut Pro 7 User Manual
Page 948
Tip: If you want to organize the arrangement of windows, choose Window > Arrange >
Color Correction. This places the Viewer, Canvas, and Tool Bench on the top part of the
screen as windows of equal size, and the Browser and Timeline on the bottom part of
the screen.
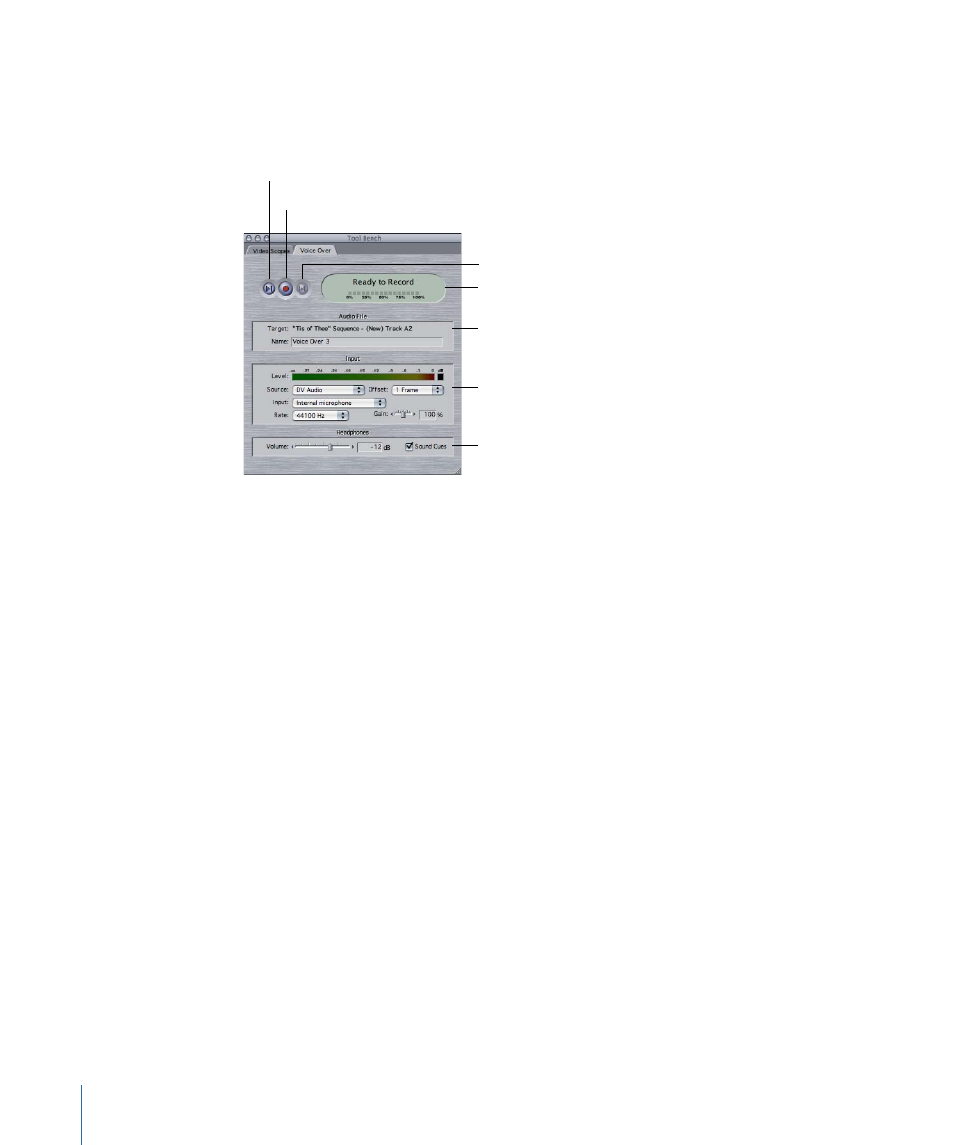
Review button
Status area
Audio destination track
and audio clip name
Input area
Record/Stop button
Discard Last Recording button
Headphones area
Playback and Recording Controls
The Voice Over tab offers the following playback and recording controls:
• Record/Stop: Click this button to begin the audio recording and Timeline playback.
While you’re recording, the button functions as a Stop button. Recording can also be
stopped by pressing the Esc key. If recording is stopped, the partial audio clip that was
recorded is saved to disk and placed in the Timeline.
• Review: Click this button to play back the section of the sequence you’ve defined, using
the sequence In and Out points or the position of the playhead and the end of your
sequence. This lets you preview the defined range of the Timeline while you practice
your voiceover.
• Discard Last Recording: Click this button to delete the previously recorded voiceover
clip. (This button is available only after you’ve used the Voice Over tool once.)
Important:
Discarding cannot be undone.
Status Area
The following options appear in the Status area:
• Ready to Record: Indicates that the Voice Over tool is ready and waiting to be activated.
• Starting: Appears along with a progressive change in color from yellow to red during
the 5-second countdown that occurs when you first click the Record button. Audio is
actually recorded during the countdown, and the resulting clip has a 5-second handle
at the beginning.
948
Chapter 58
Using the Voice Over Tool