Apple Final Cut Pro 7 User Manual
Page 1236
Tip: If you edit the clip into track V2 of the Timeline, you’ll have room to insert another
clip as the new composited background.
2
Apply the Chroma Keyer filter to the green-screen clip you just edited in.
For more information, see
“Applying a Filter to a Clip.”
3
In the Timeline, double-click the green-screen clip to open it in the Viewer; then, in the
Viewer, click the Chroma Keyer tab.
Note: In this example, you won’t use the numeric controls that appear in the Filters tab.
4
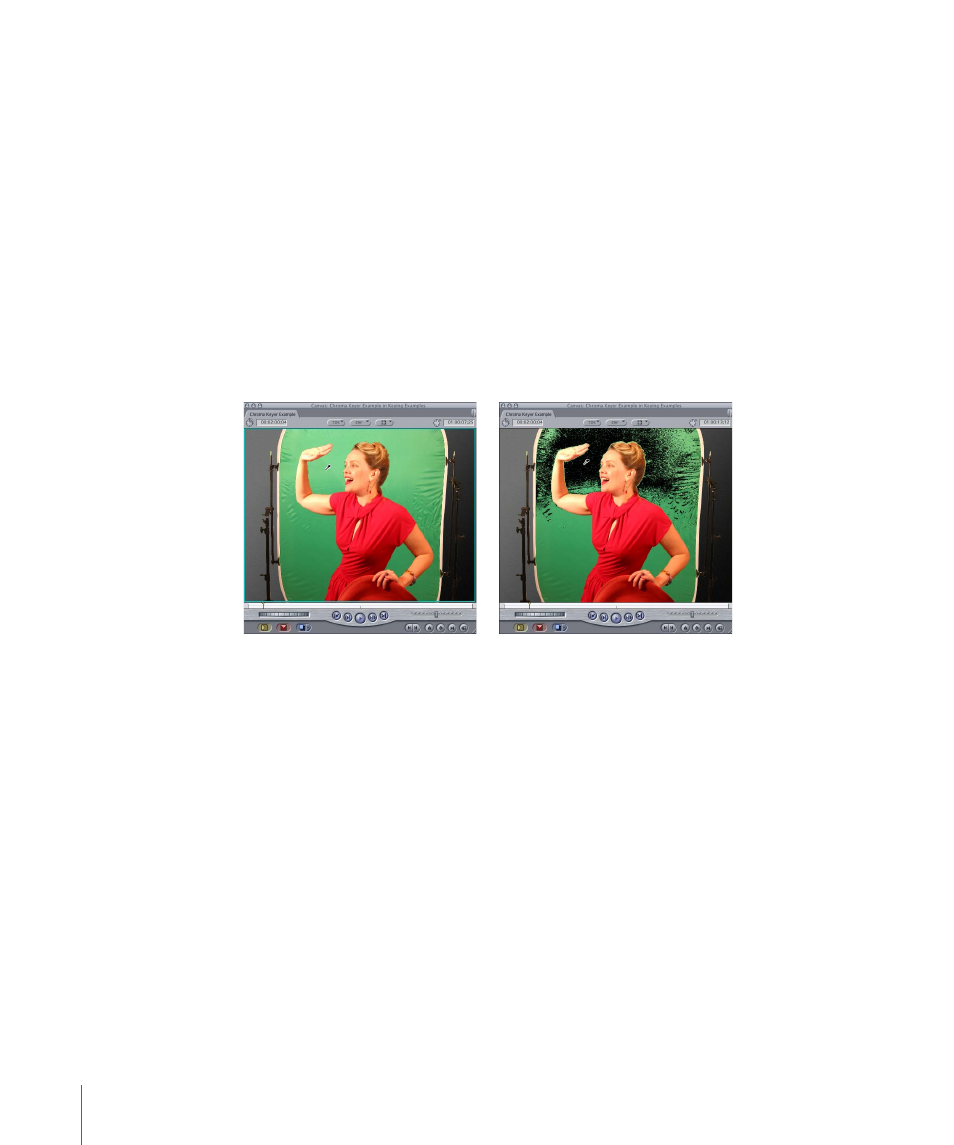
Click the Select Color eyedropper to pick a color in the clip to key, move the pointer to
the Canvas (it turns into an eyedropper), then click the desired key color. Choose a color
that’s fairly close to the edge of your foreground subject, so that the area near the subject
is the first area of color you key out.
The color range you select with the eyedropper becomes transparent in the clip.
After selecting the first key color
(not all of the green is keyed out)
Before clicking with the
eyedropper tool
Next, you want to expand the keyed area to include regions of the background that
weren’t immediately eliminated by the first key.
1236
Chapter 72
Keying, Mattes, and Masks