Changing audio levels in the viewer – Apple Final Cut Pro 7 User Manual
Page 922
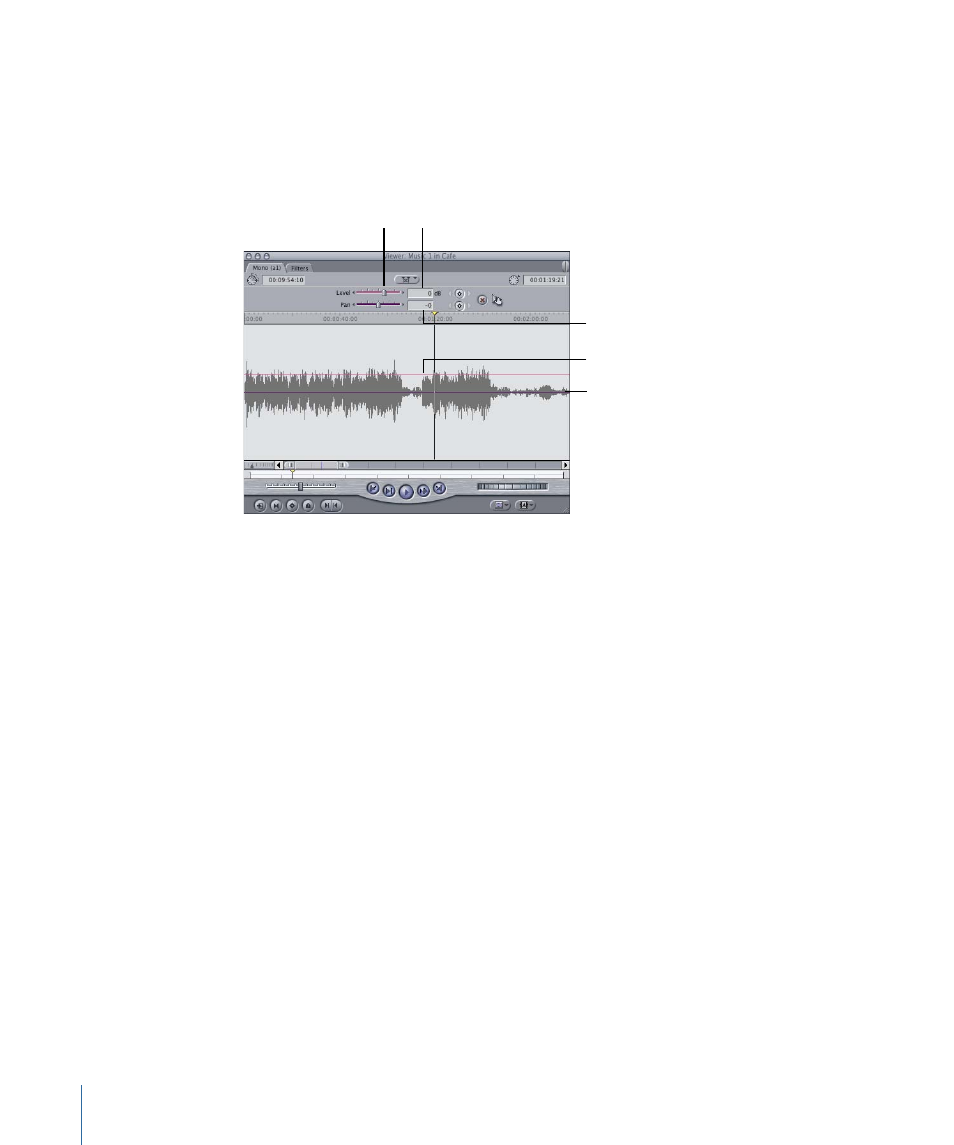
Changing Audio Levels in the Viewer
You can control the audio levels and placement of sound (pan) in a clip in the Viewer
using the sliders at the top of the Audio tab, the number fields next to the sliders, or the
overlays in the middle of the waveform display area. The detail displayed in the audio
tabs of the Viewer is good for modifying keyframes recorded using the Audio Mixer.
Audio level overlay
Drag the Level slider to
change the audio level.
Pan field
Level field
Pan overlay
How these controls affect the level of your clip depends on whether or not you’ve set
keyframes for either audio level or pan.
• If no keyframes are set: Moving the sliders or entering a numeric value changes the
audio or stereo levels for the entire clip. Similarly, dragging one of the overlays changes
the audio level or pan setting for the entire clip.
• If keyframes are set: Moving the sliders or entering a numeric value modifies the value
of whatever keyframe is at the current position of the Viewer playhead. If there is no
keyframe at the current position of the playhead, one will be added. There must be at
least two keyframes on an overlay to change the audio level or pan setting from one
level to another.
Whether or not the audio item in the Viewer is a stereo pair also affects how audio level
and pan are set. Clips can have up to 24 tracks of audio, and each item can be mono or
part of a stereo pair.
• If you opened mono items: Each channel is in its own tab in the Viewer and is mixed
separately from all others.
• If you opened a stereo pair: Both waveforms appear in the same tab, named Stereo.
Adjusting the levels of one channel adjusts the levels of the other.
922
Chapter 57
Mixing Audio in the Timeline and Viewer