Apple Final Cut Pro 7 User Manual
Page 1108
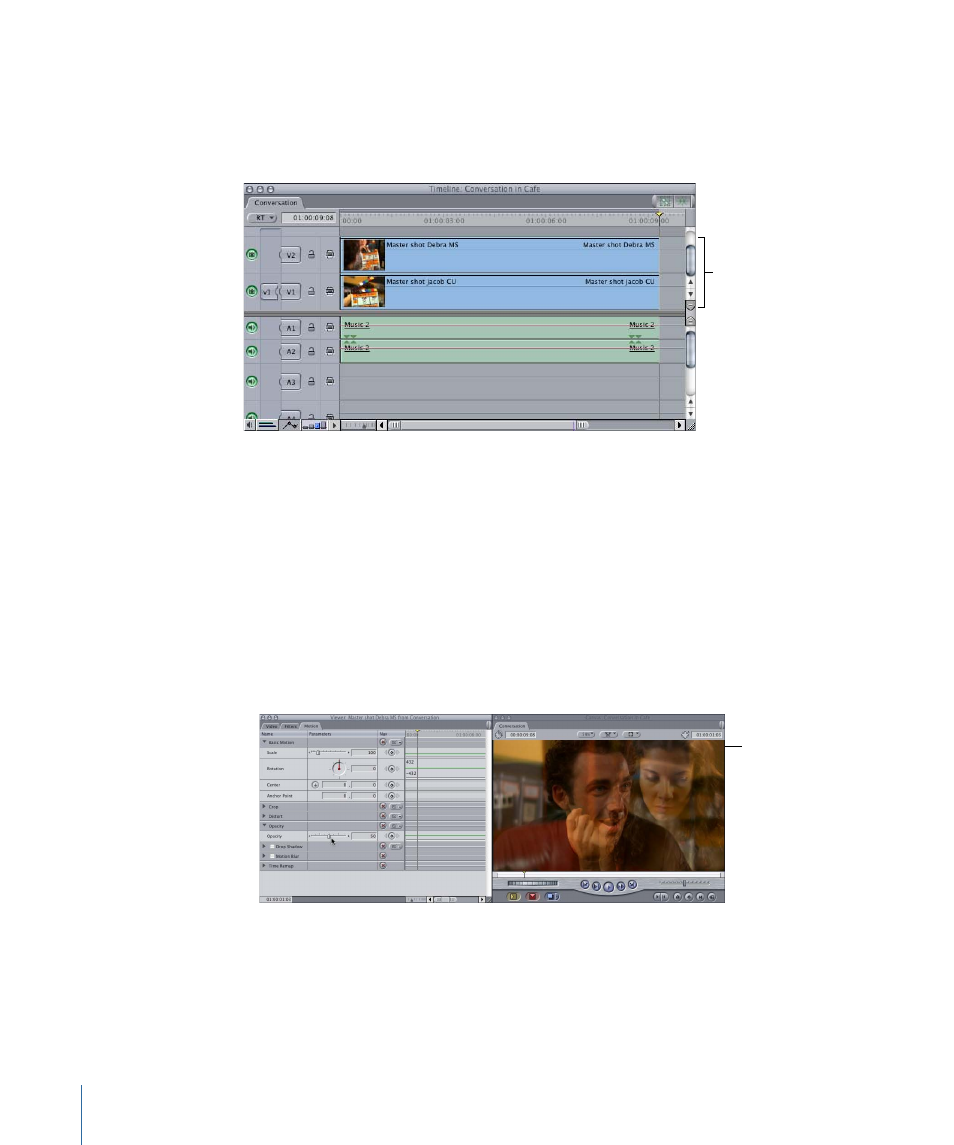
To dynamically adjust opacity over time
1
Edit two clips of equal duration into your sequence, each in its own video track.
Note: The clip you want to appear in front should be placed in track V2; the other clip
should be placed in track V1.
Layer the clips, with one
clip in track V1 and the
other superimposed in
track V2.
2
Open the clip in track V2 in the Viewer, then click the Motion tab.
3
Click the disclosure triangle for the Opacity parameter to reveal its keyframe graph line
in the keyframe graph area.
4
To adjust the opacity of the entire clip, do one of the following:
• Drag the Opacity slider to the left until the value in the number field reads “50.”
• Type “50” in the Opacity number field, then press Return.
• Position the pointer over the Opacity keyframe graph line in the keyframe graph area;
when the pointer turns into the Adjust Line Segment pointer, drag down until the value
in the number field reads “50.”
The image in the Canvas
now shows both layers
blended together.
1108
Chapter 67
Adjusting Parameters for Keyframed Effects
- Câble composite AV (16 pages)
- Adaptateur secteur USB (16 pages)
- Battery Charger (52 pages)
- iSight (32 pages)
- StyleWriter - Adaptateur EtherTalk (19 pages)
- StyleWriter EtherTalk Adapter (19 pages)
- Câble AV composante YUV (16 pages)
- Adaptateur EtherTalk pour StyleWriter (19 pages)
- VESA Mount Adapter (20 pages)
- Mac Performa 5300CD (141 pages)
- Video System (95 pages)
- Final Cut Pro 7 (178 pages)
- Component AV Cable (16 pages)
- Component AV Cable (12 pages)
- Composite AV Cable (14 pages)
- Composite AV Cable (16 pages)
- IEEE1394 (24 pages)
- Universal Dock (88 pages)
- USB PowerAdapter (16 pages)
- USB Power Adapter (8 pages)
- World Travel Adapter (20 pages)
- TV (48 pages)
- AirPort Time Capsule 802.11ac (32 pages)
- Color StyleWriter 2200 (146 pages)
- AirPort Extreme 802.11n (5th Generation) (44 pages)
- AirPort Express 802.11n (1st Generation) (48 pages)
- AirPort Extreme 802.11n (3rd Generation) (44 pages)
- AirPort Express 802.11n (2nd Generation) (32 pages)
- AirPort Express v4.2 (48 pages)
- AirPort Time Capsule 802.11n (3rd Generation) (40 pages)
- Newton Connection Utilities (for Macintosh) (117 pages)
- Newton Backup Utility (for Macintosh) (39 pages)
- Wireless Keyboard and Mouse (20 pages)
- Newton Internet Enabler (29 pages)
- (22-inch) Cinema Display (21 pages)
- Color StyleWriter 1500 (144 pages)
- Bluetooth (4 pages)
- Color StyleWriter Pro (73 pages)
- Newton Connection Utilities (for Windows) (108 pages)
- AirPort Extreme Base Station v4.2 (36 pages)
- AirPort Extreme Card (12 pages)
- AirPort Time Capsule 802.11n (2nd Generation) (40 pages)
- ImageWriter LQ (2 pages)
- TV/FM Radio System (151 pages)