Apple Final Cut Pro 7 User Manual
Page 201
This kind of setup is used mainly for low-resolution capture and offline editing. Because
Final Cut Pro can edit DV video natively, you can capture your video as if it were DV
footage, edit at DV resolution, and then recapture only the necessary media files for your
finished movie at full resolution using a third-party video interface.
Important:
If you plan to recapture footage later, make sure timecode is captured
accurately. For more information about calibrating your device control and timecode,
see
“Device Control Settings and Presets.”
A Recommended Non-DV-to-DV System Using Serial Device Control
You need the following equipment:
• Your computer and display
• A non-DV format playback device, such as a Betacam SP or Digital Betacam deck
• An analog-to-DV or digital-to-DV converter
Note: Some DV camcorders and VTRs can also act as an analog-to-DV converter.
• A 4- to 6-pin FireWire cable, available at an electronics store or an Apple Retail Store
• A USB-to-serial adapter or internal modem serial port adapter
• An RS-422 video deck control cable
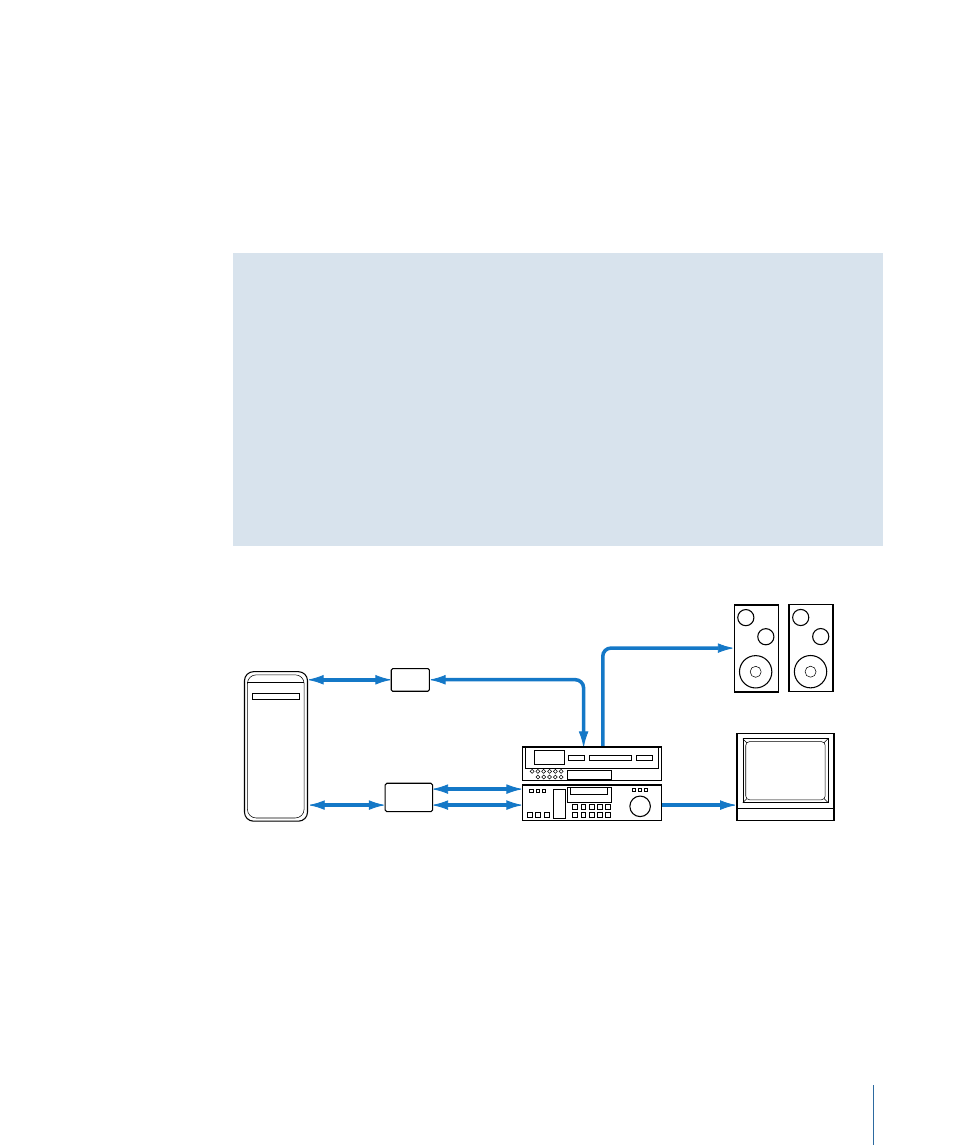
The following illustration shows a typical non-DV-to-DV setup:
FireWire
USB
Analog or digital VTR
Computer
USB-to-serial
adapter
DV converter
Standard definition
monitor
Video
Audio
RS-422 serial
Audio
Video
Amplified speakers
To connect your VTR to your analog-to-DV or digital-to-DV converter
1
With your DV converter turned off, connect the 6-pin connector on the FireWire cable to
the FireWire port on your computer.
2
Connect the 4-pin connector on the FireWire cable to the DV converter.
3
Connect the video output of your VTR to the video input of the DV converter.
4
Connect the audio output of your VTR to the audio input of the DV converter.
201
Chapter 12
Connecting Professional Video and Audio Equipment