Apple Final Cut Pro 7 User Manual
Page 935

In the example above, the section of the clip to the left of the keyframes has a level of
–30 dB, and the rest of the clip to the right of the keyframes has a level of 0 dB. This is
the simplest type of level change you can make.
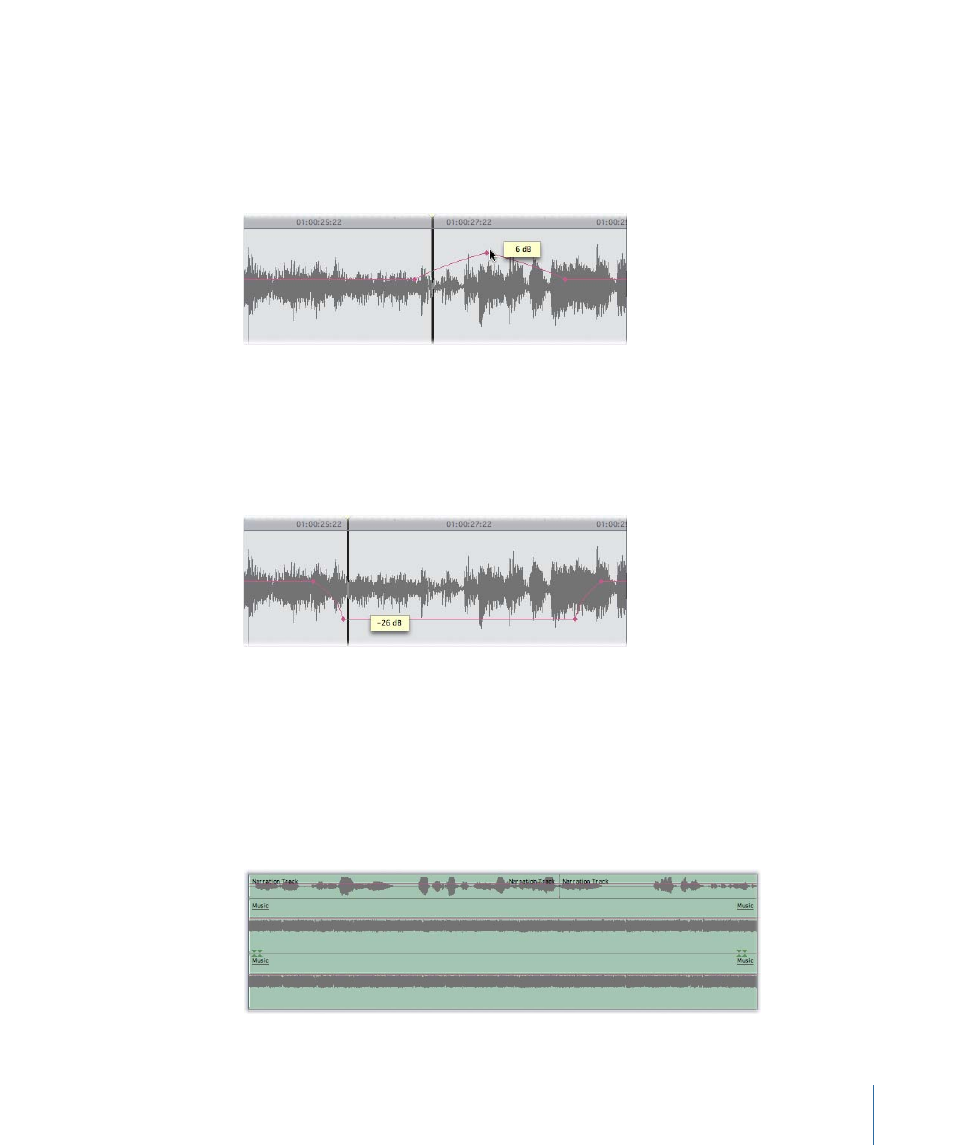
A more sophisticated change in levels—for example, introducing a slight boost in the
level of a few notes in a music track—requires three keyframes.
In the example above, the audio level of the clip starts at –3 dB and then rises along a
curve, peaking at +6 dB on the note that’s playing at that point. The audio level then
lowers along another curve, ending back at –3 dB.
Three keyframes allow you to boost or attenuate (lower) a section of audio along a curve,
but to make less gradual changes to longer sections of audio, you’ll need to use four.
In the example above, the audio level, instead of rising or lowering constantly, changes
from –3 dB to -26 dB during the first two keyframes and then remains constant. The final
two keyframes boost the level back to –3 dB, where it remains for the duration of the
clip.
Example: Using Keyframes in the Timeline to Automate Audio Levels
Suppose you’ve edited a music clip and a clip with voiceover narration together in your
sequence.
935
Chapter 57
Mixing Audio in the Timeline and Viewer
