Apple Final Cut Pro 7 User Manual
Page 1360
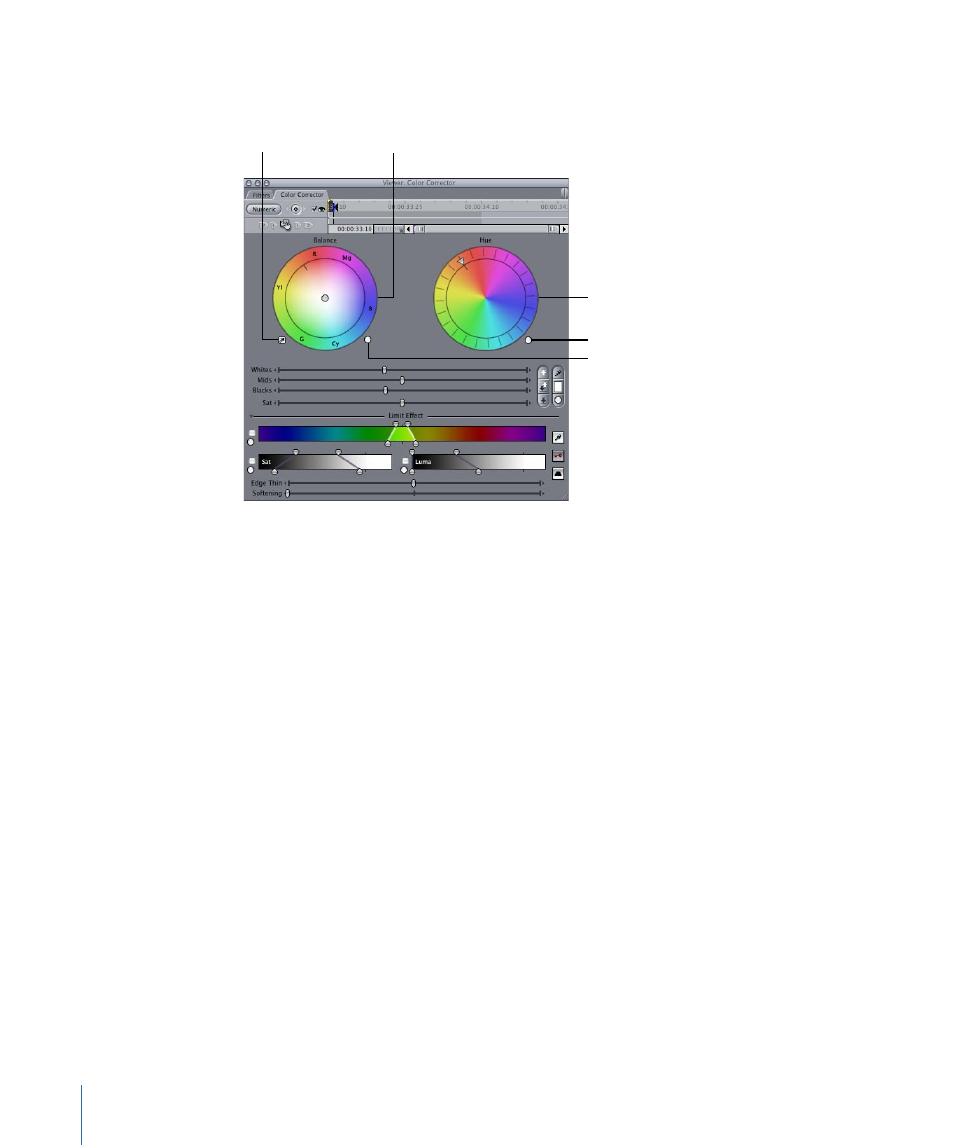
You use the controls in the Color Corrector tab to balance the whites and change hues
displayed in a clip.
Balance Reset button
Hue control
Auto-Balance
eyedropper
Hue Reset button
Balance control
The Color Corrector filter has one color balance control that lets you manipulate the
whites in a clip, as well as a Hue control. You rarely use the Balance and Hue controls
simultaneously in a single color correction operation.
• Balance control: The Balance control affects the color balance in the whites of your clip.
Drag within the color wheel to move the color balance indicator and change the mix
of red, green, and blue in the whites of your clip.
• Auto-Balance eyedropper: Clicking this eyedropper turns the pointer into an eyedropper
when it’s moved into the Video tab of the Viewer or into the Canvas. Position the tip
of the eyedropper in what is supposed to be the whitest area of your image, such as
a highlight on a white shirt, then click. The color value of the pixel you selected is
analyzed, and the Balance control is automatically adjusted to turn that pixel into white.
For example, clicking a pixel that’s slightly yellow nudges the color balance indicator
toward blue, to turn that yellow into a neutral white.
When using the Auto-Balance eyedropper, don’t select an area that’s overexposed,
such as a light source or a shiny highlight. This won’t give you the desired result. Instead,
select a properly exposed area of your picture that’s white, such as a well-lit shirt sleeve
or white wall.
Note: When color correcting a clip, using this eyedropper tool is usually the second
step you take, after first using the Auto Level controls and the Whites, Mids, and Blacks
sliders (described in the next sections) to maximize the contrast of your image.
1360
Chapter 81
Color Correction Filters