Apple Final Cut Pro 7 User Manual
Page 1101
To set keyframes from the Viewer or Canvas
Do one of the following:
µ
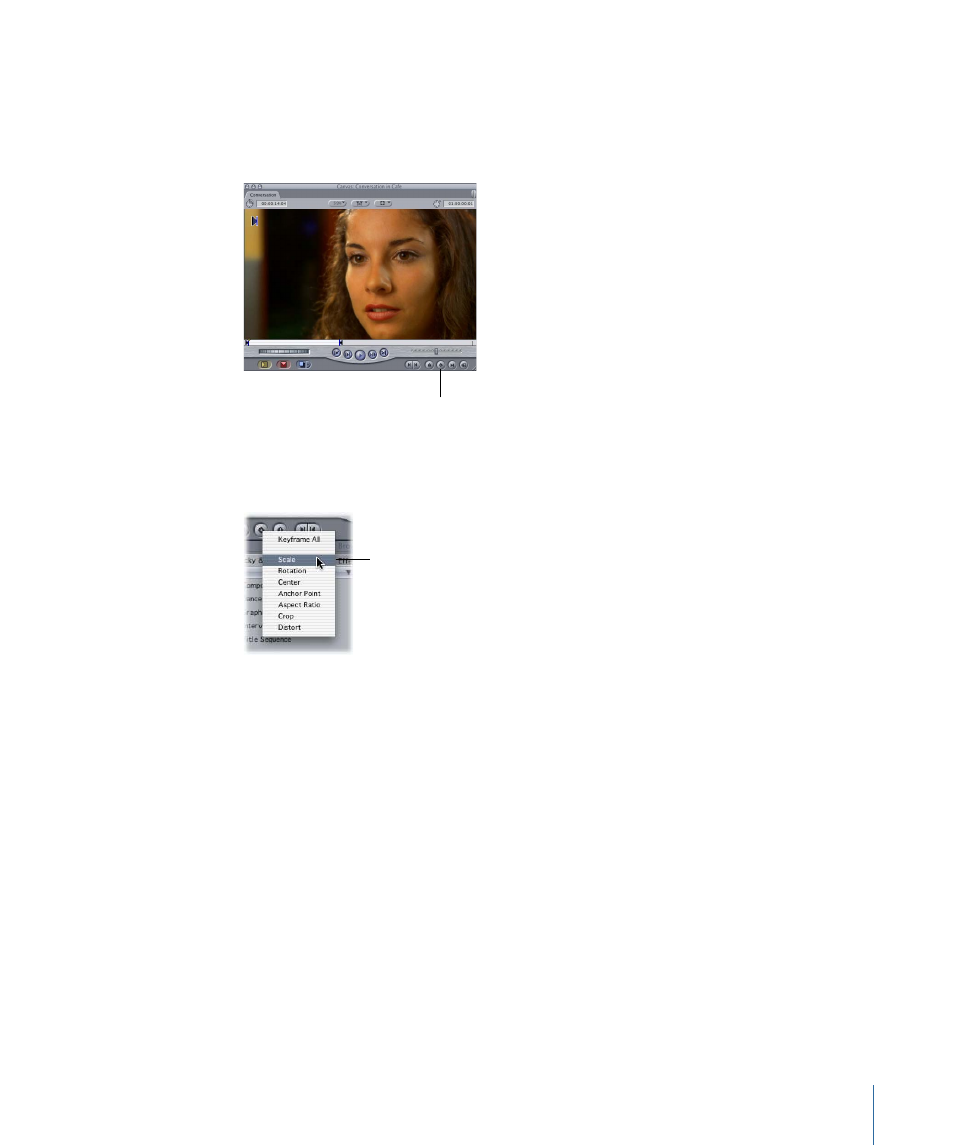
To add a keyframe to all of the selected clip’s motion settings at once, click the Add
Motion Keyframe button in the Video tab of the Viewer or in the Canvas.
Add Motion Keyframe
button in the Canvas
µ
To set keyframes for a single parameter, Control-click the Add Motion Keyframe button,
then choose a parameter from the shortcut menu.
Choose a motion
parameter from the
shortcut menu.
To set a keyframe using the Pen tool
Do one of the following:
µ
Select the Pen tool in the Tool palette (or press P); then, in the appropriate tab of the
Viewer, click a parameter’s keyframe graph line (in the keyframe graph area) where you
want to add the keyframe.
µ
Hold down the Option key and click a parameter’s keyframe graph line where you want
to add the keyframe.
Tip: This is also useful for setting keyframes in the video opacity and audio level overlays
of a clip in the Timeline.
Once you’ve added at least one keyframe to a parameter, new keyframes are automatically
added whenever you move the playhead and make further adjustments. To better see
what you are doing, you may want to add more space to the keyframe graph area before
you set additional keyframes. For more information about resizing the keyframe graph
area, see
“Resizing the Keyframe Graph Area.”
1101
Chapter 67
Adjusting Parameters for Keyframed Effects