Keyframing controls in the viewer – Apple Final Cut Pro 7 User Manual
Page 1097
Keyframing Controls in the Viewer
You can use various controls for keyframing motion effects. Although motion effects,
filters, and generator clips have their own individual settings and controls, they use the
same controls for keyframing.
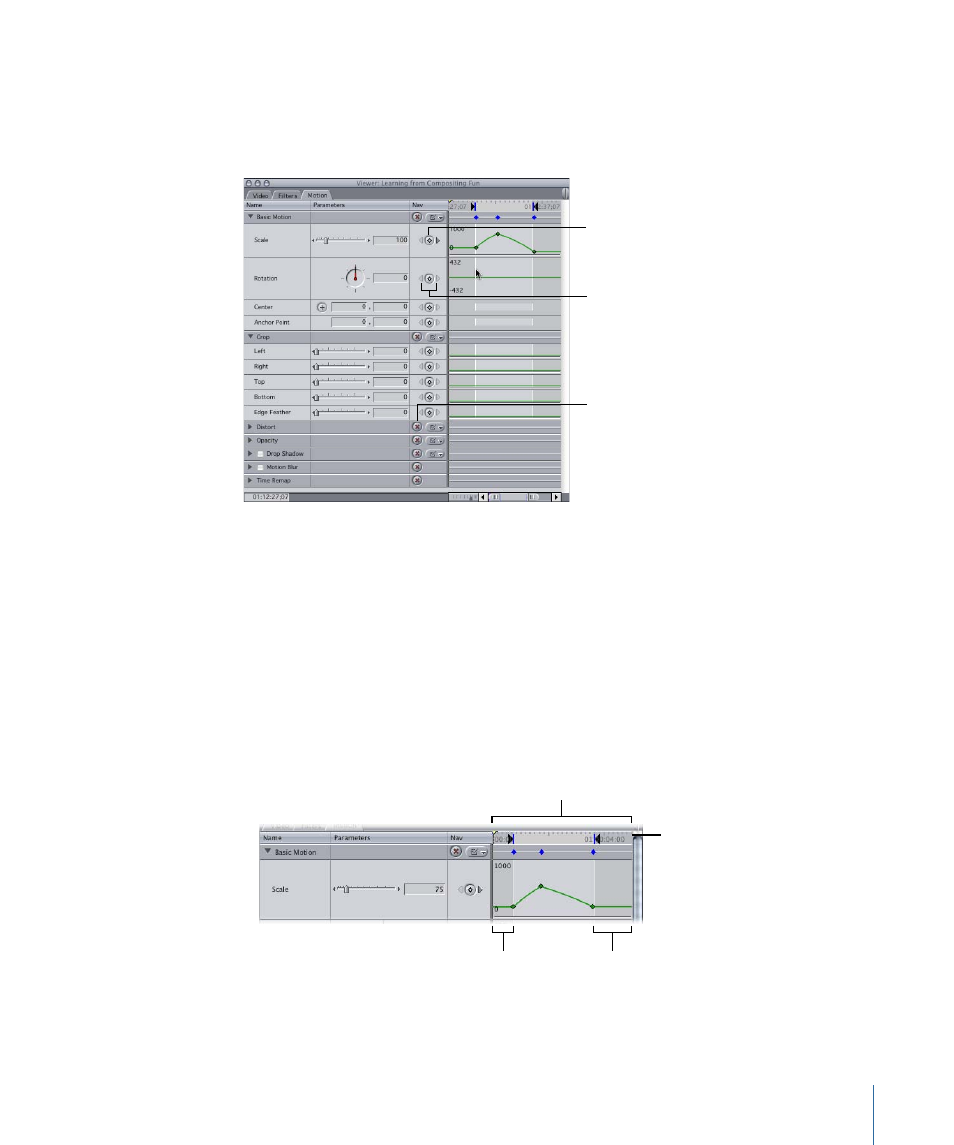
Keyframe button
Keyframe navigation
buttons
Reset button
• Keyframe button: Click to place a keyframe for the corresponding parameter in the
keyframe graph area at the current playhead location.
Note: When the playhead in the keyframe graph area is directly on a keyframe, the
keyframe button for that setting becomes a green diamond.
• Keyframe navigation buttons: Click these buttons, to the left and the right of the keyframe
button, to move the playhead from one keyframe to another.
• Reset button: Click to delete all marked keyframes and reset the parameter to its default
value.
• Keyframe graph area: Shows all the values and keyframes associated with parameters
currently displayed in the Viewer.
Section of clip
not used
Section of clip
not used
Keyframe graph area
Keyframe graph ruler
1097
Chapter 67
Adjusting Parameters for Keyframed Effects