Apple Final Cut Pro 7 User Manual
Page 145
Clip Keyframes
You can click the Clip Keyframes control to display the keyframe graph area—additional
space below each video and audio track in which to view and edit keyframes for effects
that are applied to your clips.
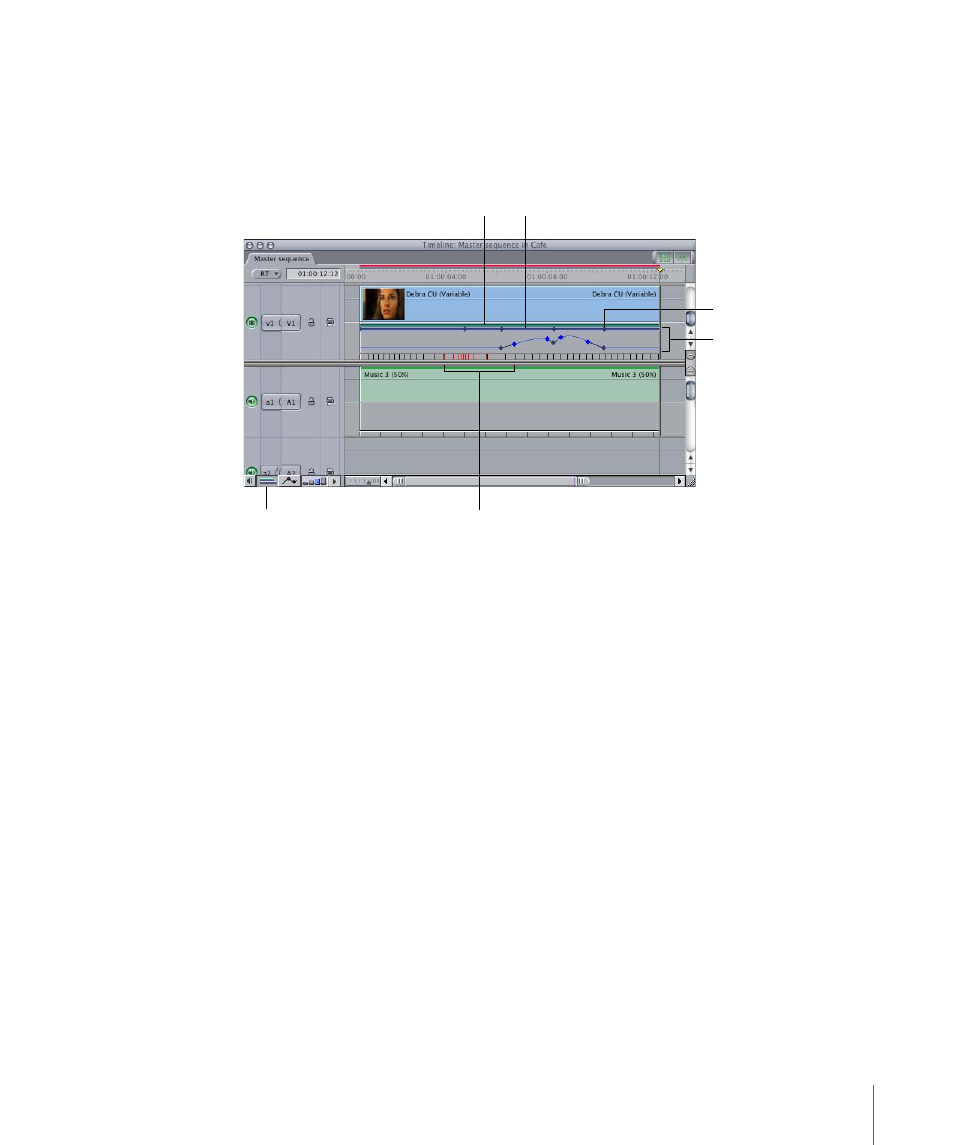
Motion bar and motion
keyframe indicated by
a blue diamond
A blue bar indicates
a clip’s motion settings
have been altered.
Keyframe editor
A green bar indicates
a filter has been applied
to the clip.
The spacing and color of the tick
marks indicate the speed and
direction of the clip’s playback.
Clip Keyframes control
This area can be divided into four optional regions showing keyframes and parameters
for motion effects, video filters, and audio filters applied to your clips. For more information
about customizing and using the keyframe graph area, see
You can also see
“Adjusting Parameters for Keyframed Effects.”
• Filters bar: If a clip has one or more video or audio filters applied, a green bar appears
in this space for the duration of that clip. If keyframes are added to a filter in a given
clip, those keyframes appear as diamonds on this bar, where they can be edited or
moved using the Selection tool.
• Motion bar: If a clip’s motion settings are modified, a blue bar appears in this space for
the duration of that clip. If keyframes are added to the motion settings for a given clip,
those keyframes appear as diamonds on the bar to which they apply, where they can
be edited or moved using the Selection tool. This bar is only available for video tracks.
• Keyframe editor: The keyframe editor shows you keyframe graph lines for motion or
filter parameters. These graphs are identical to those found in the keyframe graph area
of the Motion and Filters tabs in the Viewer. You can edit keyframes in the keyframe
editor using the Selection and Pen tools. The keyframe editor can only display the
keyframe graph line of one effect parameter at a time.
145
Chapter 9
Timeline Basics