Apple Final Cut Pro 7 User Manual
Page 1663
3
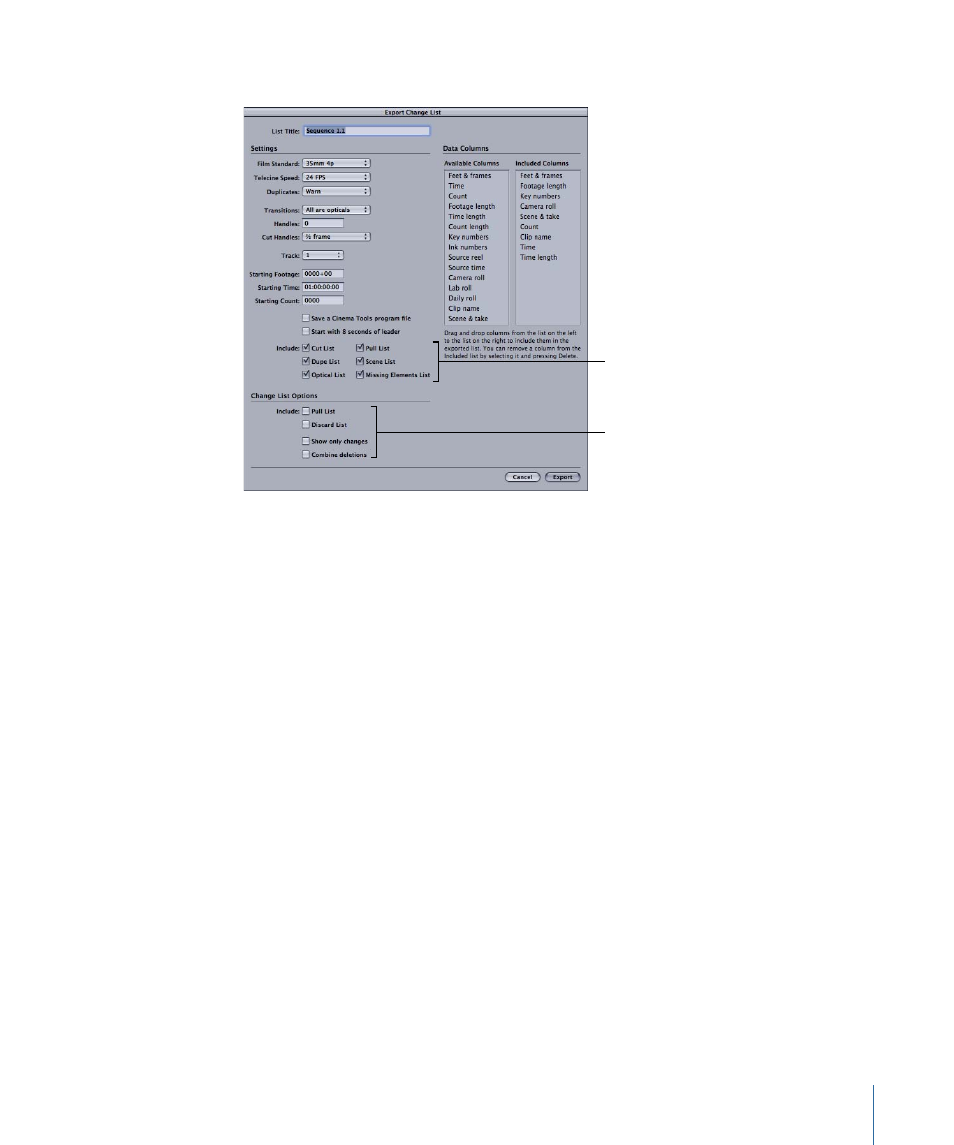
In the Export Change List dialog that appears, configure the settings, then click OK.
These lists provide
information about
the changes.
These lists provide
information about
the entire sequence.
When you select film lists in the Settings section of the Export Change List dialog, the
change list file will include (in addition to the selected change list options) the same
content you would get if you were exporting those lists from the Export Film Lists or
Export XML Film Lists dialog.
Note: Keep in mind that the following settings should be the same for the two sequences
you are comparing: Film Standard, Telecine Speed, and “Start with 8 seconds of leader.”
Key numbers or Ink numbers (but not both) must also be moved to the Included Columns
area of the Data Columns section. The two sequences must also have the same editing
timebase (set in Final Cut Pro).
4
In the dialog that appears, enter a filename and choose a location.
5
Click Choose Database to choose the database associated with the clips in the sequences
you are comparing. (Make sure you select the same database that was used when the
previous list was exported.)
6
Click Save.
7
If you selected “Save a Cinema Tools program file,” enter a filename and location for it in
the dialog that appears, then click Save.
Give the program file a name that clearly identifies the sequence and the version, so that
you can easily locate it later if you need to export another change list.
A change list file is generated, containing all the lists you selected in the Export Change
List dialog.
1663
Chapter 99
Working with Film and Cinema Tools