Liquify effect – Adobe After Effects User Manual
Page 528
The Displacement Map effect distorts a layer by displacing pixels horizontally and vertically based on the color values of pixels in the control layer
specified by the Displacement Map Layer property. The type of distortion created by the Displacement Map effect can vary greatly, depending on
the control layer and options you select.
This effect works with 8-bpc, 16-bpc, and 32-bpc color.
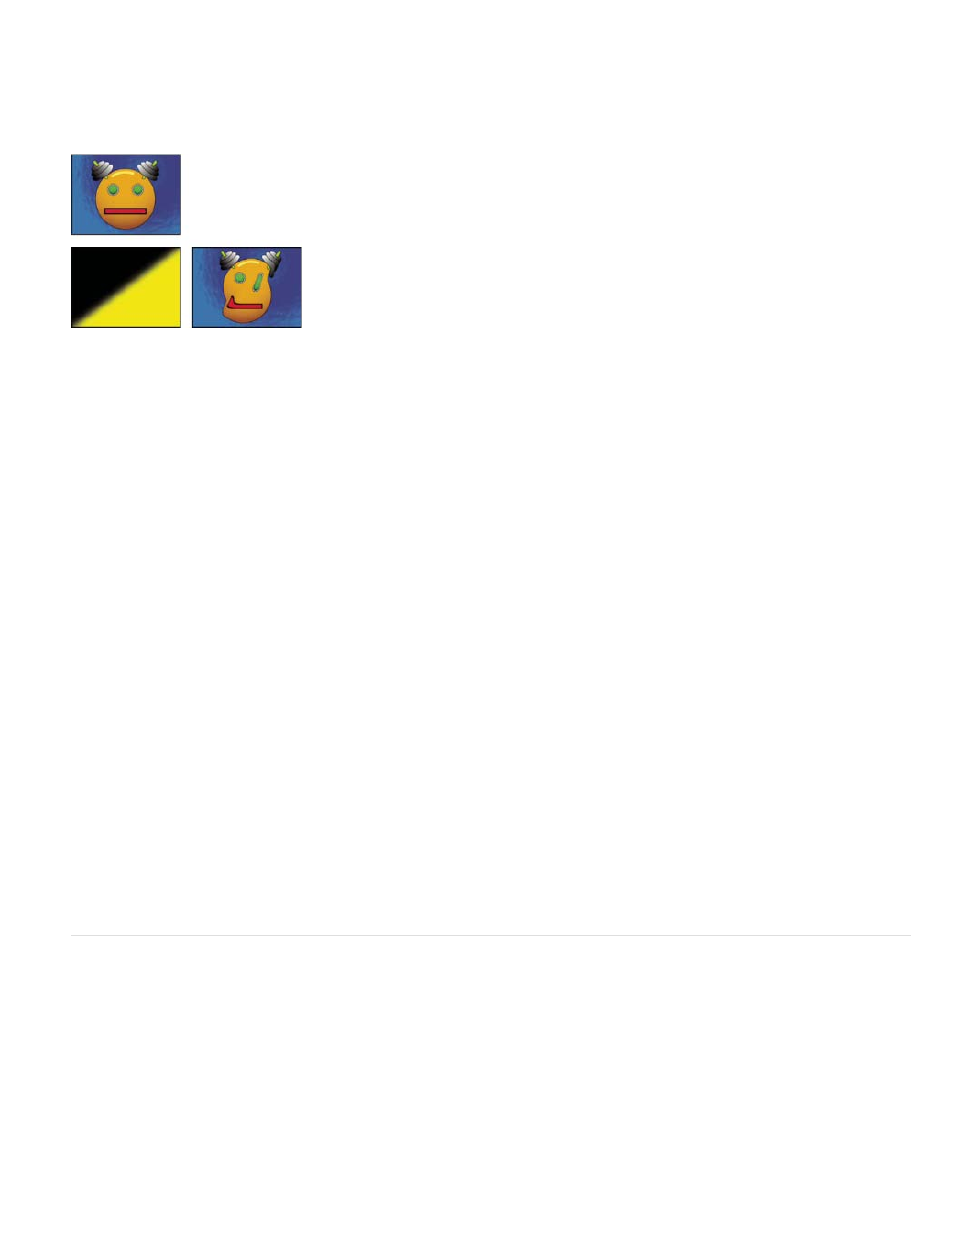
Original (upper-left), displacement map (lower-left), and displaced image (lower-right)
The displacement is determined from the color values of the displacement map. The color values range from 0 to 255. Each value is converted
into a scale ranging from -1 to 1. The displacement amount is calculated by multiplying the converted value by the maximum displacement amount
you specify. A color value of 0 produces maximum negative displacement (–1 * maximum displacement). A color value of 255 produces maximum
positive displacement. A color value of 128 produces no displacement.
The effect uses the control layer specified by Displacement Map Layer, without considering any effects or masks. If you want to use the control
layer with its effects, precompose it. If the control layer isn’t the same size as the layer to which the effect is applied, it is centered, stretched, or
tiled depending on the setting for Displacement Map Behavior.
Select Expand Output to allow the results of the effect to extend beyond the original boundaries of the layer to which it’s applied. Select Wrap
Pixels Around to copy pixels displaced outside the original layer boundaries to the opposite side of the layer; that is, pixels pushed off the right
side appear on the left side, and so on.
Online resources for the Displacement Map effect
Rick Gerard provides additional explanation and an example project for the Displacement Map effect on
Eran Stern provides a video tutorial on the
that shows how to use the Displacement Map effect with a text layer and some
smoke footage to create a smoky text title sequence.
Trish and Chris Meyer explain how to use blending modes, layer styles, and the Displacement Map effect to make text blend in to appear to be
part of a surface in the PDF article “Writing on the Wall” on the
.
Chris Zwar provides an example project on
uses the Displacement Map effect, the Turbulent Displace effect, the Texturize effect,
and a combination of Blur and Color Correction effects to create a transition in which an image appears as a watercolor image washed onto a
rough piece of paper.
Robert Powers provides a video tutorial on the
shows how to create and use a depth matte and use it as a control
layer for the Displacement Map effect. The result is then used by the 3D Glasses effect to create a stereoscopic image.
Liquify effect
The Liquify effect lets you push, pull, rotate, enlarge, and shrink areas in a layer. Several Liquify tools distort the brush area when you hold down
the mouse button or drag. The distortion is concentrated at the center of the brush area, and the effect intensifies as you hold down the mouse
button or repeatedly drag over an area.
You can limit the area of a layer you distort by using Freeze Area Mask. Use the Reconstruction mode to lessen or undo distortions you’ve
created.
The Liquify effect can extend beyond the boundaries of the target layer. This extension is useful when the target layer is smaller than the
composition.
This effect works with 8-bpc and 16-bpc color.
524