Adobe After Effects User Manual
Page 150
The beginning of the duration of a layer is its In point, and the end is its Out point. The duration is the span between the In point and the Out
point, and the bar that extends from the In point to the Out point is the layer duration bar.
To trim a layer is to modify its In or Out point so that the layer has a different duration. When you trim a layer that is based on moving source
footage, you affect which frames of the source footage item are shown in the layer; the first frame to appear is at the In point, and the last frame to
appear is at the Out point. Trimming a layer doesn’t cut frames from the footage item; it only affects what frames are played for the layer.
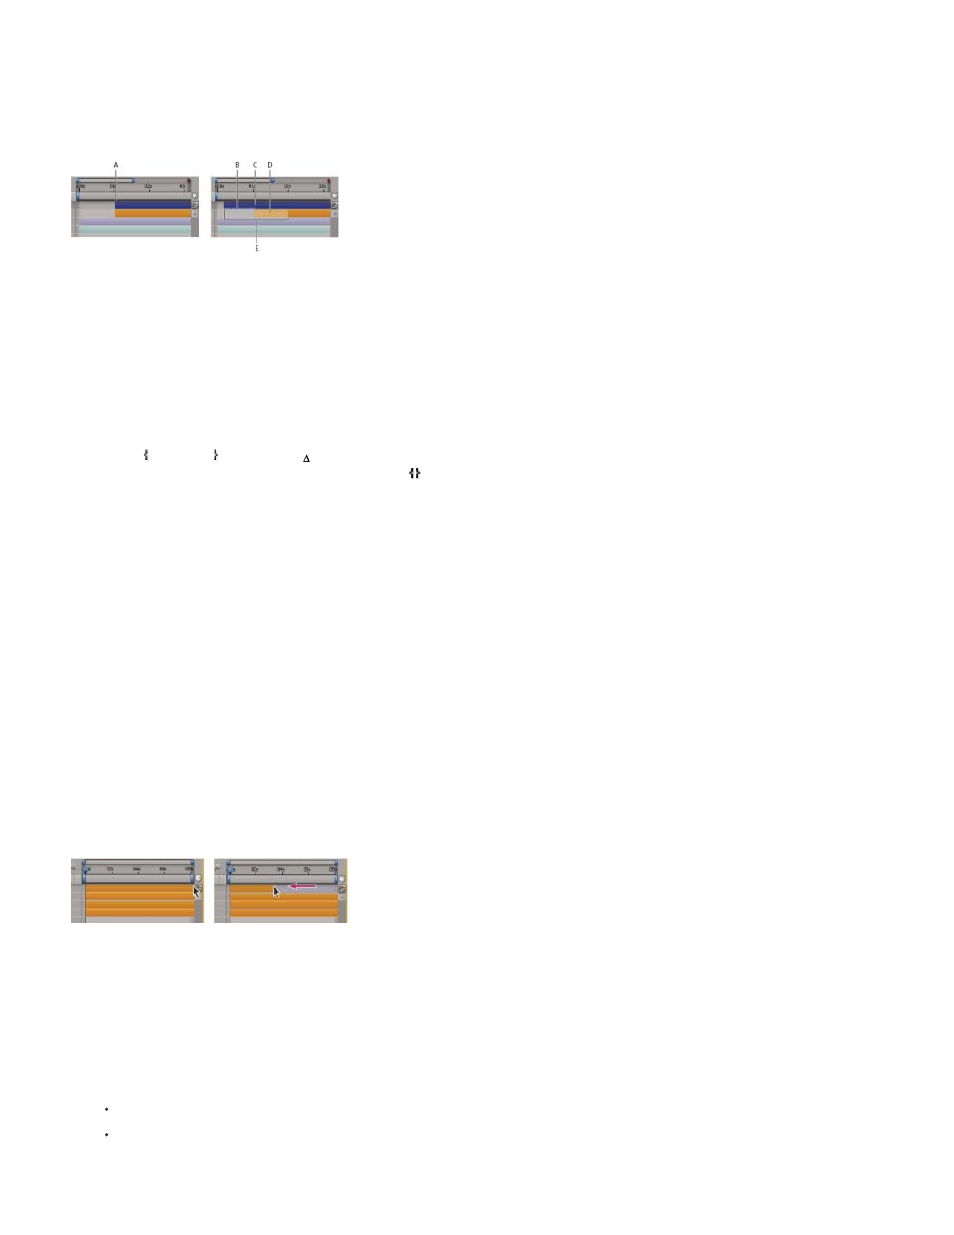
Trimming layers in the Timeline panel
A. Original In point B. Negative layer time indicator for still image layer C. Original In point D. Slip-edit bar, representing excluded frames for
motion footage layer E. New In points
When you use a footage item as a source for different layers, you can trim each layer differently to show different portions of the source. Trimming
a layer does not alter the footage item or the original source file.
You can trim a layer by changing the In and Out points in the Layer panel or the Timeline panel. (You can also trim a footage item before using it
to create a layer. See Create layers from footage items or change layer source.)
The In point , Out point , and duration values for a layer are shown at the bottom of the Layer panel. To show this information for all layers in
the Timeline panel, click the In/Out/Duration/Stretch button
in the lower-left corner of the Timeline panel. The duration, In point, and Out point
for the selected layer are also shown in the Info panel.
In the Layer panel, In and Out points are expressed in layer time. In the Timeline panel, In and Out points are expressed in composition time. The
duration is the same in both cases (unless time-remapping or time-stretching is enabled for the layer).
You can extend many kinds of layers for any duration, extending their In points and Out points out past their original times. This capability applies
to time-remapped layers, shape layers, layers based on still-image footage items, camera layers, light layers, and text layers. If you extend a layer
back in time so that the layer extends into negative layer time (past layer time zero), a series of hash marks on the bottom of the layer bar
indicates the portions of the layer that are in negative layer time. This indication is useful if you’ve applied effects to the layer—such as Particle
Playground or Shatter—that use layer time to calculate their results.
Online resources for trimming, extending, and editing layers
Jeff Almasol provides a script on his
that creates a panel with controls for moving various combinations of items in time: layer In
point, layer Out point, layer source frames, keyframes, and markers.
Trim or extend layers in the Timeline panel
Dragging the Out point of a layer duration bar.
1. Select one or more layers in the Timeline panel.
2. Do one of the following:
Drag either end of a layer duration bar.
Move the current-time indicator to the time at which you want to set the In point or Out point. To set the In point to the current time,
press Alt+[ (Windows) or Option+[ (Mac OS). To set the Out point to the current time, press Alt+] (Windows) or Option+] (Mac OS).
146