Animating with puppet tools – Adobe After Effects User Manual
Page 257
Animating with Puppet tools
Note:
Puppet Pin tool
Puppet Overlap tool
Puppet Starch tool
Note:
Puppet tools overview and resources
Manually animate an image with the Puppet tools
Record animation by sketching motion with the Puppet Pin tool
How the Puppet effect creates outlines
Work with Puppet pins and the distortion mesh
Puppet Overlap controls
Puppet Starch controls
Puppet tools overview and resources
Use the Puppet tools to quickly add natural motion to raster images and vector graphics, including still images, shapes, and text characters.
Though the Puppet tools work within an effect (the Puppet effect), you don’t apply the effect using the Effect menu or the Effects & Presets
panel. Use the Puppet tools in the Tools panel to directly apply and work with the effect in the Layer panel or Composition panel.
The Puppet effect works by deforming part of an image according to the positions of pins that you place and move. These pins define what parts
of the image should move, what parts should remain rigid, and what parts should be in front when parts overlap.
Each Puppet tool is used to place and modify a specific type of pin:
Use this tool to place and move Deform pins.
Use this tool to place Overlap pins, which indicate which parts of an image should appear in front of others when distortion causes parts of the
image to overlap one another.
Use this tool to place Starch pins, which stiffen parts of the image so that they are distorted less.
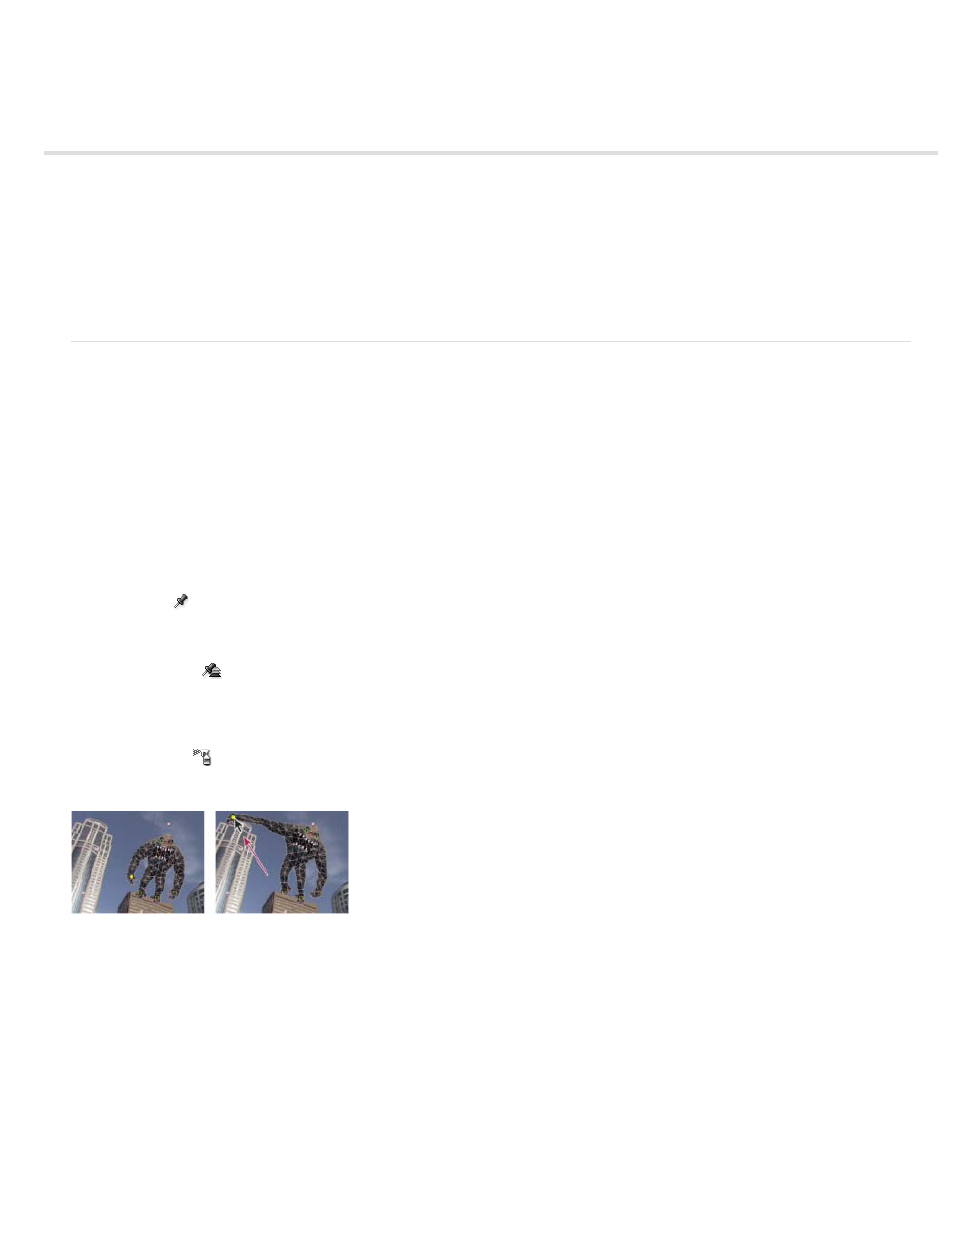
Mesh created by placing Deform pins (left), and result of dragging a Deform pin
When you place the first pin, the area within an outline is automatically divided into a mesh of triangles. An outline is only visible when the Puppet
effect has been applied and a Puppet tool pointer is over the area that the outline defines. (See
Each
part of the mesh is also associated with the pixels of the image, so the pixels move with the mesh.
To show the mesh, select Show in the Tools panel.
When you move one or more Deform pins, the mesh changes shape to accommodate this movement, while keeping the overall mesh as rigid as
possible. The result is that a movement in one part of the image causes natural, life-like movement in other parts of the image.
For example, if you place Deform pins in a person’s feet and hands and then move one of the hands to make it wave, the motion in the attached
arm is large, but the motion in the waist is small, just as in the real world.
253