Move the current-time indicator (cti) – Adobe After Effects User Manual
Page 200
Note:
To turn pixel-aspect ratio correction on or off for previews, click the Toggle Pixel Aspect Ratio Correction button at the bottom of the panel.
The quality of the pixel aspect ratio correction is determined by the Zoom Quality preference. (See
When possible, preview on the same kind of device that your audience will use to view your final output. For example, you can preview on an
external video monitor.
If color management is enabled, you can preview a composition, layer, or footage item as it will appear in the output color space. (See
.)
Select Show Rendering Progress In Info Panel And Flowchart (Edit > Preferences > Display (Windows) or After Effects > Preferences >
Display (Mac OS)) to see additional information in the Info panel or the project Flowchart panel during rendering, either for previews or for final
output.
Move the current-time indicator (CTI)
The most basic way of previewing frames is to manually preview by moving or dragging the current-time indicator (CTI).
The time ruler visually represents the time dimension of a composition, a layer, or a footage item. In a Layer or Footage panel, the time ruler
appears near the bottom of the panel. For a Composition panel, the time ruler appears in the corresponding Timeline panel. The time rulers in
different panels represent different durations. The time ruler in a Layer or Footage panel represents the duration of the contents of that panel; the
time ruler in the Timeline panel represents the duration of the entire composition.
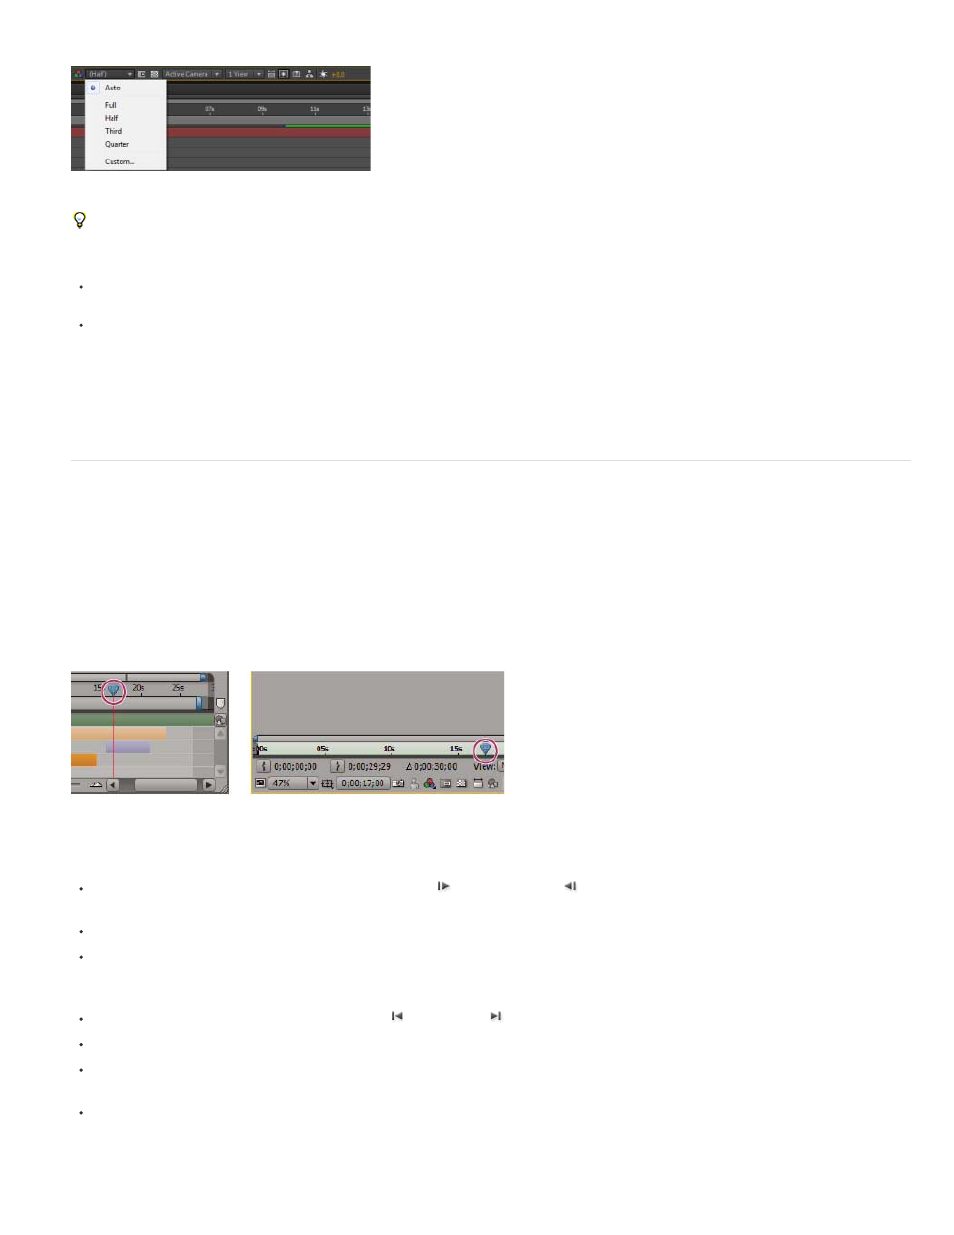
On a time ruler, the current-time indicator indicates the frame you are viewing or modifying.
Current-time indicator in the time ruler in the Timeline panel (left) and in the Layer panel (right)
To go forward or backward one frame, click the Next Frame
or Previous Frame
button in the Preview panel, or press Page Down or
Page Up.
To go forward or backward ten frames, Shift-click the Next Frame or Previous Frame button, or press Shift+Page Down or Shift+Page Up.
To go forward a specific period of time or number of frames, click the current-time display, and then enter the plus sign (+) followed by the
timecode or number of frames to advance. For example, enter +20 to go forward 20 frames or 1:00 to go forward one second. Precede the
value by the minus sign (-) to go backward. For example, enter +-20 to go backward 20 frames or +-1:00 to go backward one second.
To go to the first or last frame, click the First Frame or Last Frame
button in the Preview panel, or press Home or End.
To go to the first or last frame of the work area, press Shift+Home or Shift+End.
To go to a specific frame, click in the time ruler; click the current-time display in the Footage, Layer, Composition, or Timeline panel; or press
Alt+Shift+J (Windows) or Option+Shift+J (Mac OS). You can also drag the current-time display in the Timeline panel to modify the value.
Shift-drag the current-time indicator to snap to keyframes, markers, In and Out points, the beginning or end of the composition, or the
beginning or end of the work area.
196