Adobe After Effects User Manual
Page 285

Note:
Note:
After Effects CS5: Learn By Video series provides an introduction to color channels and color bit depth, and it shows how
choosing the right color bit depth can often eliminate banding in gradients.
Comparative advantages of each color depth
The dynamic range (ratio between dark and bright regions) in the physical world far exceeds the range of human vision and of images that are
printed on paper or displayed on a monitor. Low dynamic range 8-bpc and 16-bpc color values can represent RGB levels only from black to white,
which is only a small segment of the dynamic range in the real world.
High dynamic range (HDR), 32-bpc floating-point color values can represent brightness levels much greater than white, including objects as bright
as a flame or the Sun.
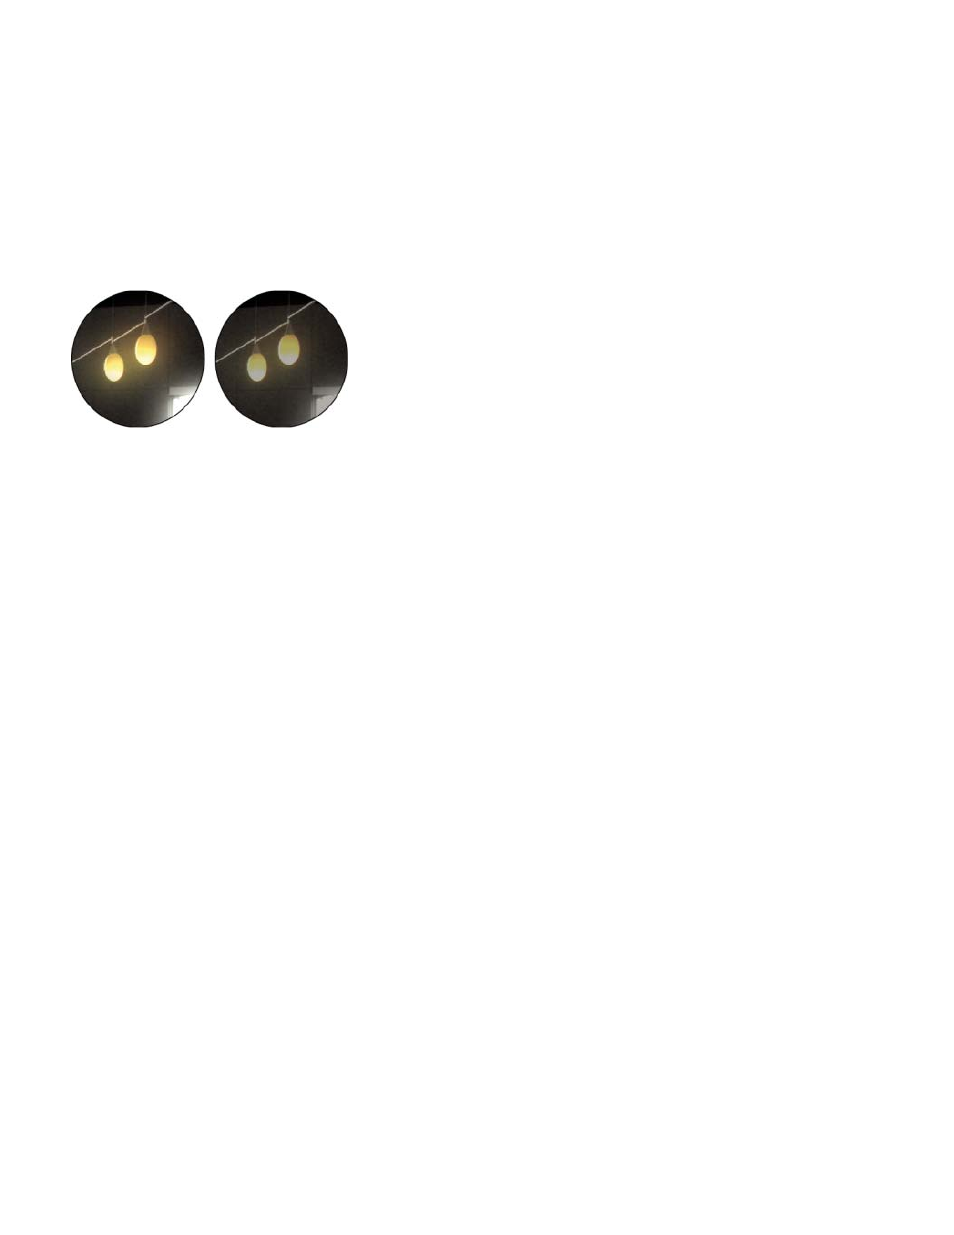
Glow effect and Gaussian Blur effect applied to image in 32-bpc project (left) and 16-bpc project (right)
Set the project color depth to 32 bpc to work with HDR footage or to work with over-range values—values above 1.0 (white) that aren’t supported
in 8- or 16-bpc mode. Over-range values preserve the intensity of highlights, which is as useful for synthetic effects such as lights, blurs, and
glows as it is for working with HDR footage. The headroom provided by working in 32 bpc prevents many kinds of data loss during operations such
as color correction and color profile conversion.
Even if you’re using 8-bpc footage and are creating movies in 8-bpc formats, you can obtain better results by having the project color depth set to
16 bpc or 32 bpc. Working in a higher bit depth provides higher precision for calculations and greatly reduces quantization artifacts, such as
banding in gradients.
Merely increasing the color depth within a project won’t eliminate gradients if the output format has a low bit depth. To mitigate banding,
After Effects introduces dithering of colors when the colors are converted to 8-bpc colors, including when rendering and exporting to an 8-bpc
format. This dithering is not introduced for previews. To force dithering for previews, apply an 8-bpc effect that does nothing—such as the
Arithmetic effect with the default values—to an adjustment layer.
Because 16-bpc frames use half the memory of 32-bpc frames, rendering previews in a 16-bpc project is faster, and RAM previews can be longer
than in a 32-bpc project. 8-bpc frames use even less memory, but the tradeoff between quality and performance can be obvious in some images
at a project color depth of 8 bpc.
Special considerations for working with high dynamic range color
You can use the HDR Compander effect to compress the dynamic range of a layer with an HDR footage item as its source. In this way, you can
use tools that don’t support HDR color, such as 8-bpc and 16-bit effects. When you’re done, use the HDR Compander to undo the dynamic range
compression. The HDR Highlight Compression effect lets you compress the highlight values in an HDR image so that they fall within the value
range of a low dynamic range image.
Because we can see only a subset of the luminance values in a real-world scene in an HDR image on a monitor, it is sometimes necessary to
adjust the exposure—the amount of light captured in an image—when working with an HDR image. Adjusting the exposure of an HDR image is
like adjusting the exposure when photographing a scene in the real world, allowing you to bring detail out of very dark areas or very bright areas.
You can use the Exposure effect to change the color values of a layer for final output, or you can just adjust the exposure in a specific viewer for
preview purposes.
Because some operations—including glows, blurs, and some blending modes—behave differently in 32-bpc mode as compared with 8-bpc
or 16-bpc mode, your composition may look significantly different when you switch between high dynamic range and low dynamic range project
settings.
281
