2 synchronous clutch-in, 5function blocks – Lenze E94A User Manual
Page 191
Lenze · 9400 function library · Reference manual · DMS 6.7 EN · 08/2014 · TD05
191
5
Function blocks
5.11
L_CamSyncIn - synchronous/oversynchronous clutch-in
_ _ _ _ _ _ _ _ _ _ _ _ _ _ _ _ _ _ _ _ _ _ _ _ _ _ _ _ _ _ _ _ _ _ _ _ _ _ _ _ _ _ _ _ _ _ _ _ _ _ _ _ _ _ _ _ _ _ _ _ _ _ _ _
Operating mode
The traversing range has a starting position which can be defined via the dnOpenPos_p input. This
starting position is also the target position for the LS_Positioner system block for repositioning.
As soon as the start of the synchronous range is reached, the cutting process can be started. The
starting position of the synchronous range is defined via the dnSyncPos_p input.
Afterwards the tool reports the end of the cutting process, e.g. using the boolean signals. This signal
serves to activate the LS_Positioner system block to traverse the saw back into the dnOpenPos_p
starting position.
During or after the termination of the re-positioning, the bReset input must be set from FALSE to
TRUE once to activate the function block for the synchronisation of the next purpose.
A "top cut" can be activated by setting the bManualSync input to TRUE. In this case, synchronising is
immediately started independent of the mark detection/position of the material.
5.11.2
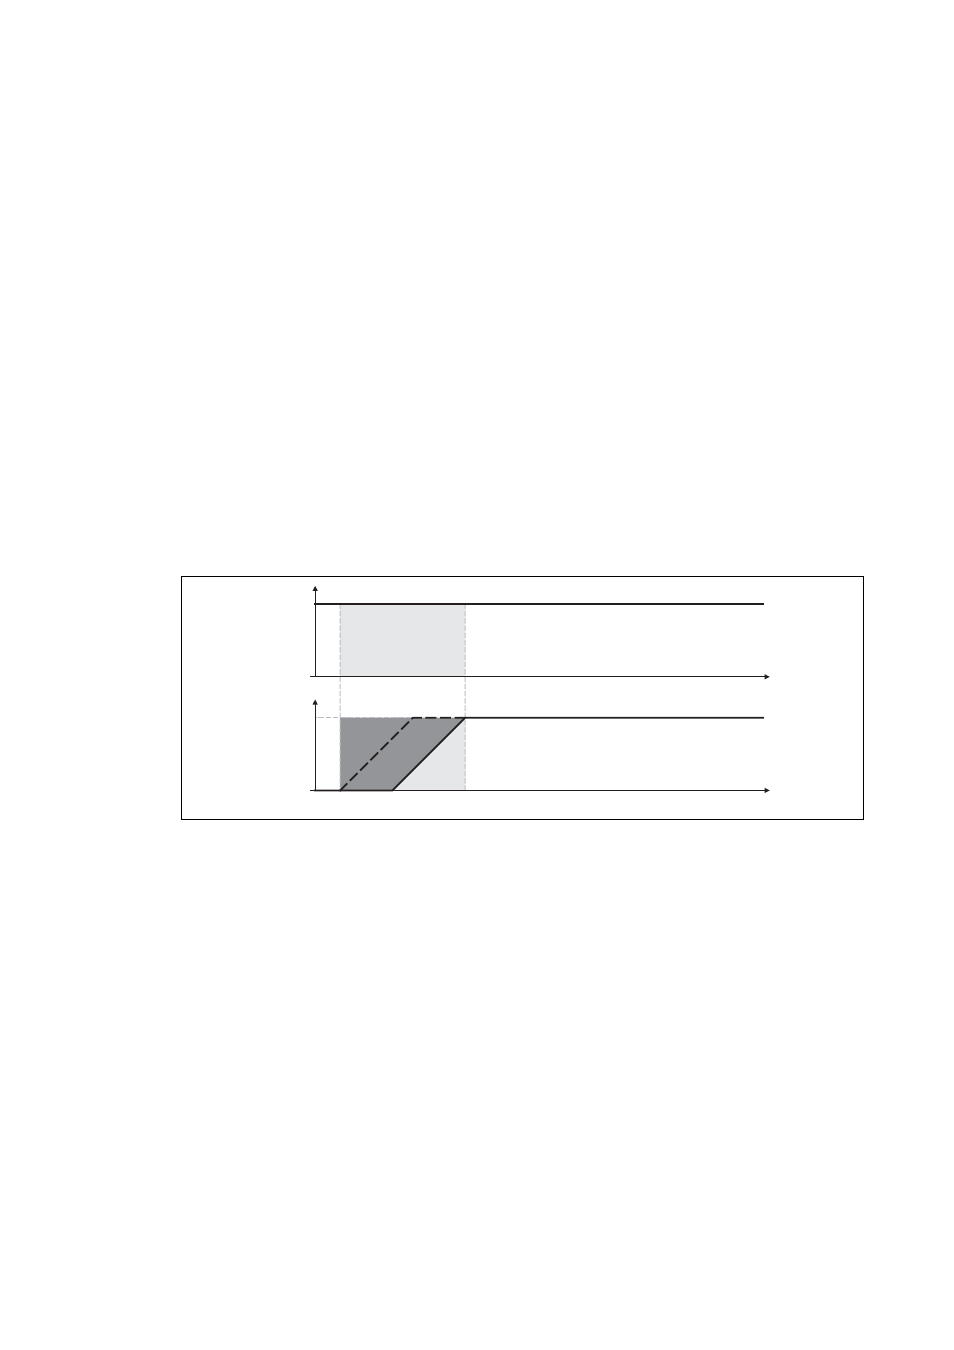
Synchronous clutch-in
Due to the set ramps and the position of the touch probe sensor, no distance needs to be caught up.
After clutch-in, the dnSpeedOut_s speed output follows the dnSpeedIn_s master speed.
[5-26] Principle "Synchronous clutch-in"
Tip!
Prefer the synchronous clutch-in to the oversynchronous clutch-in, since it prevents the
material and tools from damage.
V
Master
V
Slave
0
0
t
t