IAI America XSEL-S User Manual
Page 188
Chapter 4
Absolute Reset and
Absolute Battery
4.1.1 For PC Software
180
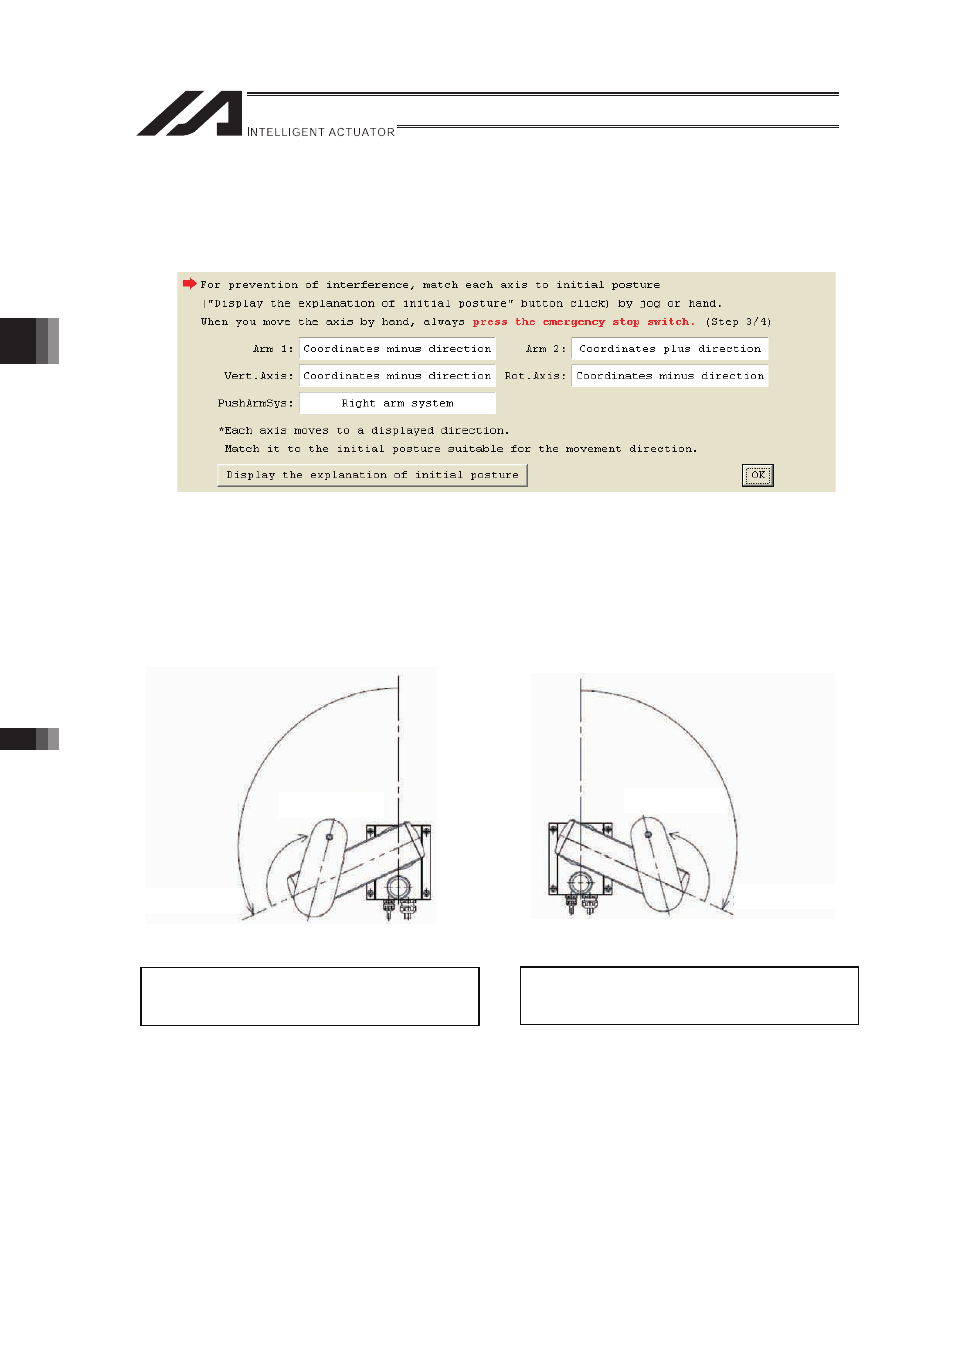
4) By referring to the displayed movement direction for each axis, adjust the axes to the
initial posture. The posture differs depending on the movement direction. Click on “Display
the explanation of initial posture” to check the explanations. Make to work on with the
emergency stop activated when moving the axes with hand. Click on the “OK” button after
the work is finished.
[Initial posture]
�
Arm1, Arm 2
Considering the stopper pressing position, adjust the posture to either of right arm system or
left arm system. When the product is delivered, it is set to the right arm system. Adjust to the
right arm system. In case the arm interferes with the peripheral in the right arm system, set it
to the left arm system in advance, conduct “Push stopper position acquisition” and then
adjust to the left arm system. [Refer to (2) How to Acquire the Stopper Interfering Point]
Arm 2 =
Negative direction of coordinate
Arm 1 =
Positive direction of coordinate
Arm 1 =
Negative direction of coordinate
Arm 2 =
Positive direction of coordinate
Initial posture of left arm system
Arm 1 = Positive direction of coordinate
Arm 2 = Negative direction of coordinate
Initial posture of right arm system (At the delivery)
Arm 1 = Negative direction of coordinate
Arm 2 = Positive direction of coordinate