IAI America XSEL-S User Manual
Page 170
Chapter 4
Absolute Reset and
Absolute Battery
4.1.1 For PC Software
162
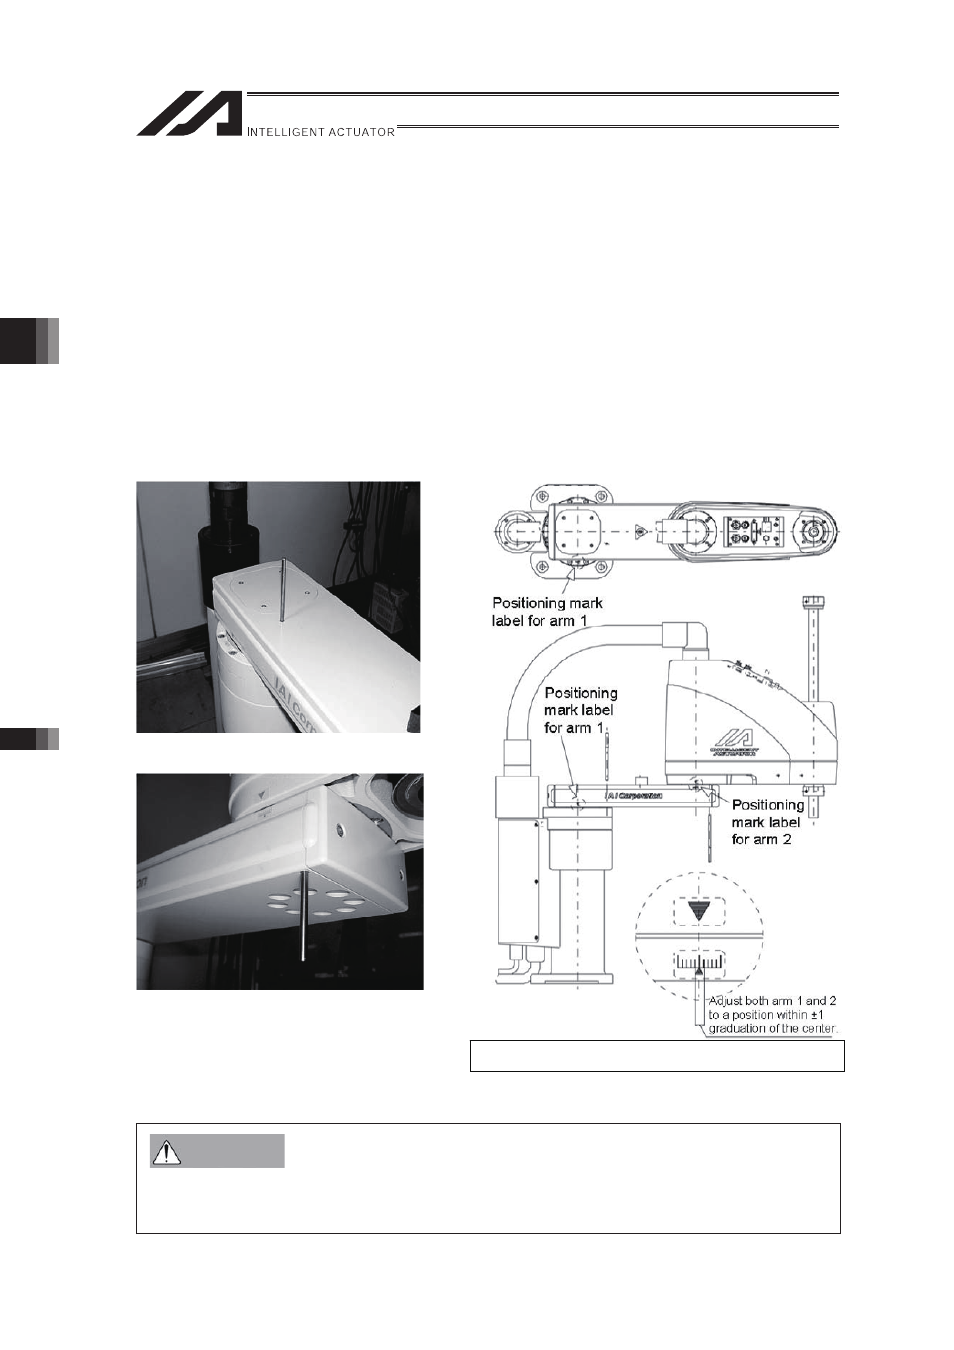
6) Press the EMERGENCY STOP switch.
7) When performing an absolute reset for arm 1, set an adjustment jig (pin) in arm 1 to fix the
arm at the reference position. When performing an absolute reset for arm 2, set an
adjustment jig (pin) in arm 2 to fix the arm at the reference position.
�
Set the jig after confirming that the EMERGENCY STOP switch is pressed.
�
Set the jig after adjusting the arm to the reference position, using the positioning mark
label as a guide.
�
Only arm 1 has a cover, which is fixed with setscrews. Remove the setscrews and
remove the cover before setting the jigs.
�
It is recommended that an adjustment jig is used to perform an absolute reset. With arm
1 or 2, however, rotation data can be reset as long as positioning preciseness of "center
of positioning mark label ±1 graduation" is ensured.
�
To perform an absolute reset for Arm 2 with an arm length of 120, turn Arm 1 to the side
as described in the basic posture for an arm with length of 120 below, and set the
fixture.
Arm 1 (Arm length 500/600, 700/800)
Arm 2 (Arm length 500/600, 700/800)
�
Be sure to press the EMERGENCY STOP switch before setting an adjusting jig.
Failure to do so may cause a robot malfunction, which may lead to a serious accident
resulting in injury or death.
Warning
Arm length 500/600, 700/800 Reference Position