Set up a document grid – Adobe InDesign CS5 User Manual
Page 61
55
USING INDESIGN
Layout
Last updated 11/16/2011
You can set up a baseline grid for a frame by using the Text Frame Options. (See “
1 Choose Edit > Preferences
> Grids (Windows) or InDesign
> Preferences
> Grids (Mac
OS).
2 Specify a baseline grid color by choosing a color in the Color menu. You can also choose Custom in the Color menu.
3 For Relative To, specify whether you want the grid to start at the top of the page or the top margin.
4 For Start, type a value to offset the grid from either the top of the page or the top margin of the page, depending on
the option you choose from the Relative To menu. If you have trouble aligning the vertical ruler to this grid, try
starting with a value of zero.
5 For Increment Every, type a value for the spacing between grid lines. In most cases, type a value that equals your
body text leading, so that lines of text align perfectly to this grid.
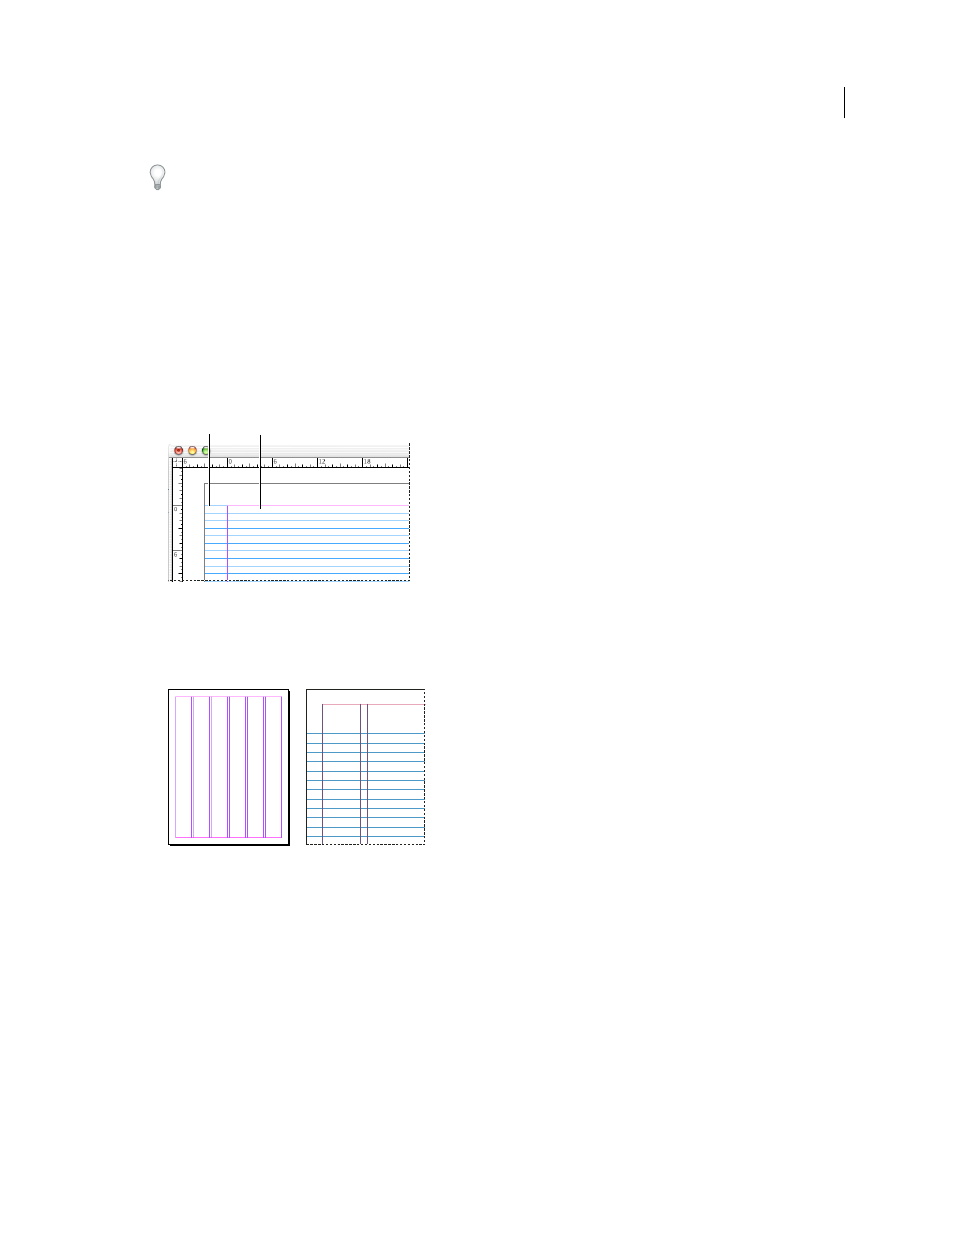
Baseline grid in document window
A. First grid line B. Increment between grid lines
6 For View Threshold, type a value to specify the magnification below which the grid does not appear. Increase the
view threshold to prevent crowded grid lines at lower magnifications.
Baseline grid at magnification below view threshold (left) and above view threshold (right)
7 Click OK.
Note: The Snap To Guides command controls both snapping to guides and snapping to the baseline grid.
Set up a document grid
1 Choose Edit > Preferences
> Grids (Windows) or InDesign
> Preferences
> Grids (Mac
OS).
2 Specify a document grid color by choosing a color in the Color menu. You can also choose Custom in the Color menu.
3 To set horizontal grid spacing, specify a value for Gridline Every in the Horizontal section of the Document Grid
section, and then specify a value for Subdivisions between each grid line.
4 To set vertical grid spacing, specify a value for Gridline Every in the Vertical section of the Document Grid section,
and then specify a value for Subdivisions between each grid line.
A
B