How the puppet effect creates outlines – Adobe After Effects CS4 User Manual
Page 264
258
USING AFTER EFFECTS CS4
Animation and keyframes
Last updated 12/21/2009
How the Puppet effect creates outlines
When a Puppet mesh is created, its boundaries are determined by an outline, which can be defined by any of the
following types of closed paths:
•
An unlocked mask path
•
A shape path on a shape layer
•
A text character’s outline
If a layer has no unlocked masks, shapes, or text characters on it when you apply the Puppet effect, it uses Auto-trace
to create paths from the alpha channel. These paths are only used by the Puppet effect in the determination of outlines
and do not appear as masks on the layer. If the layer is a raster layer with no alpha channel, the result is a single
rectangular path around the bounds of the layer. For a complex image, or to configure Auto-trace settings, use Auto-
trace before using the Puppet tools. (See “
Create a mask from channel values with Auto-trace
A text character that consists of multiple disjoint closed paths (such as the letter i) is treated as multiple separate paths.
The stroke of a shape or text character is not used in the determination of outlines; only the path is used. To encompass
a stroke within a mesh created from such items, increase the Expansion value. The default value of 3 pixels for
Expansion encompasses a stroke that extends 3 pixels or less from its path.
Apply paint strokes to a layer using the Brush tool with the Paint On Transparent option. Painting with this option
selected creates a raster layer with only the paint strokes, defined by an alpha channel. You can then use the Puppet
tools to animate the paint strokes. Do not use a mask on the layer.
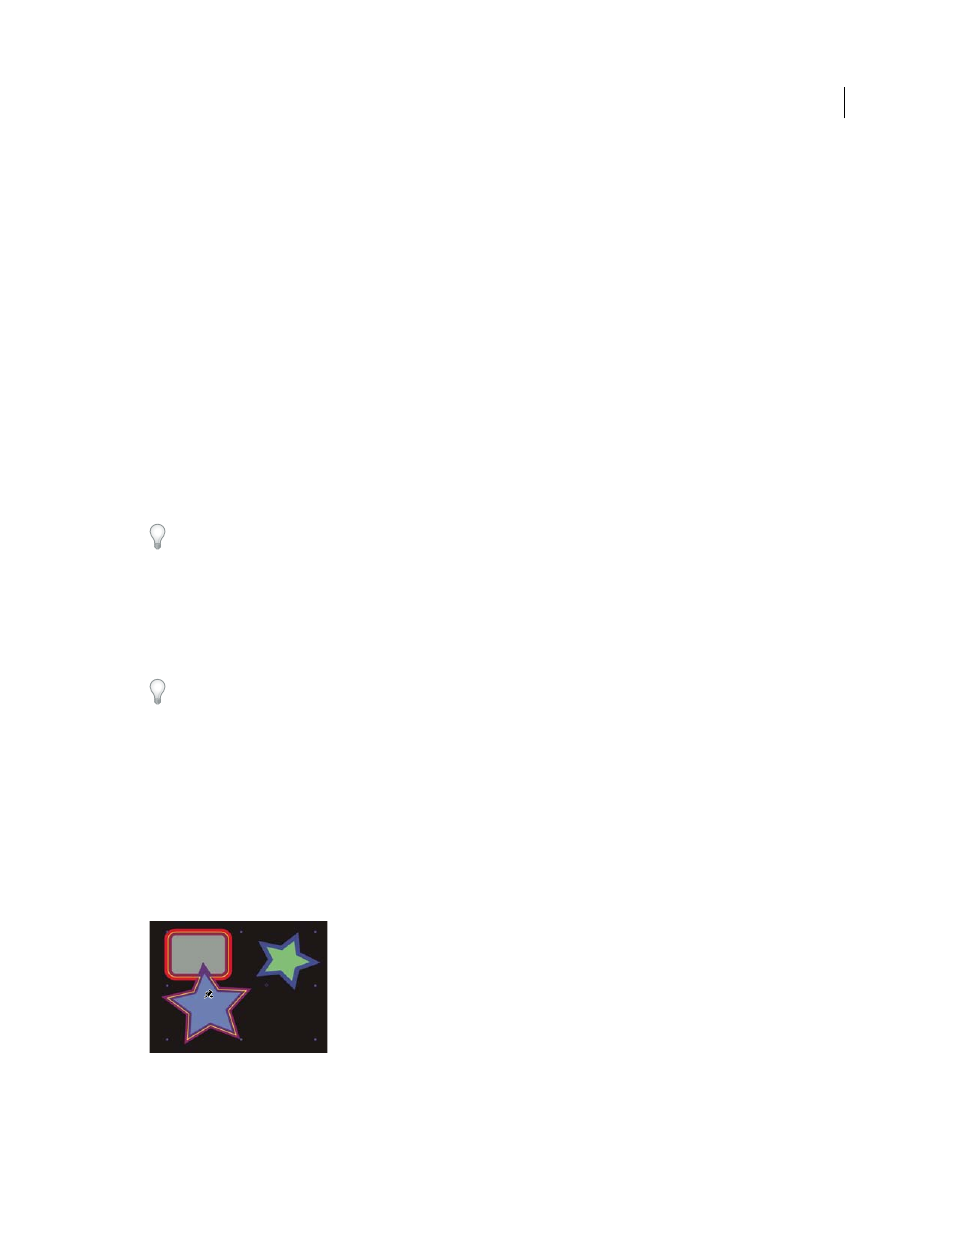
If multiple masks, shapes, or characters overlap on the same layer, an outline is created from the union of the
overlapping shapes, overlapping characters, or overlapping masks. If a mask overlaps a text character or shape, outlines
are created for the entire character or shape, for the portion of the character or shape that is inside the mask, and for
the mask itself.
To distort multiple disjoint characters or shapes as one object, surround the individual objects with a mask (with mask
mode set to None), and use the mask path as the outline with which to create the mesh. You can delete the mask after
you have created the mesh.
If the Puppet effect has already been applied to a layer, outlines appear with a yellow highlight as you move a Puppet
tool pointer over them. You can choose the outline in which to place an initial pin to create a mesh. A mesh is created
each time that you click within an outline with a Puppet tool.
If the Puppet effect has not already been applied to a layer, outlines for that layer have not yet been calculated. When
you click, the Puppet effect calculates outlines and determines whether you have clicked within an outline. If so, it
creates a mesh defined by the outline in which you clicked. Otherwise, you can move the pointer around in the layer
to select the outline in which to place a pin and create a mesh. Moving the pointer around in the layer is useful for
seeing the outlines of various objects and choosing which outlines to use to create a mesh.
Outline for union of two shape paths, indicated by yellow highlight, visible because Puppet tool pointer is within area defined by outline