IDEC High Performance Series User Manual
Page 458
8 Selector Switch
8-134
WindO/I-NV2 User’s Manual
■
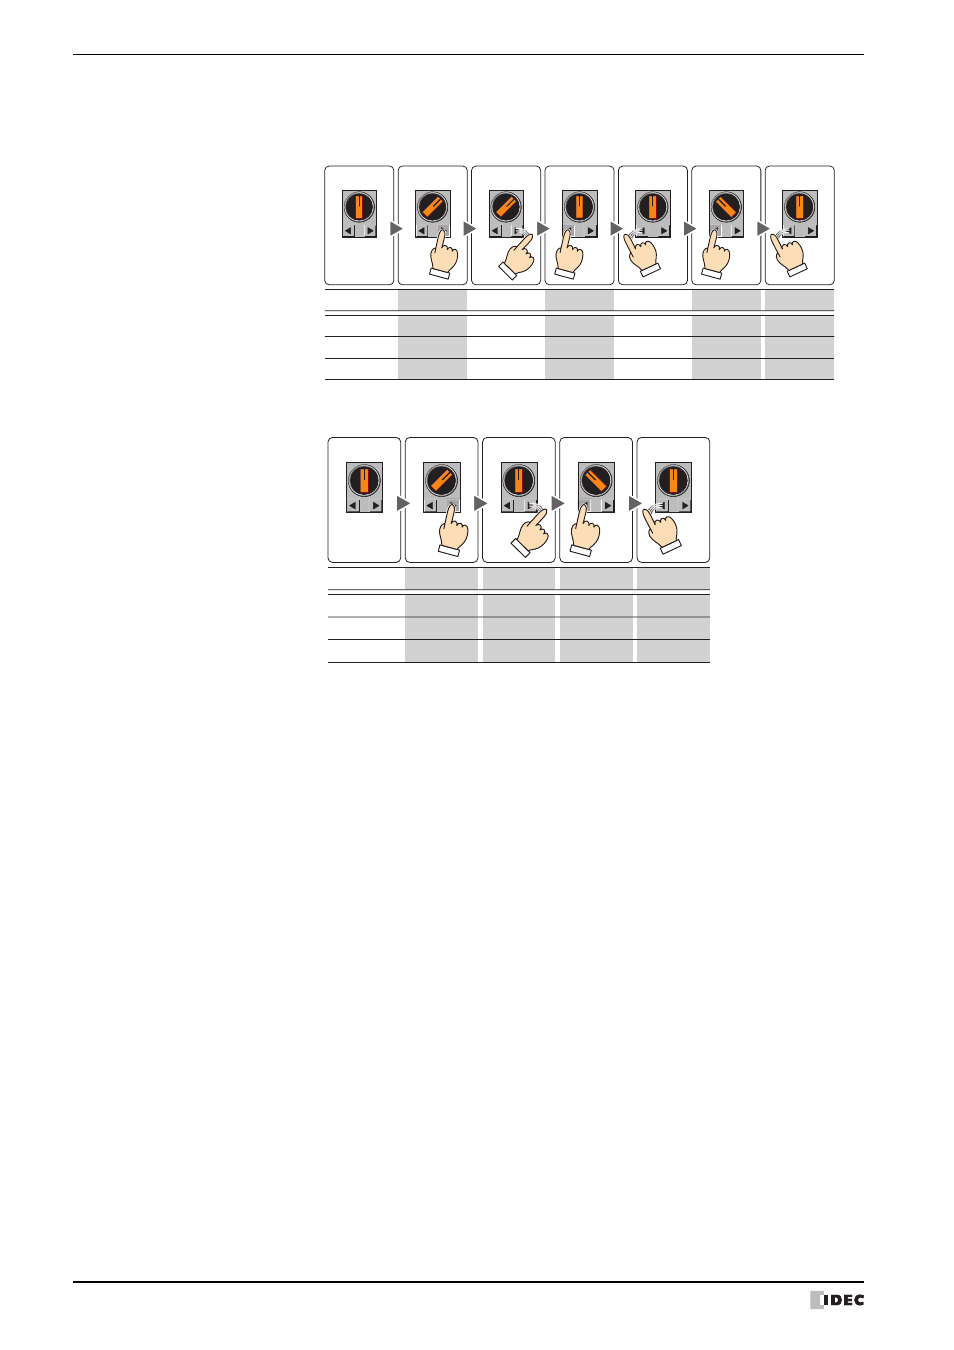
Notch
Register and edit the settings for each notch to each channel.
3-Notch L-return:
• If the knob is switched to Ch1, it returns to Ch2 when the button is released.
• If the knob is switched to Ch2, or from Ch3 to Ch2, it stays where it is even if the button is
released.
3-Notch Both-return: If the knob is switched to Ch1 or Ch3, it returns to Ch2 when the button is released.
Release
Default state
Press L-button
Release
Press L-button
Release
Press R-button
0
1
1
0
1
0
0
1
0
Write
Write
Write
Write
0
0
0
Ch1
Ch2
Ch3
Action
Operation
and view
Data
written
Release
Default state
Press L-button
Release
Press R-button
0
1
1
0
1
0
0
1
Write
Write
Write
Write
0
0
0
0
Ch1
Ch2
Ch3
Action
Operation
and view
Data
written
Use Text Manager:
Select this check box to use the text registered in the Text Manager as the
Registration Text for each channel.
(List of Notch settings): This list shows the notch settings for each channel.
No.:
Shows the channel to be output. The number of notches selected in the Switch
Type determines the number of channels.
Double clicking the cell displays the Notch Settings dialog box where you can edit
the notch settings. For details, refer to “Notch Settings dialog box” on page 8-136.
Device: Shows the destination bit device or bit in the destination word device.
Double clicking the cell displays the Device Address Settings dialog box where you
can edit the device address. For the device address configuration procedure, refer to
Chapter 2 “5.1 Device Address Settings” on page 2-67.
Text:
Shows the Registration Text for the channel.
Double clicking the cell displays the Unicode Input dialog box where you can edit
the Registration Text.
If you select the Use Text Manager check box, the text ID is shown. Double
clicking the cell displays the Text Manager where you can edit the text.
Color:
Shows the color of the Registration Text for the channel.
Double clicking the cell displays Color Palette. Select a color from the Color Palette.
Set:
Registers or changes the notch settings. Selecting a number that has already been registered
changes the existing notch settings.
Clicking Set displays the Notch Settings dialog box where you can configure the notch. For
details, refer to “Notch Settings dialog box” on page 8-136.
Notches are always registered from Ch1.