Configuration verification, Figure 6 – H3C Technologies H3C SecPath F1000-E User Manual
Page 614
5
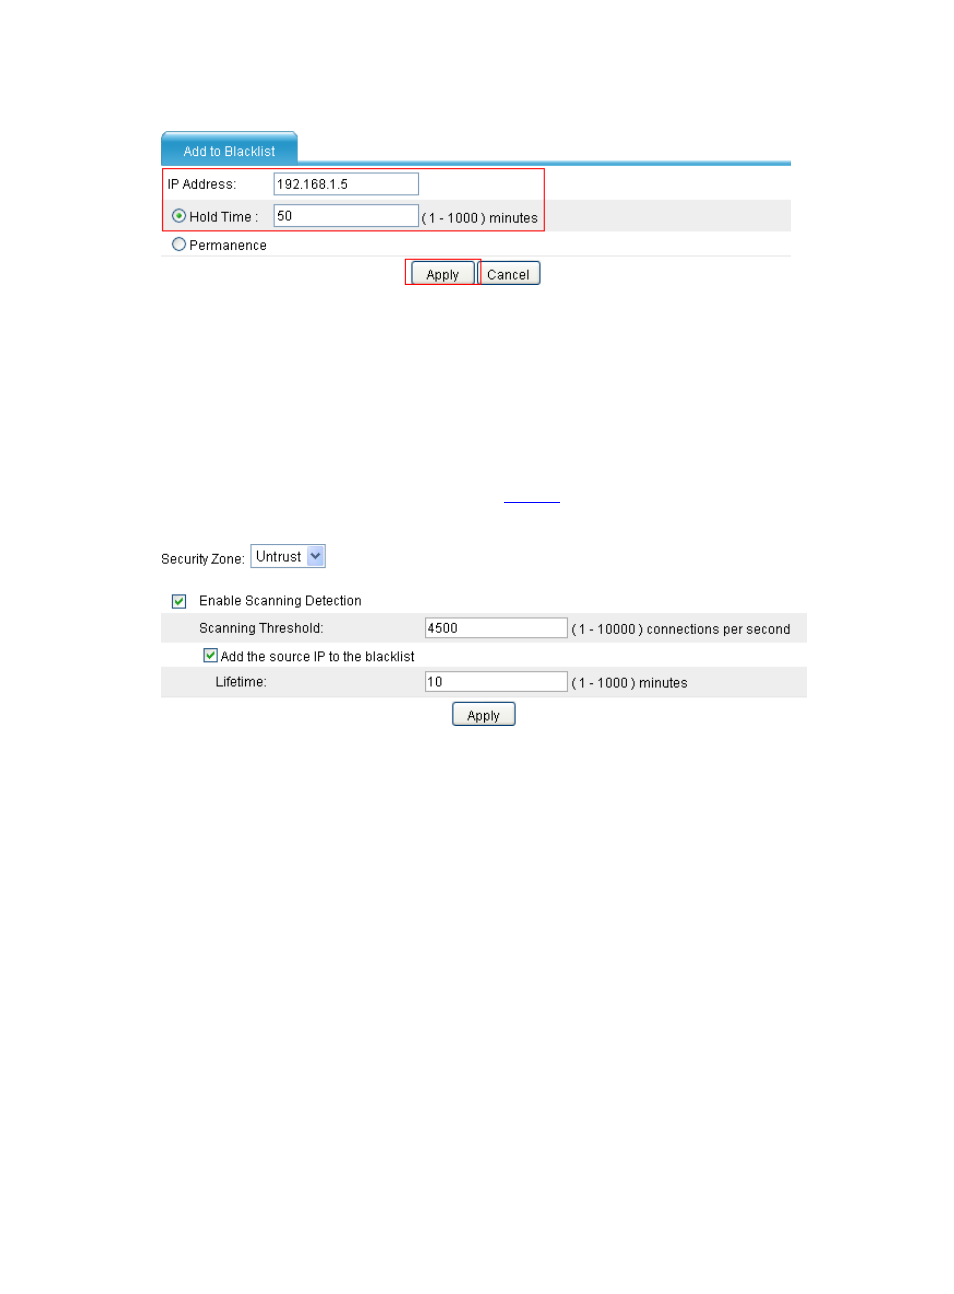
Figure 6 Add a blacklist entry for Host C
•
Enter IP address 192.168.1.5.
•
Select the Hold Time option and, in the box next to the option, set the lifetime of the entry to 50
minutes.
•
Click Apply to complete the configuration.
# Configure scanning detection for the untrusted zone.
Select Intrusion Detection > Traffic Abnormality > Scanning Detection from the navigation
tree and then perform configurations as shown in
.
Figure 7 Configure scanning detection for the untrusted zone
•
Select security zone Untrust.
•
Select the Enable Scanning Detection option.
•
Set the scanning threshold to 4500.
•
Select the Add the source IP to the blacklist option.
•
Click Apply to complete the configuration.
Configuration verification
After completing the configurations, check that:
•
The manually added blacklist entries appear on the blacklist. You can select Intrusion Detection
> Blacklist from the navigation tree to display the list.
•
The device discards all packets from Host D before you remove the blacklist entry for the host.
•
The device discards all packets from Host C within 50 minutes. After 50 minutes, the device
forwards packets from Host C normally.
•
Upon detecting a scanning attack from the untrusted zone, the device outputs an alarm log and
adds the IP address to the blacklist. You can select Intrusion Detection > Blacklist from the
navigation tree to check the blacklist for the entry.