Resizing objects using object zones, Resizing objects using object zones -13 – Grass Valley Xstudio Vertigo Suite v.4.10 User Manual
Page 106
Xstudio User Manual
5-13
Adding and preparing objects on the Xstudio canvas
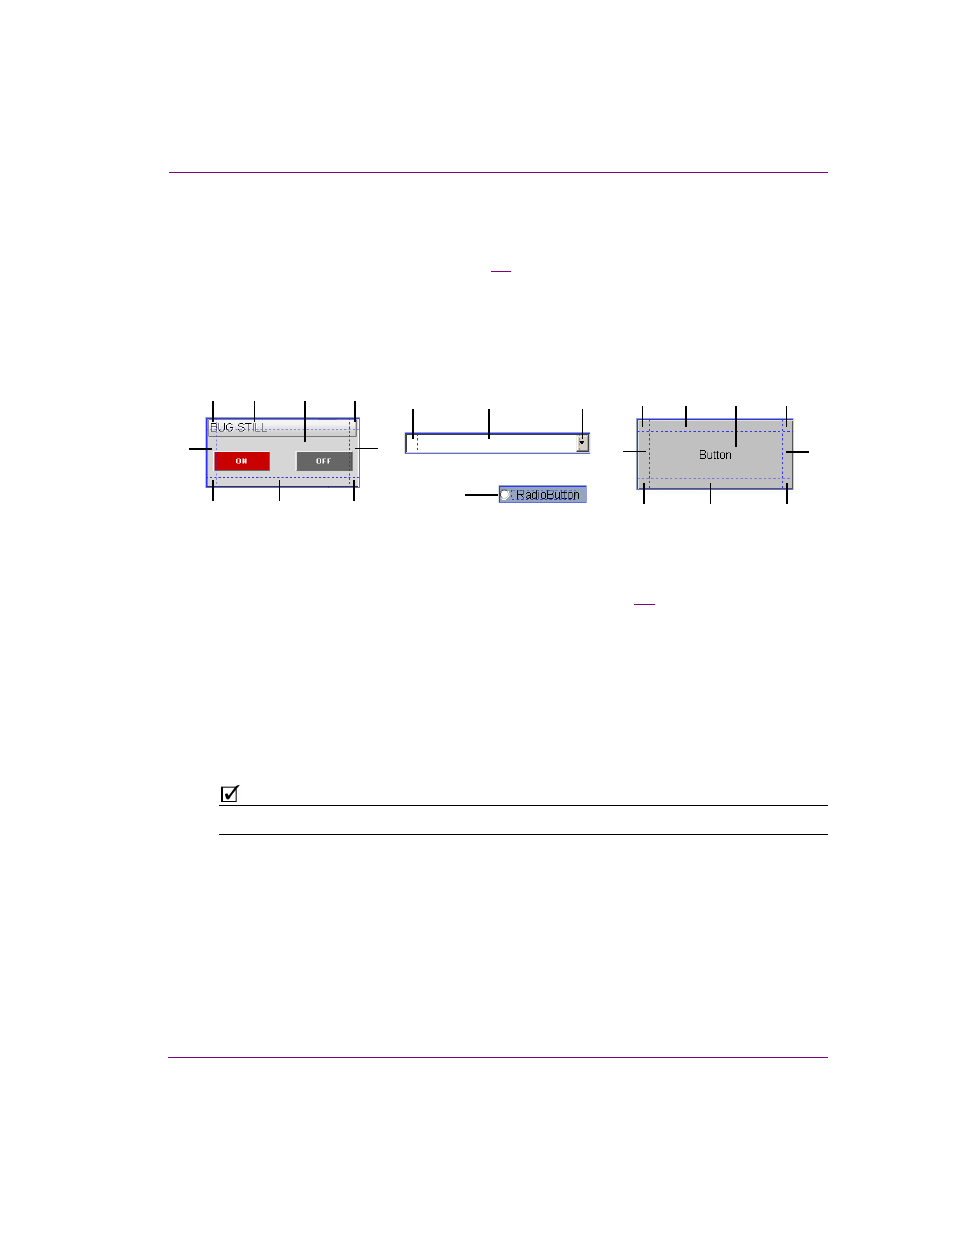
Resizing objects using object zones
When you select an object that has been placed on the canvas, a grid appears on top of the
object, dividing it into multiple zones (figure
5-8
). The blue grid indicates that this is the
primary object, which is the last or only object selected. When multiple objects are selected
at the same time, the primary object displays a blue grid, while the others will have a red
grid. Identifying the primary object is extremely helpful in formatting situations like aligning
objects. If you were aligning objects all other selected objects (overlaid with a red grid to
indicate that they are not the primary object) would align with the primary object.
Figure 5-8. An object’s zones, indicated by a blue/red grid, can be used to resize or move the object
Based on their dimensions and purpose, the various types of primitives have a different
number of object zones. For example, the Button primitive in figure
5-8
is divided into nine
(9) zones, while the drop-down box primitive is only divided into three (3) zones, and a radio
button primitive only has one (1) zone.
When you hover the pointer over the object zones, the pointer transforms into a two-headed
directional arrow. Clicking and dragging the object zones of objects, and some types of
primitives, allows you to resize (stretch and shrink) the object in a free-form fashion in the
direction that it is being dragged. To maintain the scaling of the object while resizing,
simply hold down the S
HIFT
button on your keyboard, while dragging the outer zones
of the object. As well, dragging from the central zone allows you to move the object around
the canvas.
N
OTE
Pressing ESC before releasing the mouse button aborts the move, copy or resize operation.
1
2
3
1
2
3
4
5
6
7
8
9
1
1
2
3
4
5
6
7
8
9